I’m a Texan, and any good Texan loves BBQ. However, BBQ can be a tricky. You can’t just throw a slab of meat onto a grill and then slather it with sticky sweet sauce and expect to have good BBQ. BBQ needs LOOOOONG slow cooking with delicious smoke from well-seasoned wood. What that means is that you have to have a piece of meat that has lots of fat, so chicken breasts and backstrap are out. Those boys in Tennessee and South Carolina know this as a BBQ must.
Here in cattle country, we know that brisket is the key to a Texas BBQ. And if you’ve read the Big Red Ribs recipe, you know that if you are going with ribs they need to be pork ribs and not beef. However, Texans have a really bad habit of overlooking the greatness of the Boston Butt. It could be because it’s pork and not beef; it could be because it’s got a yankee name and the fact that yankees call a shoulder roast a “butt”. Let’s overlook the sins of our sisters from the North and look deeply into what could potentially change everything you’ve known about BBQ and become a staple in your stable.
They call this thing a pulled pork; if you go to a Hard Rock Café, you should find a dish called the Tennessee Pulled Pork or the “TPP” (‘If you’ve been to the HRC and you haven’t had the TPP, you haven’t been to the HRC’). Before they closed the HRC in Dallas, that was one of my favorite things to get. I actually had a kidney stone attack one time eating a TPP, but it’s so good I hung in there for the whole sandwich before heading to the emergency room. True story. On a toasted bun, this might turn into your favorite BBQ sandwich, and again…this is coming from a Texas Beef fan.
First of all, let’s take another look at our pig diagram:
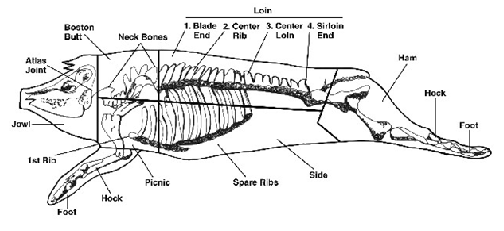
Right above the ear, you’ll see the words “Boston Butt”. Yeah, it’s the shoulder. They also call this a “blade roast”. Either way, when you go shopping you’ll be looking for the biggest slab of non-ham pork you can find. Note: there’s also a “picnic roast”, which is a nice alternative if you can’t find a shoulder roast. However, the bone isn’t quite as easy to remove for presentation, so stick with the shoulder if you can.
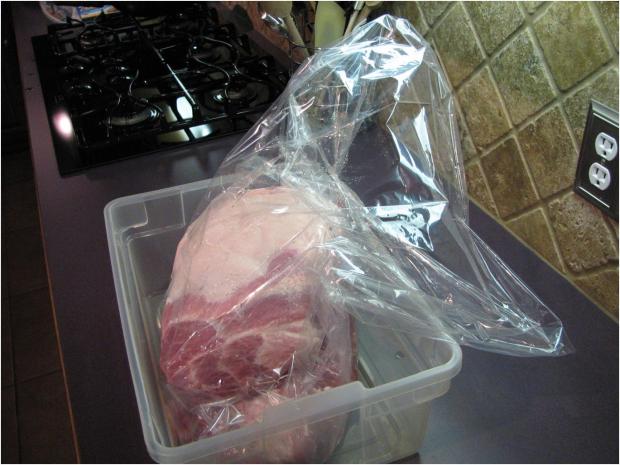
In the package:

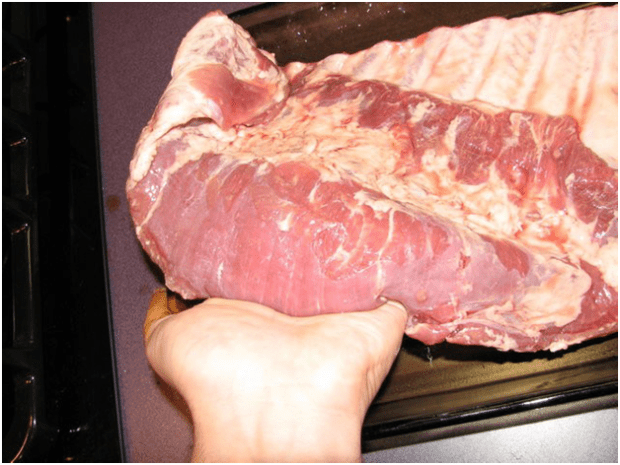
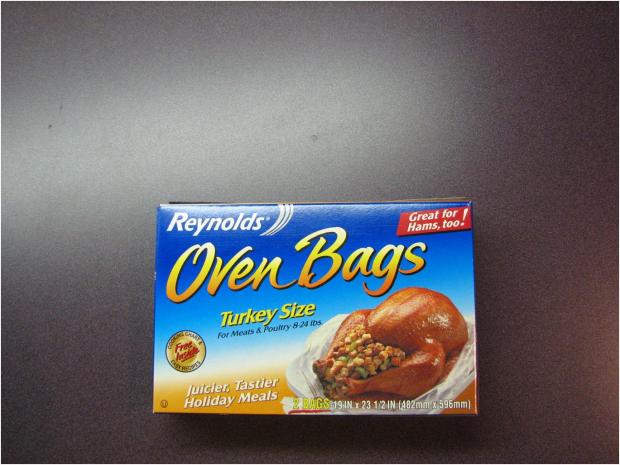
That’s an eight-pounder, which is about the average of what you’ll find. On occasion you’ll run across one a little bigger or smaller, but for the most part that’s what you’ll get when you buy one. First thing’s first….take it out of the package and rinse it under water. Be careful…there are a couple different muscles here, so it may try to fall apart on you. When you get it rinsed off and set aside, let’s get the bag out. I like to use a turkey bag. Reynold’s makes a perfect product for this:
Take the bag and put it into one of those cheap plastic storage bins.

I’m doing two roasts here, but you can double this up easily in the same bag and bucket.
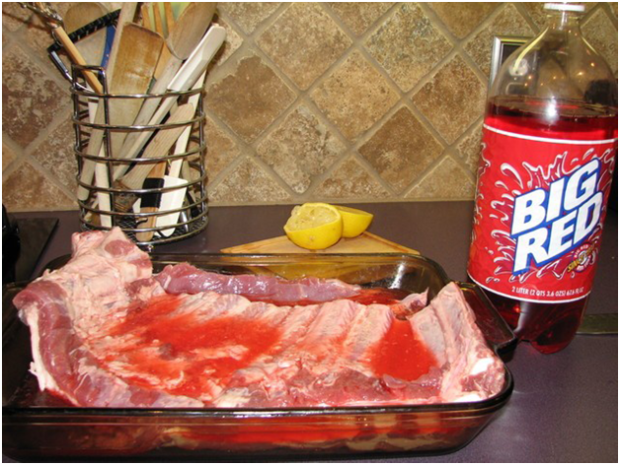
Go ahead and put the roast(s) in the bag. Now, for the next 24 hours, we need to brine this bad boy. Remember…a brine is for moisture, not for flavor. If any flavor is garnered from the brine, it’s a bonus and not the original intent. The brine will be a mix of sugar, salt, and acid to break down those muscle fibers to be as tender and moist as possible. For our brine we are going to use about this much apple juice:

Just pour it right into the bag. No reason to scrimp, but no reason to over do it.

And about this much apple cider vinegar (about a cup):


You can mix them right in together. Swish ’em around a bit, but you don’t have to worry about getting them perfectly mixed. Go ahead and close up the bag and get as much air as you can out. It’s not imperative to get it air tight, but it will keep your fridge from being too vinegared up if you get it closed.


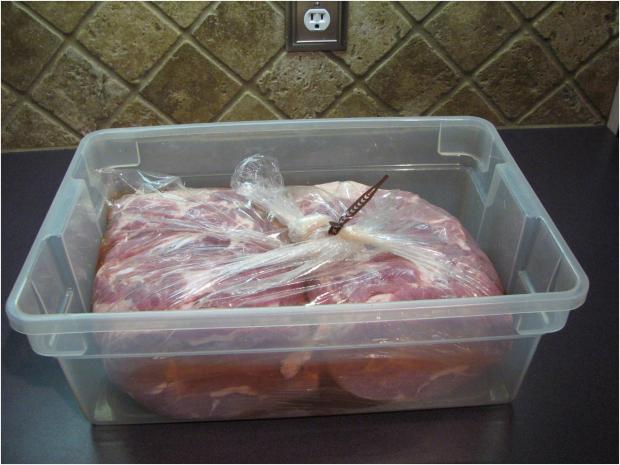
Into the fridge it goes for the night. The next day, take it out of the fridge, unfastened the closure and pour as much of the liquid out as possible. We are going to use a dry rub on this, so you want to make sure you get as much liquid out as possible. No reason to save the brine…it’s done it’s job, and we’ll have ample liquid from the drippings from this after it’s cooked.
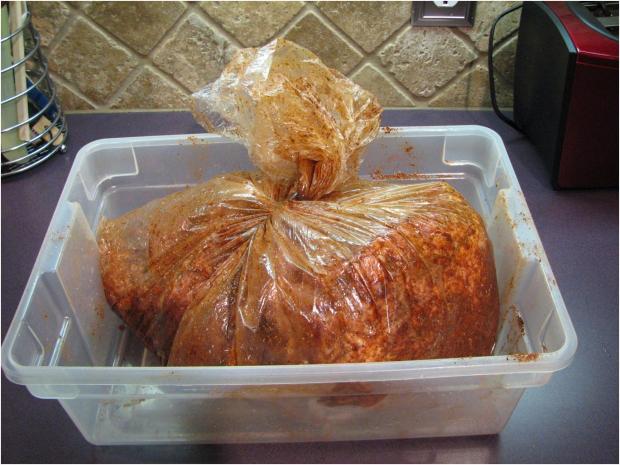
Using the Arcadian BBQ rub, liberally coat these things down on all sides and any cracks and crevices you can find. Then, put it back into the bag and close it back up. It needs another night to get seasoned up.

So that your timing is right, this is your timeline:
Day 1: brine in the evening, in the fridge overnight and into the next evening
Day 2: season with rub, into the fridge overnight
Day 3: smoking for six-ten hours (including the rest)
Fire up your smoker. Now, you guys know how I feel about mesquite. That’s not changing. However, I really like pecan/hickory on this recipe. Because you are cooking for so long, though, you’ll want to use a mixture. Mesquite is a harder wood and will cook hotter and longer than pecan, which is a softer wood. That’s why my nickname in college was “Mesquite”. What’s up, ladies?
Get your smoker rolling to 225-250deg and put your roast on fat side UP. It’s totally up to you on how much smoke you put on it, but you need at least 2 hours of pure unadulterated smoke. Some might argue with me on the fat thing, but if your smoker is designed correctly you’ll have indirect heat, full smoke, and the fat will melt into the meat fibers. That’s important in this dish. You see, it’s different from brisket because on brisket we cut against the grain. However, with TPP we are going to literally pull the pork apart so the meat fibers will be long. Since they are going to be long and not short, they need to have a lot of fat in between them to lubricate the fibers and make them easy to masticate. Get your mind out of the gutter.


After you’ve put all the smoke you want on it, take your digital probe thermometer and stick it into the opposite end of the shoulder blade bone longways and push it in as far as it will go. Then wrap the roast in foil VERY well. That is, lay down the foil with the shiny side down and lay the roast on it.
Then wrap the foil around the sides and back over the roast, making sure the thermometer is sticking out and the foil is tight around it. Then put another layer of foil around it. The reason is that there will be lots and lots of tasty liquid that we want to save, and if you don’t have it wrapped well the drippings will escape.


Note: the temperature we are looking for does not reflect doneness in any way. Instead, it’s just a marker for us to go off of because once we get to 195deg internal temp, then we know that the roast is cooked the proper amount of time to melt all that delicious fat intertwined into the roast meat fibers.

For the next few hours, keep your smoker going at 225-275. When you wrap the roast, it will probably be around 110-120deg. After you wrap it, the temp will start coming up relatively more rapidly.


Don’t rush it. We need it to go slow, so take your time and pay attention to the temp of the smoker and look for 195deg on internal temp. Once you get there, pull it and put it into a cooler. You know the drill…you need at least two hours of rest in the cooler, but the mass of this thing will let you go much longer. You can keep the probe in and keep the therm on and watch the temp. As long as you don’t drop too far down (130 or so), then you can let it rest a long time.
When you pull it out of the cooler, get one of those disposable foil pans. Get a deep one because the presentation is going to get kinda messy. Using your cooking gloves and with the assistance of your favorite sous chef, open up the foil and take the roast out without spilling any of the juice. The juice is good. The meat should be receded from the shoulder blade enough so you can grab onto it, give it a jiggle or two and take it out.

Throw it away…it’s duty to the world is over (or at least until some critty comes along to chew on it).
Using two large forks turned back-to-back, start ripping the meat apart. Don’t worry about being gentle, just rip. Break up all the chunks. It needs to be stringy.

When you get it all ripped apart, pour the juice over the top and toss the meat in it. Do as little or as much of the drippings as you want, but keep in mind that if you have any too much juice after serving the drippings will coagulate and make pork jello when it cools.

This is great straight up on a plate with some Texas Toast, or you can toast up some buns and throw some of the meat onto the crispy bun. Add some sauce if you like, a couple of pickles slices or onion slices, and you’ve got yourself a gen-yoo-wine TPP. Texas Pulled Pork, made the way Texans eat BBQ.