Experiment: Propagating Roses

I am experimenting with rose propagation. I don’t really know what I’m doing, but I have read about it and gotten advice from my rose-expert friend, who has successfully propagated roses clipped from bar ditches and yards with a caved-in houses.

According to the internet and my friend, a stem that is about the diameter of a #2 pencil with multiple nodes is ideal. It’s recommended to use a seed starter mix, perlite or vermiculite as the medium and rooting hormone.

These roses came from the flowers at my grandmother’s funeral. They were beautiful and smelled amazing, so I figured I’d give it a go and see what happens. I can’t identify these roses (although they are technically not roses, but rather floribundas,) and I don’t know if they are GMO freaks or their growing history. I’m sure they were bombed with all kinds of chemicals and preservatives.

1. Since it’s off season, I got what they had at the hardware store, putting the starter mix into a tub and watering thoroughly. Water, stir, water, wait, water, stir.

2. Once the starter mix is sufficiently moist, I packed it into a couple pots.

3. Made planting holes several inches deep with my handy chopstick.

4. Clipped the roses down to use just the stems with multiple nodes.

5. Dipped the stems into water, then into the rooting hormone so it would stick, and placed each stem into the holes.


6. Covered with plastic sacks to create a mini greenhouse. I left the pots on the ground in the greenhouse in a partially sunny spot.

Now we wait and hope.

The last time I tried this it didn’t work, but it was July, in Texas, during a drought, and we left for vacation, etc. A north Texas November and a commercially grown floribunda may not work either, but I figure it’s worth a try.

Extreme Hulabaloos, Blue Northers & Snowpocalypses

[Editor’s note: it’s been far too long since I posted to the blog. No time like the present.]

The Blue Norther commeth …

Extremes are the normal with North Texas weather. There is constant clashing of warm moist air with cool dry air. The dry air sweeps across the western U.S., over the Caprock then down the draw known as the Llano Estacado and collides with warm moist air coming up from the Gulf.

There is a diagonal  250 mile-wide strip where these prevailing winds smash into each other.

I live is in the center of this strip, so it’s common to have a 40 degree temperature change in a few hours. Friday, November 22, 2013 was one of those days. (it was also the 50-year anniversary of the Kennedy assassination.)

It was still, warm and humid with a high in the 70s. Then what is called a Blue Norther showed up. The wind picked up suddenly and the temps dropped 20 degrees in 30 minutes.

My tree before the wind.
My tree 12 hours later, after the wind.

These days, any form of moisture is welcome, even if it comes in frozen pellets of rain or snow. In a day or two the weather will warm up and the frozen moisture will thaw into ground-soaking water—something we need desperately in North Texas.

It is ridiculous when you think about the hullabaloo made over winter weather in North Texas. Every year winter shows up, freezes and ices everything, then is gone as quickly as it came. Yet we are bombarded with severe weather reports and warnings to bundle up, be safe on the roadways, and bring outdoor pets inside.

Everyone is hopefully anticipating a day to blow off school and work. However it is the opposite for nurses, doctors, insurance claims processors, wreckers, firemen, police and ranchers and farmers. Don’t forget the U.S. Postal Service always delivers – rain, snow, sleet or shine.

There is ever-increasing hyperbole and drama surrounding the extreme weather. Handy Husband always jokes with the next door neighbors that we will resort to cannibalism since “snowpocalypse” is forcing everyone inside for three days. Now after two days inside … I think I’ll emulate the Canadians and go outside even with a 100% chance of snow. Because I, like the Canadians, have cabin fever, and must go outside weather be damned (seriously, it’s only 30 degrees –I have wool socks and thermal underwear, it’ll be ok.)

My Precious Tomatoes

A rainbow of fall tomatoes.

My compulsion to garden began with my quest to grow an abundance of tomatoes. I didn’t even like tomatoes until I was about 22 years old. The first time I remember loving the flavor of a freshly-picked, salted tomato was when I lived in Chicago working my first post-college job. I visited friends in Champagne one weekend and bought tomatoes at the farmers’ market. That first bite of beautifully ripe tomato was like heaven on a plate and since then I’ve been hooked. Two years after that tasty bite, I moved to Michigan—where the climate is just right for tomato growing.

My first garden was a success in Michigan, which has a much milder climate than North Central Texas. The harsh Texas summers and drought conditions make gardening a challenge. I decided to approach the objective from a different angle by looking for the best-performing vegetable varieties for my area.

I consulted the Texas Agri-Life Extension Service’s list of recommendations but only found a few tomato varieties for sale at local vendors– Celebrity, Beefsteak and Big Boy are the most commonly available. So I started looking to seed sources and catalogs, hoping to find varieties that would grow well where I lived. Over the last few years, I’ve amassed quite an assortment of seed stock and catalogs. The more I learned about the plentiful tomato varieties, the more intrigued I became with open-pollinated and heirloom varieties of all plants, not just tomatoes.

Peppers: Jalapenos and Serranos

Even though Texas “technically” has a long growing season, the hottest part of the summer is about keeping things alive, not producing. So really we have two short growing seasons with fall being best of all. In the spring I try to grow bush-type tomatoes that ripens (55-70 days) all at once. In July I pull the spent vines and start seeds in the same beds. What sprouts and makes it will produce the best fall fruit. If a volunteer tomato comes up, I let it grow. Every time I’ve done that, it’s produced the most awesome fruit.

After three trial-and-error growing seasons of starting tomatoes from seed, I’ve found that Porter and Porter Improved are the top performing tomato cultivars in my backyard; Willhite Seed has the highest germination rate of all the sources I’ve used; and when a volunteer tomato plant starts growing, let it grow because you will be rewarded for it.

My favorite resources:

Texas Agri-Life Extension http://aggie-horticulture.tamu.edu/ — a great resource for all Texas gardeners. If you live in a different state, look for your local extension service. It will be affiliated with the land grant university in your state (Auburn, Michigan State, University of Illinois, Purdue, Texas A&M, etc.)

Willhite Seed
www.willhiteseed.com – everything I’ve ever grown from this supplier has been top notch. They breed their own watermelon seeds! The first year I grew their Porter tomatoes, I had a 98 percent germination rate – that is quality seed!

Botanical Interests
www.botanicalinterests.com – this company is part of the coalition of non-GMO growers and suppliers of seed. They have the best information on their seed packets – tons of information about each variety and cultivar.

Totally Tomatoes
www.totallytomato.com – the 2013 growing season is the first year I’ve used seeds from this supplier. So far so good. They have the most comprehensive selection of tomatoes I’ve ever seen. They also have a wonderful selection of other seeds, especially night shade plants (tomatoes are part of the night shade family).

RH Shumway
www.rhshumway.com – this company has the coolest retro-style catalogue and is one of the best sources for beans. 2013 is the first growing season I’ve used this seed provider. The germination rate has been excellent. It will be awhile before I can report on production.

Victory Seeds www.victoryseeds.com – one of the best sources for open-pollinated and heirloom seeds that grow in most parts of the United States. They produce their own seeds and are a non-GMO seed source.

Baker Creek (rare seeds) www.rareseeds.com – another comprehensive source for heirloom, open-pollinated and non-GMO seeds. I have not grown any seed from this supplier but they have great reviews.

Time well spent

Today was Mother’s Day. I spent the day with my family, as many moms do. My son was part of a tribute program to the mothers in our church congregation. Afterward, we went to lunch with my mom and dad, then my mother and I left with my son to visit my 83 year old grandmother and 94 year old grandfather.

It’s not how I planned spend the second half of my day, but it was worth every second. While I was with my sweet grandmother and grandfather we talked about nothing in particular—my grandfather was watching The Players Championship on TV . I had an opportunity to tell my sweet yet pious grandmother that Tiger Woods needed forgiveness too, just as King David did.

Even though my grandmother, mother and I all boast about our prowess in the kitchen, today we let Sara Lee do the cooking so that we could have quality time together. It was a beautiful day in May in North Central Texas, regardless of the long-standing drought.

After I got home at 5:45 p.m. I immediately began picking up the house, doing wash and other mom-like chores. My home needs cleaning, but I tried to remind myself that the house isn’t that dirty and that years from now I will cherish the time spent with my grandparents. The bathroom will still need to be cleaned but it can wait, for the moments that my grandmother and son are here on this Earth simultaneously are few.

Happy Mother’s Day.

Son and Dog-Daughter on Mother’s Day. Handy Husband taking the photo.

The New Victory Garden

Gardening: the original patriot act. (source: Michigan State University)

I have been salivating over gardening books, seed catalogues, blogs and ag extension websites for weeks. It’s only January and I’m anxious to start a spring garden. My seed box has many great leftover seeds from previous growing seasons. There are numerous sources for all kinds of seeds—organic, heirloom, F1 hybrids, new plant breeds, etc. I want to plant them all.

Over the last three years, I’ve noticed a surge in the availability of heirloom and open-pollinated seeds. Considering the growing popularity of locally-grown, non-GMO or organic food, it’s not surprising that the market is meeting the demand. This trend toward organic and local foods has sprouted the long-dormant victory garden concept. Urban and community gardens have become all the rage in big cities and small-town classrooms.

The victory garden’s inception came during WWI, but really took off in America during WWII. It was a way for the war department to send all available food supplies to the troops. The idea was for private citizens to grow their own produce in their backyards, so the large-scale farm production could be sent to the war overseas. Eleanor Roosevelt championed the first victory garden planted on the White House grounds in 1943 to publicize gardening as a patriotic act. The U.S. Department of Agriculture estimates that more than 20 million Americans planted gardens during the WWII years.

Fall tomatoes collected before the killer frost 2012.

Today’s victory garden trend is a more grass-roots movement. People are driven by health consciousness, environmentalism, self-sufficiency, and the emerging “food culture” in America. Fueled by available resources focused on cuisine, there is a schmorgesborg of food blogs, print publications, websites, TV programs, all focused solely on cooking methods, recipes and food preparation. When celebrity chiefs cook, they use the best ingredients, which are fresh, locally-grown produce and meat.

Market demand for homegrown food—favoring organic, heirloom and specialty items—is the byproduct of our food culture. Thus, boosting demand for seeds, especially the unique and old varieties. The benefits of healthy eating is a major contributor to the new victory garden effort. The first spring in the White House, First Lady Michelle Obama created a kitchen garden as part of her healthy living initiative. Ironically, Mrs. Obama’s kitchen garden is the first White House vegetable garden since Eleanor Roosevelt’s.

Other groups advocating gardening are Americans who want to be self-sufficient, or are ecologically minded. There is also a group of people who are opposed to Genetically Modified Organisms (GMOs). There is big debate about the long-term safety of consuming food from GMOs. Stewardship and nostalgia factor in too, since many gardeners and horticulturists want to preserve the world’s rare and unusual plants.

For me, I’m just happy these forces are culminating into a perfect storm for gardens and seeds, both rare in nature and scientifically cultured.

I love to see city folks growing nutritious food in whatever space they have available. It’s a reconnection to our roots (no pun intended) as Americans that carved out a way of life in a harsh and rugged environment. It’s also gratifying as an “ag woman” to see a renaissance of agriculture—growing our own food so we don’t have to travel, scavenge or starve. And the important lessons of knowing where food comes from; the work involved to grow it; and the patience required for a bountiful harvest.

I will be planning an entirely new garden space this year … more to come.

Ladybugs are a garden’s friend.

Fun Photos from Arcadia

It’s been a very long time since I’ve posted fun photos from our life here in Arcadia.

Black eyed susans from my front flower bed. This is a perennial favorite of North Texas gardeners.

Jdubs on the “Fastcat.” His grandfather rigged up a stampede string from a left-over strip of leather.

The real deal.

Textbook wall cloud. A few minutes after I snapped this, the sky opened up and hail stones rained down.

This photo represents the “why” of living where I do.

Trav’s Corner: Cream of Hatch Chile Soup

First, assemble the ingredients:

1 cup Hatch chiles, roasted, peeled, seeded & diced

¾ cup chopped onion

3 cloves garlic, minced

3 roma tomatoes, diced

1 large avocado, diced

½ cup chopped cilantro

Juice of 1 lime

2 cups half & half

1 cup chicken broth

In a large saucepan, sauté the onion in some olive oil & butter until soft and translucent. Add the chiles and garlic and sauté briefly. Do not allow the garlic to brown. Add the chicken broth and bring to a rolling boil for two minutes. Add the half & half, lime juice, tomato, avocado, and ½ the cilantro. Bring to a simmer for 30 minutes. Put into bowls and serve with a sprinkle of cilantro and a twist of lime.

Homebrewing Beer 101: The Finale

For the past two months, almost two cases of beer were in my front hall closet going thru a process of fermentation, carbonation, and conditioning. If you’ve followed along with us so far, then you’ve seen the background of how we got to this point and why. You might have even seen the second batch we bottled.  Weeks of waiting and holding and damn near torture and we’ve arrived at Judgement Day…we’re going to uncork.

This beer is a clone of Tire Biter Bitter Ale. We used a blonde malt…

And steeped hops for 90 minutes:

This creates a “wort”. The wort is the beer before it starts beerifying itself. We left the beer in a primary fermenter for a month. NOW…we should have pulled this after the first 7 days and then moved into a secondary fermenter, but we didn’t. Also, we realized when we went to bottle that we left out a couple pounds of sugar on the recipe, so we added it posto facto. It couldn’t be that great of an idea, but it worked out pretty good, all things considered. The wort went for a second fermentation with the added sugar. Then we pulled it, bottled it, and let it sit for 3.5 weeks to condition perfectly.

And here we are.

We keep a stocked kegerator that has a freezer on top, perfect for keeping frosty mugs and p’s for the beer. Four friends, four frosty pubbers, four bottles of beer.

Let’s do this…

The immediate pop is a HUGE relief to us. You never know if the carbonation is going to really take place. As long as the sugars stay fermenting and the cap stays airtight, then we should be good on bubbles. If not…well, let’s not discuss the ‘if nots’ right now.

The pour is perfect…lots of air, lots of foam. Good head forms on the top of the golden elixir and tiny bubbles work their way up thru the now completed beer.

Tasting notes: I’ll admit…I expected this to kinda suck. The homebrews I’ve had in the past have sucked harder than anyone has ever sucked before. This got off on the right foot in the glass. It looked like beer. It smelled like beer. And by gawd, it TASTED LIKE BEER. And not just homemade beer…this tasted DAMN GOOD. Tons of hoppy flavor and bite, a very citrusy finish that didn’t linger as much as the hops. We didn’t take measurements on this one, but from the buzz we got right afterwards, we are guessing that the abv is quite high.

This was a really good beer. Not to brag, but we KILLED it the first time out. We all sat in awe of the process and the work we did, still not really sure if one or all but one of us got together and filled the glasses with real beer as a joke on one person. It was a very good beer, to the point that I’d take it over most commercially made beers. The body was deep; lots of character to it. The bubbles made a perfect head with creamy froth for your lips.

We call this one “Made In Voyage”.  It’s a play on words from “maiden voyage”, or our first time thru the process.  But mainly because we changed things up from the original recipe as we went, so we were literally making this in the voyage and making it up as we went.  We are still learning the rules, but so far our little maverick ways have paid off.

And after all this time, all it took was a little homebrew. I’m hooked. Can’t wait to get right back in and try another batch.

Homebrewing Beer 101: Editor’s Note – Big Jim’s Double Dark

As a quick aside from our beer chronicles, we went ahead and purchased the ingredients for a Double Bock (or a “Doppel Bock” as the purist say) the last time we were in the brewstore. This is made with DARK malts and dark roasted grains. The recipe is meant to be a clone of the delicious Paulaner Salvator Doppel. I’ll add more pictures down the road at some point, but this actually is worth a quick post just to tell the story of our first ‘big’ beer. We wanted one that would be ready in a couple months and a fun one. This one takes 6 months to finish off. That sounds long to the novice, but the masters will brew then cask in bourbon oak casks for a year at a time to mellow their wort.

We’re not waiting that long, at least not at first when we are still learning how to do this. Here’s the fun part, though….when we were bottling the bitter ale, we realized that we LEFT THE SUGAR OUT OF THE DOUBLE BOCK. That’s an issue. Without enough sugar, the yeasts can create enough alcohol and the flavor will be really weak. After some deliberation and a commercial beer or two, we decided to go ahead and mix in the sugar AFTER the initial fermentation to restart the yeasts for another fermentation before we bottled. The process would last 3days to a week until the sugar was devoured.

Now…was this a smart idea? Probably not. The risk of picking up mold spores or dust or anything bad in the transfer is really not something we want to do. However, spending 6 months on a beer that ends up tasting like something they sell in Oklahoma where they limit the beer abv to 3.9% is not something we’d rather do. So we mixed up the sugar with some of the wort we siphoned out of the carboy then funneled it back in. After a full week, the bubbles stopped and the beer was ready to bottle. We left it in an extra week. Why? Well, we were busy. That’s probably not that smart either, but hey…we are new to this.

Bottles, disinfected and dried

The glass carboy with the delicious double bock waiting inside. Notice the ring of yeast around the top. That’s where the wort was when we first put it in. The yeast ate it down that far.

The color is like cappuccino. Dark brown with a foamy crema on top.

I’m fast forwarding a bit, but this is what the carboy looks like after it’s drained. The bottom looks like saturated river bottom sand. Doesn’t smell like it, though…this smells like warm yeasty bread with a PUNGENT alcohol punch to it. Smells incredible.

This is the brew in the secondary fermenter that we are using for bottling b/c it’s the only bucket we have with a spigot. Forgive me for the heaven photo effect, but it’s the only one I could find that highlighted the brew and the crema without picking up any other colors. The texture is similar to a dark soy sauce. It’s a sweet flavor that’s definitely young and needs some time in the bottle. In a pinch, though, you could drink this right now. It would need to be in a pinch, though, because this needs some bottle lovin’ for a few months.

We used a couple oversized bottles that Runnin’ Buddy has been saving for a few years in case he ever picked up homebrewing. It’s almost destiny.

Some random shots of the bottles, filled with the sweet nectar of the double bock.

And there we have it…forty bottles of our double bock that we lovingly named Big Jim’s Double Dark. Check back in August when we get to open these.

Homebrewing Beer 101: Tire Biter Bitter Ale Part 2

If you remember the last time we met here, we were in stage one of our new project: homebrewing. It’s the essence of true Arcadia. Anyone crazy enough to move out to the country needs to pacify themselves somehow.

The last time we were here, we just finished up the wort for a bitter ale called “Tire Biter”, made with blonde malt syrup and blonde malt grains, seeped in a tea for a while, then all mixed together for an hour with noble hops, and then we cooled it off in our primary fermenter, primed the airlock with vodka and slid it into the hallway closet for the magical yeast to take it’s time to do what it do, baby. Next step: Bottling.

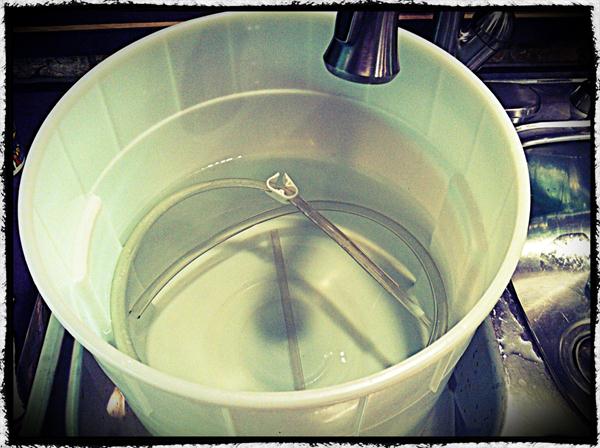
We always start with a little bit of hot water and some bleach. Not too much…just enough to kill stuff. Now, since this is our first time thru the beer making process, we were told to used diluted bleach. Since that time, we’ve met up with a couple different homebrew supply stores who think we are batshit crazy for using bleach. There’s some other stuff we are supposed to be using, so we’ll get some the next time we’re in. For now, it’s bleach.

All parts go in to the bleach soak:

We’ve got two cases of bottles washed and disinfected in the dishwasher. We’ve got a disinfecting cycle on our Bosch diswasher. Pretty damn handy for kids or beer.

The only ingredient we are using today is corn sugar. 3/4c is all we need to prime, which means we are going to add it to the wort to make the fizzy bubbles in the beer.

First thing, we have to take off the top of the primary bucket and prime the wort. I mixed up ¾c of corn sugar with enough water to make a pint. Then, I left it out for a bit to come up to room temp and swirled it into the wort, being careful not to upset the yeast on the side and bottom of the bucket.

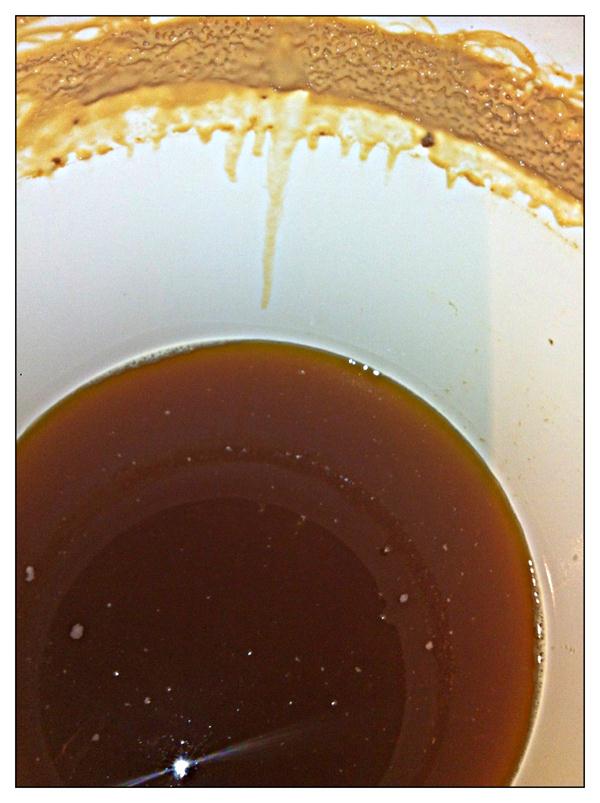
Now, before we go any farther, let’s take a look at the wort so far:

I ran a little thru the bottle filler hose to flush out anything left from the rinsing stage. Gorgeous color, and the smell is divine. The yeast looks absolutely dreadful, but it smells like warm bread dough. We debated on uses for the left over gunk, but could only come up with “potential sourdough starter”.  In the end, we just washed it down the drain.

Gravity says we have to siphon from up above to down below, so we put the bucket up on the counter, attach the bottle filler, and open the valve. Since the top is open, we don’t have a problem with creating a vacuum.

The bottle filler is designed to go all the way to the bottom of the bottle and trigger to release the flow of beer into the bottles. When it gets to the top (maybe even overflowed a bit), then you pull it out and it’s ready to be capped. The extra space in the bottle helps age the beer, which it needs an additional 3 weeks still after this bottling to mellow the flavor and create the bubbles. The bubbles are made from the leftover yeast and the sugar we added to prime.  The yeast eats the sugar (which calms the flavor), and yeast expunges CO2 as its “waste” product.  That’s right, kids…beer is bubbled with yeast poop.

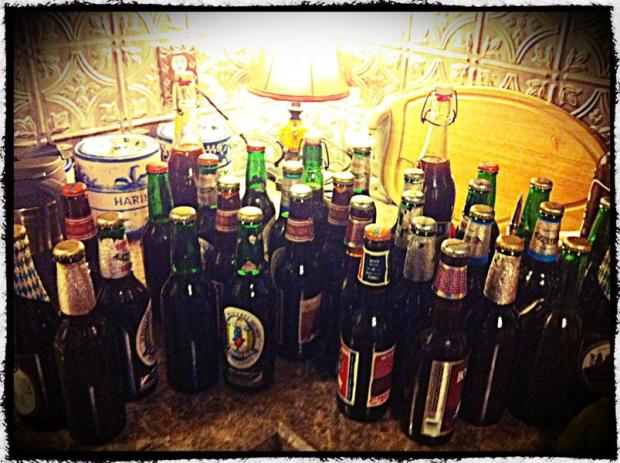
Our bottles are mottled this time around. We went heavy on the EZ-Cap style. I think we’ve decided to go with the EZ-Caps as much as possible in the future, but we also have about 50-60 regular bottles that require a metal cap. Since we are just starting out, we are just going to do both and see which one we like best.

With the bucket up on the counter and bottles in place, we are ready to go.

Top view before we start. The color is like a light orange honey.

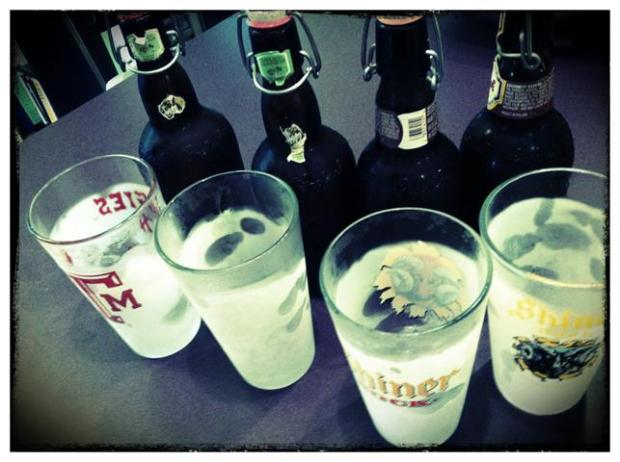
This is about halfway thru with the bottling, but I wanted to show these two up next to each other for effect.

And of course, the bottom of the barrel

The bottom still sorta churns itself as the yeast are still somewhat active.

If you’ve ever had a bottle of Fischer’s Alsatian style beer or a Grolsch, then you know how easy the EZ-Caps are to open. They are just as easy to put on as they are to take off. When we ran out of EZ-caps we went to the old standard beer bottles and our analog bottlecapper.

We had some old unused bottlecaps that came from an old Sunkist bottling plant. We don’t give a shit what the caps say. All we care about is the beer. As long as they work, that’s all we care about. Plus, it will be a good conversation starter.

Another shot at the wort…maybe it is Sunkist afterall.

And when they are all finished, they go back into the hallway closet at 60deg F for another 3-4 weeks for bottle aging. We are a month away. Can’t wait.

Finale coming up shortly…