Scattered Thanksgiving

Several people have asked me what we were going to make for Thanksgiving. When I say “nothing” puzzled glances follow with raised eyebrows. When your family is far-flung or out of pocket for whatever reason, it’s hard to justify cooking an 18-pound turkey for four adults and a small child.

My grandmother is recovering from the surgery she had last week. The procedure made her weak and tired. I have a family member going through a divorce and another one with a terrible bacterial infection, etc., etc.

So it was just easier and more convenient (and cheaper) for my immediate family go to Wildcatter for Thanksgiving.

A big pile of food ... Tri tip steak, ham and smoked turkey. Mac n cheese, grits, dressing, green beans, broccoli and sweet potatoes.

It was delicious! And we had a spectacular view of the North Texas Hill Country.

View off the southern bluff at Wildcatter Ranch

We had a stellar French Burgundy and when we were done, we went home. No dishes, no leftovers, no nada.

2003 Santenay was lights-out good!

I don’t think I’ll want to do it every year, but I’m thankful it’s an option. We’ll have traditional Thanksgiving feast with my husband’s family over the weekend – fried turkey, dressing and pumpkin pie.

We had a good day, (well other than that fight we had). And it was a beautiful day to be outside in the garden. I worked on long-overdue cleanup and winter planting.

The Christmas tree went up with relative ease. As I write, the Aggies and Longhorns are still battling it out. It’s been the holiday I really needed.

Dad’s Mustard Brisket

Of all the things I cook, the most requested recipe is brisket. As a Texan, it should be required in order to graduate high school to know how to properly cook a brisket. It doesn’t have to be smoked, but right before they hand you a diploma, if you can’t answer “slow and long” to the question of how a brisket should be cooked, they should send you back to class.

My brisket is a world-stopper. You’ve never had BBQ quite like this, and the key is yellow mustard. Not fancy brown or Dijon mustard, but plain ol’ French’s mustard. Here’s my secret, though: This isn’t my recipe. It’s my dad’s. When he first told me how he was doing his brisket, I just about squeezed my eyeballs out of my head squinting at him. Sure enough, though, he was right. He’s right about a lot of things that I challenge him on, but none moreso than mustard brisket. Here’s to you, dad.

I’ve never officially gone thru this procedure before because of one major component, and we might as well tackle it head-on right out of the chute. To properly cook a brisket, you’ve got to dedicate an entire day to doing it. Not a “day” as in “when the sun is up”, rather a full 24 hours. An entire rotation of the friggin Earth. If you aren’t willing to put in the time, sacrifice some sleep, and do this right then don’t bother with it. Go get yourself a nice margarita and rent Brokeback Mountain. When you get started on this, take notes of time and do it right. Don’t come bitching to me if you pull this thing after the sun goes down and it tastes like shit. Not my problem. You’ve been warned.

Your timeline is:

Day 1: Brine for 4-6 hours, up to overnight

Day 2: Marinate overnight

Day 3: Smoking

4-6 hours unwrapped

12-14 hours wrapped

4-7 hours in the cooler

Example:

1) Put the brisket on at noon unwrapped

2) Wrap it at 6pm

3) Put it in the cooler at 7am

4) Serve at noon.

24 hours.

Good so far?  Good.

Now that we have the unpleasantness of the requirements out of the way, let’s get to the basics of Texas BBQ beef. The brisket was just a trash piece of meat until just a few decades ago because no one knew how to cook it right. For reference, picture a delicious bovine:

The brisket is the cut just above the front legs. Think of it as your chest if you were to get down on all fours. Because of where it is, more than half of the entire body weight of the animal sits on this piece of meat. Therefore, it has to be strong, long meat fibers that are filled with fat and connective tissue. In addition, there are three different muscles that come in, and therefore three different meat fiber directions. This makes things really difficult to manage, especially when it comes to cutting the finished roast.

Ranchers would just toss this thing because it was so hard to cook. There’s an entire cap of fat on one side, and all three muscles are separated by  layers of fat and membranes that are really deep and hard to get to before it’s cooked. Even then, you can easily mess up the presentation by cutting it wrong. The direction of the cut is almost as important as how it’s cooked. About 50 years ago, though, ranchers started noticing that their Mexican hands were taking the briskets and making incredible dishes with them. They figured out that what they were doing was cooking it over low heat for a long time in a braise. They took the braised meat and cooked it over dry heat, and the modern Texas BBQ was born.

Now that I’ve officially scared hell out of you for cooking this thing, let’s get things prepped. We’ll need:

-an untrimmed brisket. UNTRIMMED by the butcher, that is. Don’t get a trimmed brisket.

-Bottle of Allegro marinade

-French’s yellow mustard (generic will do; I’m using French’s here so you see it’s not anything special)

-An oven bag

-Your favorite BBQ rub

That’s it. Not a whole bunch to this thing. Your brisket needs to be untrimmed. Competition BBQueers will try to tell you to trim a brisket, but that’s just because they are trying to skip on time. Keep it untrimmed…we are going to need as much fat as we can get. What size?  Hell, I don’t know.  About this big will do:

Doesn’t really matter. When you go to pick it out, what you are going to be looking for is a solid cap of fat on the backside of the brisket (they always put the label on the opposite side because it’s prettier). I had someone tell me one time that they went to Central Market and bought a “prime” brisket. I’m not sure that it even exists. This is meant for trashy cuts of beef, so the sinewy-est, fatty, marbled up slab of brisket you can find is perfect. If you spend more than $2.50/lbs for your brisket, you got taken. Look for it on sale, and buy it when it’s around $1/lbs and freeze it.

Take your brisket out of the plastic and rinse it under water to get off all the extra blood. Let’s examine:

You see the long meat fibers here? They lie just under that membrane on top of the meat. Don’t peel it off…I just want to point out how the meat runs for later. We are going to cut AGAINST the grain when we serve.

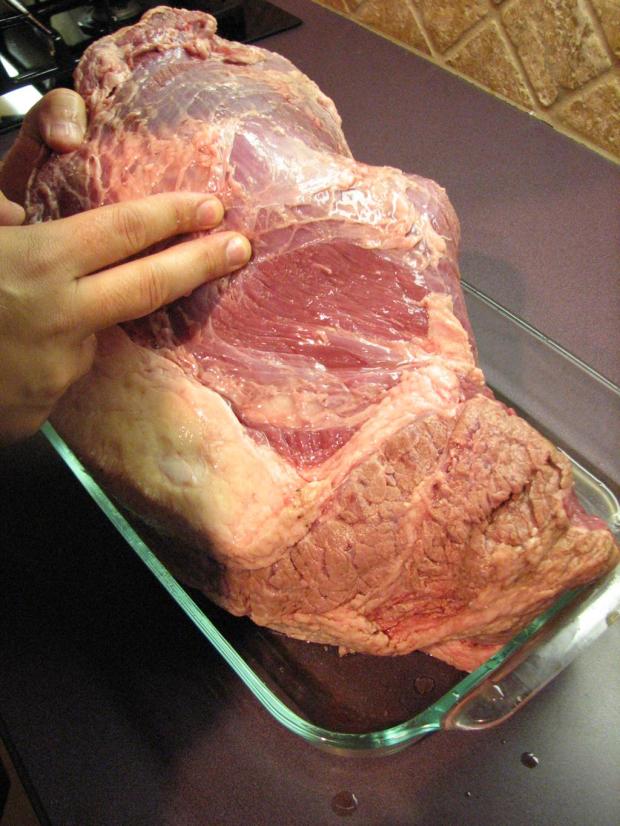
I pulled back that membrane a little bit to get a good shot. See how the direction of the fibers curves away? When we start cutting, we’ll need to look for that, and stop when we get to the point where we aren’t cutting against those grains.

The fat cap:

One of my favorite tools is the Reynolds turkey bag. They are just plastic bags that you can marinate/brine your meat in. Take one out, and put your brisket in, with the fat cap side DOWN.

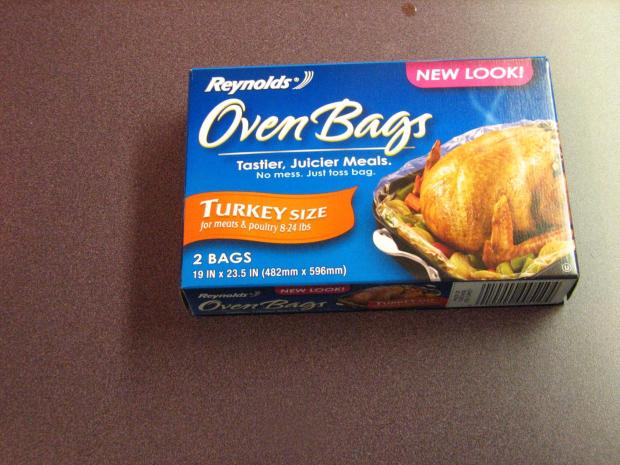
I like to put it into a pan in case there’s a leak in the bag, and there’s always a leak in the bag.

Now, take that Allegro marinade and pour in enough so that it comes up about halfway up the brisket.

Make sure that it’s the fat cap side that’s down, and not the meat fibers. What we are trying to do is use that salt and acid that’s in the Allegro to break down the fat and the muscle fibers around the fat. If you brine this with the meat side down, you are going to turn the meat into mush, and we don’t want that. Seal up the back and put into the fridge for 4-6 hours, up to overnight.

When you are finished, pull it out and lay it into a pan big enough to hold the whole thing. This is key…you are going to be flipping it in just a bit. Start with the fat cap side DOWN.

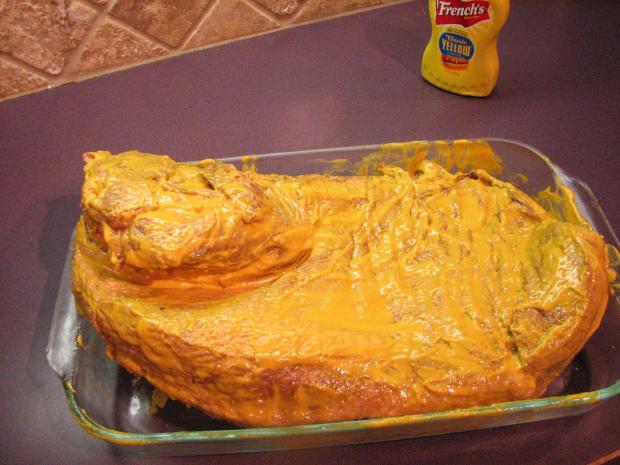
Get your yellow mustard out and squeeze LIBERALLY all over this thing, and then smear it with your hands so that it’s thick all the way around. Go ahead and rub it in kinda hard into the cracks and crevices where you can get your fingers. I always start mine out right:

Coated:

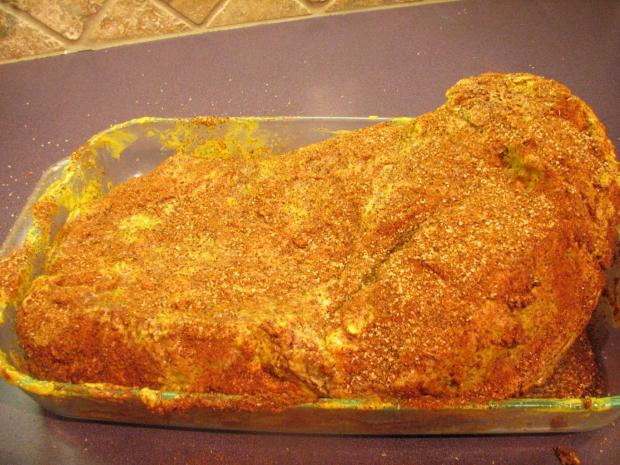
When you get a good thick layer on it, grab your favorite bbq rub and sprinkle it LIBERALLY all over. You don’t have to use the Arcadian Rub, but you want to make sure you use one with some brown sugar, salt, and spicy cayenne. You know what? Just use the damn Arcadian Rub.

Flip it over and get the other side as well (fat cap back down). DON’T RUB IT. Just sprinkle on top of the mustard. If you’ve disturbed the mustard coating, make sure it’s even and then re-sprinkle to cover.

A close-up:

Now, we need to put this back into the fridge overnight. Don’t skimp. Needs to be overnight. If you put it in unwrapped, though, your fridge is going to smell like this for weeks, so grab a new trashbag (unscented) and put the whole thing in, pan and all. Seal it up and let it sit in the cold.

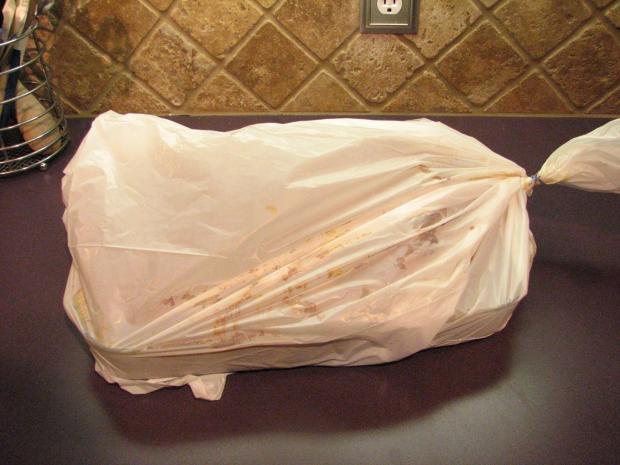
After a night in the fridge, poke that bad boy’s head out and take a look. The rub has gotten wet with the mustard and has made an incredible coat around the meat. That will be important for the next few hours as we slow smoke this

Close-up:

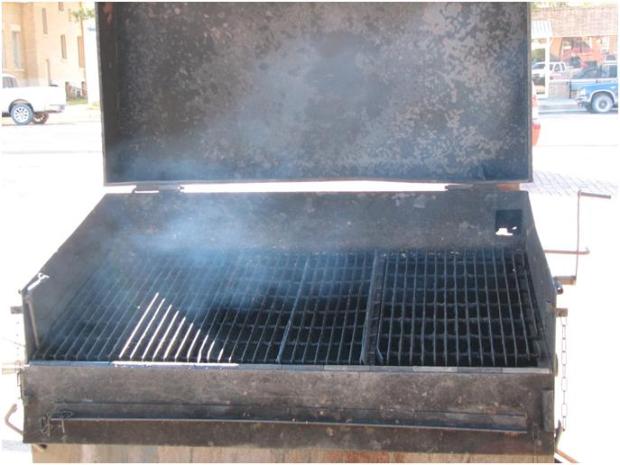
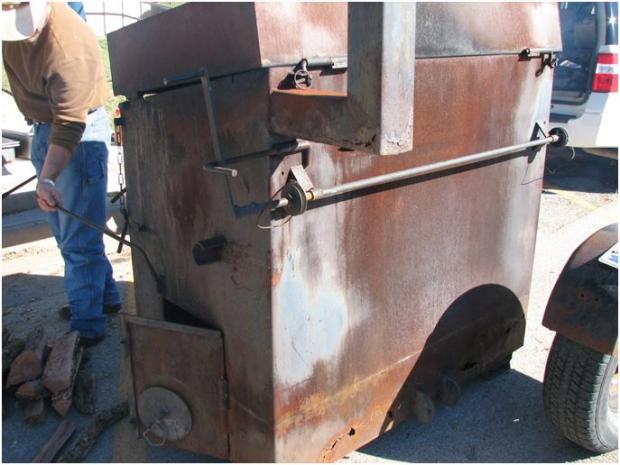
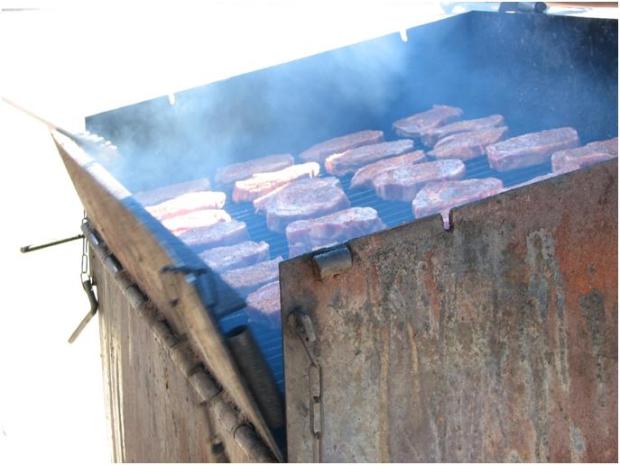
When you take it to your smoker, make sure you’ve let your smoker go enough so you are regulated to about 225deg constantly. Don’t try to singe this or sear it at first. It’s totally unnecessary, despite what you may hear from BBQ “experts” on tv. Just make sure you have a hard rolling smoke going, and your temp is around 225deg. 250deg at the highest.

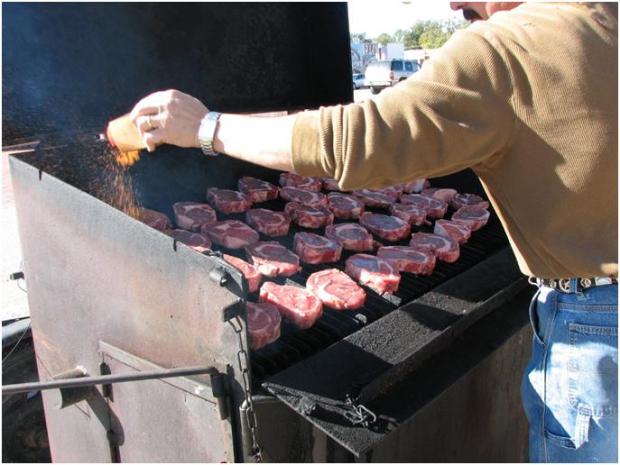
I’m using mesquite.  Not pecan and especially not oak, which is good for firewood and that’s about it.  Use mesquite wood on your beef.  I could almost accept someone mixing in some pecan, but it’s not needed.  Just use mesquite.  Stop asking questions.  Use mesquite.

Put it into the grill with the fat cap UP. UP.

There are differing opinions on whether or not you should smoke fat side down or up. The folks who say “down” say that it helps keep the meat from charring. However, it you run your smoker right, it should never char since we aren’t getting above 250deg. Also, if the cap of fat is up, then it will melt down inthru the meat fibers, coating them with the delicious fat and Allegro brine. Does it matter? In the long run, probably not. However, this is how I do it and I know it works. Try it this way and see if it’s not good. If not, do it however you want to do it. This is America, baby.

After 4 hours:

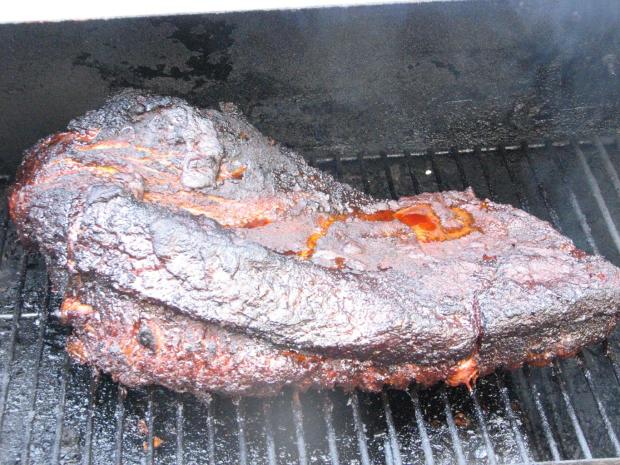
After six hours (with a couple of sweet potatoes thrown on to smoke for dinner):

You notice how black it is? That’s GOOD. We call that “bark” in the BBQ world. It’s the blackened layer right around the outside that has all the seasoning flavor from the mustard mixed with our rub. After six hours, we need to wrap this. You can go a little longer if you like, but I think six hours is plenty.

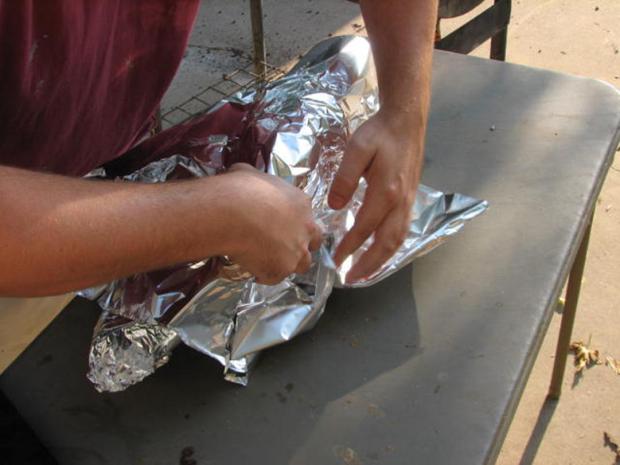
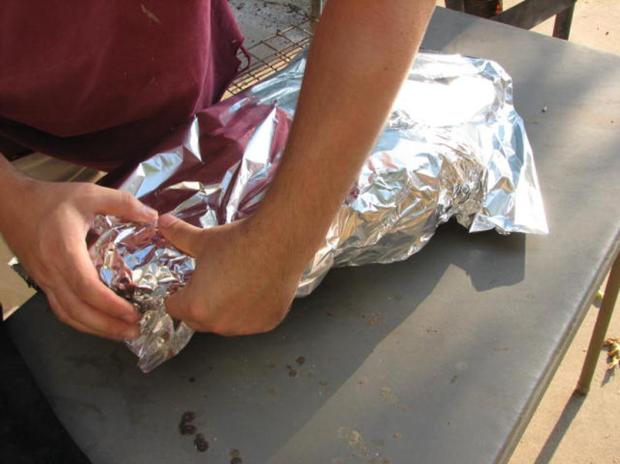
Get your handy prep table out, and lay two layers of heavy duty foil (the long package). Lift your brisket right out of the grill and onto the foil.

Fold the first layer of foil around the briskets. Fold it TIGHT and do it so that all corners are covered. I start at the bottom, fold across like you are putting a diaper on a baby (old style diaper on a baby, that is).

Do both ends, tucking in each loose piece, pinching them together, and making sure they are sealed up TIGHT.

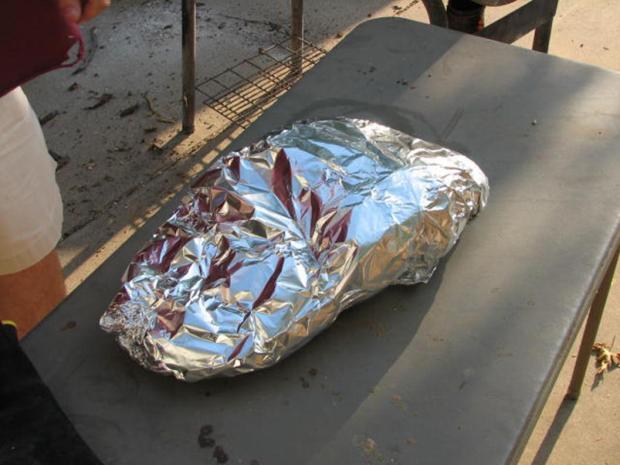
When you get it all sealed up, a nice fold or pinch will keep it together. Just like a good marriage.

You might have some spots left exposed after the first wrap. No worries..we’ve got three more layers to go. Second layer from the bottom:

After both bottom layers go on, take another large piece of foil and wrap all the way around the top, covering that hole at the top, tuck under, but make sure you fold corners so that it fits like it should. Do that twice. You should have used four sheets of foil so far.

Then you’ve got your tight wrapped brisket, ready to go on for the long burn. Again, make sure you are watching your fire constantly and keeping it between 225-250deg.

Back on it goes. Let’s add up the time so far:

-Allegro brine (4-6 hours, potentially overnight)

-Mustard and rub down (overnight)

-4-6 hours on the smoker at 225-250deg.

Up next, this needs to go for 12-14 hours wrapped at the same temps. Crazy, right? Yeah, just trust me on this.

After the smoker has done it’s work, the pretty foil will go from a nice golden yellow to a dark brown.

After 12-14 hours, take the entire brisket and place it in to your BBQ Cooler and let it rest for up to seven hours.

Do NOT open the cooler or disturb the foil until you are ready to cut.  That’s important.  Let it rest, and the rest is just as important as the other steps.  Don’t skip on this…let it rest.  Up to 7 hours max, no less than 4 hours.

When you are ready to carve, here’s a little trick.  You’ve got the fat side up still, so reach into the cooler and either rip the foil with your fingers or take a knife and cut the foil open.  You should be able to pick it up from underneath and flip it out onto your carving board.  However, get a pan so you can collect the drippings before you flip it out.  I use the same pan that I used to marinate the brisket.  Just tip it so the drippings run out, flip your brisket out onto your board, and then collect as much of the drippings as possible.  If you have some drippings that come out onto the board, go ahead and try to rake those into your pan also.  It will make the carving so much less messy.

Big ol’ slab of beef.

From the bird’s eye view:

When you start to cut, keep in mind how the meat fibers run.  Again, we are going to cut against the grain.  There’s a little secret to make sure you do this correctly.

a) start at the “skinny” end of the brisket

b) start on one corner, where you think you need to start

c) cut off the top of the corner on a bias (or on an angle) to make sure you are starting right.  If you chose the wrong corner, you can easily go to the other corner w/o too much of a do-over.

How do you know if you’ve cut it against the grain?  The part you cut should fall apart, with the meat fibers being really short.

I like to use an electric knife.  Honed steel is good, but don’t foresake the precision of an electric knife here.  Start making about 1/4″-1/2″ slices along that same line that you started on just a bit of a bias.

Excuse the blurriness, but you get the idea.

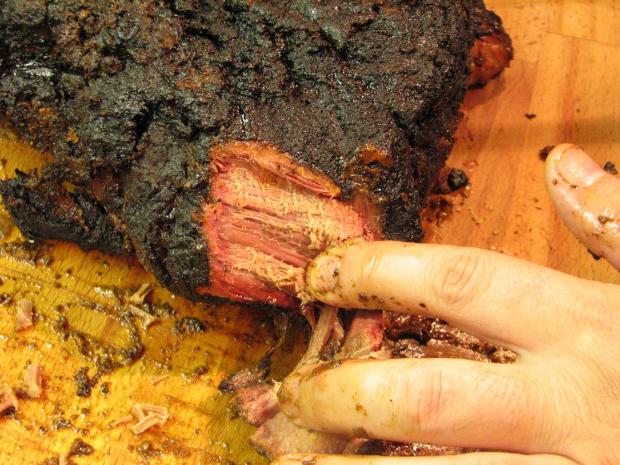
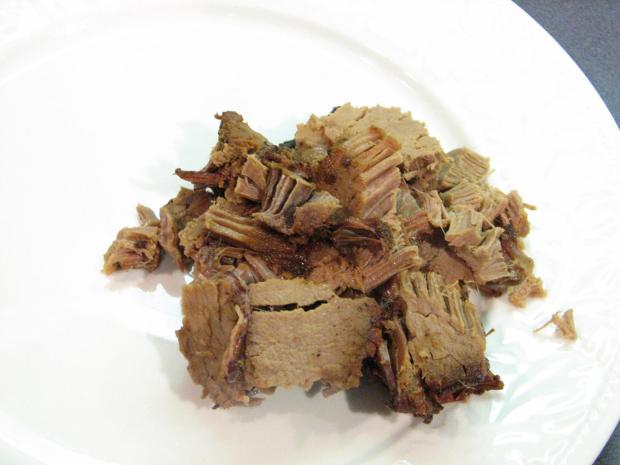
This is what I’m talking about being “against the grain”.  See the short meat fibers now that seem to fall apart?  That’s what you want.  This will be so tender that the meat will literally fall apart when you try to pick it up.

Here’s your brisket slice, about as whole as you can get it.  It’s ok if it falls apart.  It’s going to be so good and tender, it doesn’t matter if it stays in long slices.

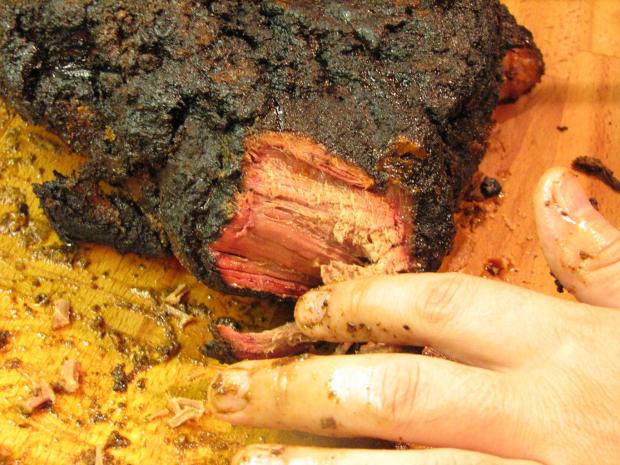
Continue on until you get to the point where the meat fibers begin to turn.  You’ll know you are there when you get to the big thick part of the brisket, and your slices look like they are slanted.  Then, turn the brisket 90degrees and start cutting right across the top, which will now be against the grain.  You’ve got two different muscles in here, but they’ll both be going the same way.

A close-up of the muscle, with a thin membrane separating.

Here are the long meat fibers.  Cut against then so your knife is perpendicular to the muscles.

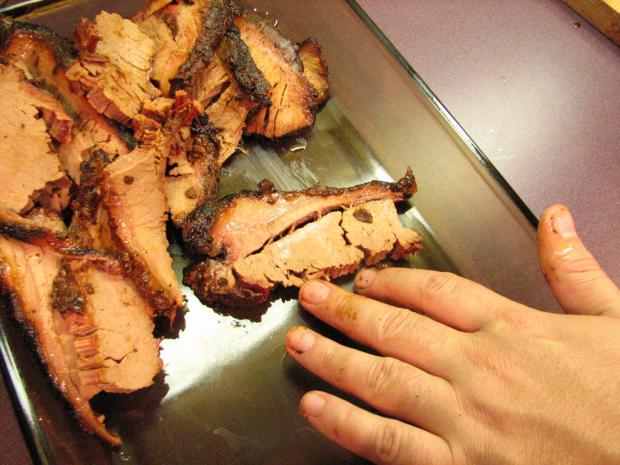
Close-up, of the slices.

When it’s all sliced up, you have should be able to peel some of the extra fat off and keep it in a pile up at the top.  Plus, you have tons of extras left over.

There’s all the brisket cut up.

That fat still has tons of potential to it.  Let’s not throw it away.

If you take your fat trimmings and put them into a skillet, you can start to render some of the extra fat off.  Brown on both sides for a bit…

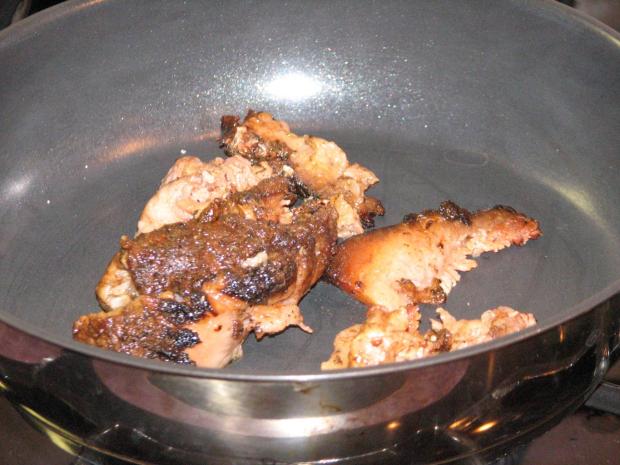
Then add a little beef broth or some of the drippings back to the pan and let it suck as much of the fat out as possible.

Then take that hot grease and drippings and pour it right back over the sliced brisket.  Cover it with foil, put it into the oven at 170deg for a few minutes just to keep warm until it’s time to serve.

Presentation on the plate:

In the pan, you’ll have this deliciousness:

I’m not opposed to putting sauce on this, but if you are going to use sauce, let’s use the WGD brisket sauce and not just some sugary sweet crap off the shelf.

That’s it.  My dad’s mustard brisket, cooked for a full 24 hours and about as perfect as Texas BBQ can be.

Shiner Bocker Beans

You know what I like? Beans. You know what else? Shiner Bock. You know what’s REEEEEEL good together? Beans and Shiner Bock. Your life as a bean-eater is about to change. For the better. Bocker better.

A quick glance at the ingredients:

-2lbs of dry pintos

-a medium yellow onion (I’m using a fresh one here with the greens still attached, right out of the garden)

-a tomato or two, homegrown if possible

-a juicy ripe jalepeno, homegrown if possible

-pork (I had a hambone from NYD that I needed to get out of the deepfreeze)

-SHINER THUMS UP BOCK

Pour the dried beans into a colander and rinse them off really good under cool water.

Get your best stock pot out and put a few cups of water in, just enough to cover the beans. A thick bottom on your pot will keep the beans from scorching. It makes a difference because we are going to be cooking for a LONG time. Add some salt when you turn the heat on. The salt will soften the water and flavor the beans.

Pour in the beans and bring the water to a boil. After the water boils, let it go for 10 minutes and then cut the heat off and cover the pot. It will need to sit for an hour in the hot water.

After an hour, strain the water off the beans back into your colander. Don’t rinse the beans…just pour the water off.

Add enough water back to the pot to cover the beans plus another inch and then add the beans back in. Throw the heat back to the beans and bring them back to a boil. Add a little bit of salt, but not too much if any at all. We’ll add our seasoning later on.

Now…before we go any farther, let’s discuss pork and beans. Pork is good, too. Pork is real good. I save all my bacon drippings in an Illy Coffee can. It’s perfect for storing bacon grease so I can use it for cooking. Nothing other than bacon drippings goes into this can. No vegetable oil or olive oil or butter…just pork fat. I’d drink this in a pinch if I had to. Add a couple of good scoops of fat to the pot.

I mentioned my New Year’s hambone. I make a ham every NYD to go along with my blackeyed peas and cabbage. That’s also my birthday, so I get a pineapple upside-down cake, too. When I’m on death row, that might be my last meal. Anyway…(tense)…back to the pork. If you don’t have a spare hambone laying around your freezer, get some hamhocks from the grocery store. They are a close 2nd place on the pork scale for me when it comes to beans. Hambone is the way you want to go if possible, though.

I like to leave a bunch of meat on the ham when I carve it just for the reason that I know that at some point in the next few months I’m going to make beans, and the ham in the beans will send it over the top. If for some reason you don’t have a hambone and have to use hamhocks, it’s ok to get a couple of slices of country ham from the meat counter at your grocery store.  Don’t use deli sandwich slices…the ham you add needs to be thick cuts.  If you are using a hambone, make sure you take off all the cloves and you’ll want to separate the joint, but other than that just pitch all that pork into the pot.

Heat. Cover. Go.

After it comes to a boil, set it to simmer and uncover. It’s going to slow simmer ALL DAMN DAY. 5 hours at least. After it starts to simmer, let’s start putting in some flavor. Take an onion and quarter it. If you are lucky enough to have a whole fresh onion, go ahead and rough chop the greens, too.

While you are at it, throw in 5-6 cloves of garlic, peeled but whole. The simmer: (note the delicious fat on top)

The vege mise en place:

In they go:

Stir it in well, and let it simmer again. For an hour. Uncovered. UNCOVERED!!!! WHOOOOOP!!!

After an hour or so, cover it back up but make sure you lower the heat so you don’t burn it. The onion and garlic will break down and leave you with a nice full body of flavor. Plus, the starch will start leaking out of the beans and the fat and connective tissue will start melting from the pork. It all leaves you with a delicious brown color and a thick gravy.

Now we are going to start adding flavor. Remember the Arcadian Rub? Let’s sprinkle in 2tblspns.

Now we are starting to resemble real live beans. Make sure every 15 minutes or so, you give them a good fold. Try not to stir too hard and break up the beans…just a gentle fold.

You should be to the point where you can see the line along the side of the pan where the liquid started. We’ve lost a lot of liquid so far from the beans soaking it up and the constant simmer evaporating the water out. If you ever get to the point where you are running low on liquid, you need to add some back in. And that’s where the Shiner comes in.

I set a bottle out at room temp so I’m not adding cold beer to the beans and ceasing the simmer. Pour it in slowly…it will foam up as the carbonation fizzes out.

The foam will subside pretty quickly, but be careful so that it doesn’t overflow onto your cooking surface.

While you are here, go ahead and throw in a quartered tomato or two. If you like it spicy, pitch in a whole jalepeno. Don’t pierce it or cut it up. Just throw it in whole. Any real Texan will tell you that the Jalepeno not only packs a solid wallop, but it also has a delicious fruity flavor. Let it boil for a while…if you don’t want it too spicy, take it out after 30 minutes, bifurcate the pepper and remove the seeds and inner membrane with a spoon. That’s what makes it spicy. You can then throw the pepper back it so it can continue its purpose in life.  If you like onion or think that it needs a bit more of the onion flavor, you can throw in another quartered onion.

All along the way, you should be tasting this to see how it is coming. I like a lot of cowboy in my beans, so after an hour with the tomato and the jalepeno I’ll add Arcadian rub every 5-10 minutes and taste. If the spice/flavor is there, but you want it a bit more salty go ahead and add some fine grain salt like table salt. Pull the beans from the heat and let them rest for a few minutes, covered. Then you are ready to serve ’em right out of the pot.

The essence of Texas ranch-style beans. Serve straight up or with some of momma’s cornbread like a good boy/girl. Congrats to you; you are the proud new eater of the Shiner Bocker Beans.

Trav’s Corner: Southwestern Chicken Liver Pate

I have been trying to get more liver into my diet lately, as it is the richest source of vitamin A out there. The vitamin A found in liver is much more readily absorbed and complete than the beta carotene found in plant sources and is one of the best antioxidants around. That being said, liver can challenging to make appetizing, especially when you don’t want to fry it (for carb avoidance reasons in my case). This recipe is not only appetizing, but simple and inexpensive to boot.

1 bucket of chicken livers (about 1 1/3 pounds)

½ an onion, chopped coarse

2 cloves garlic, smashed

1 bay leaf

2 t dried thyme leaves

2 t dried basil

1 jalapeño, sliced

4 Anaheim or New Mexico chiles, roasted, peeled, and seeded

1 t bourbon

1 stick of butter, room temp

Put everything except the last three items in a saucepan and cover with water. Bring to a boil, and then turn down to a simmer for three minutes. Remove from heat and cover for 5 minutes. Remove the bay leaf and discard. Using a slotted spoon, move everything to a food processor. Add the chiles and the bourbon. Pulse a few times to combine, season with salt and pepper (I recommend kosher salt and freshly finely ground pepper), and while the processor is running, add the butter a pat at a time until fully incorporated. Continue processing until silky smooth. Scrape into ramekins or small bowls and chill for at least three hours before serving. If you want to keep it longer, put some melted butter on top and cover in the fridge for a week or the freezer for 2 months. Serve with crackers, toast, or tortilla chips, or even with veggies.

Variations: If you like it spicier, throw in a Serrano pepper with the boil. For a smoky flavor, take out the jalapeño and use a chipotle with the chiles. For a more Mexican flavor, substitute Poblanos for the chiles and throw in some chopped cilantro with the butter.

The Victual Files: Casa Mañana

Across the high plains of north Texas sits dusty Wichita Falls. You may know the city from the giant tornado that hit it in the early 80’s or because the Dallas Cowboys held training camp there or the world renowned Hotter ‘N Hell 100 bike race that takes place in the hottest part of August every year. You may not know the city at all…there are only about 100k people that live there at one time, however the city is home to Sheppard Air Force base so there are quite a few of our brave servicemen and women who have spent some time there at some point over the last 60 years.

Either by bike or plane, a trip to Wichita Falls can be a bit underwhelming. At one time the city was a bustling boom town, and was the “big city” destination in The Last Picture Show that was set in Archer City, Texas. However, now it can seem like a city that is hanging on by a thread to past glory. Depending on when you go, the downtown can seem almost like a ghost town. There are gorgeous buildings down there, but the style harkens back to a time when people around the country thought all Texans looked and acted like the characters on the tv show Dallas.

With that long-winded intro, let me say that love to go to downtown Wichita Falls. There’s a great kitchen supply store there, and you can usually catch some pretty unique events at the Kay Yeager Coliseum/Multi-Purpose Event Center (MPEC). As well, one of the better steaks in all of north Texas resides at McBride’s Land and Cattle right at the corner of 6th and Scott. However, the greatest joy in Wichita Falls comes from a visit to Casa Mañana, the “Home of the Red Taco”.

Confused? Yeah…just hang on. This is a good ‘un.

If you don’t know what you are looking for, you will miss it. It’s on a street next to a shoeshine place that I’m not sure is still open, and that’s next to a store that I’m pretty sure is closed also. Look for the red door. On the inside, it looks like a simple Mexican food joint you can find in any strip mall. If you are looking for authentic Mexican food, then you are going to be disappointed. I’m not really sure exactly how you’d describe this food other than being authentic Wichita Falls. It’s definitely TexMex but it’s unique.

The menu is about what you’d expect from any other Mexican food place, complete with the stereotypical sleepy Mexican picture and random bullfighting image.

However, right on the inside cover at the bottom, you notice something very telling: Home of the Original “Red Taco”. Red taco? Oh, hell yeah. Red Taco.

Ask anyone from the area about the Red Taco and you’ll see their eyes light up. I’ll get there in a sec. First…

Oh, yeah…there’s a sombrero…

…and the vexing young Alicia, our server for the evening. Ask for her.

They start you out with a nice cold beverage and a bowl of chips. These chips are as thick as sheet metal and are extremely crisp and tasty. Along with…

…some really tasty salsa, it’s a great way to start this meal. The chips are really good, but that’s only the beginning of this unique experience. Every table gets a bowl of queso. Check this stuff out:

Yeah, it’s kinda orange. The first time I ate at Casa Mañana I made a funny face when they brought this stuff out. Don’t be scared, though. The queso is thick and it is good.

It hangs on those chips. The next unique item comes in a plastic bottle.

You might have to ask for a bottle, but it’s worth it. They call it “red wine sauce”. I have no idea what it is…it might just be catalina dressing, but it’s sweet and tangy with the slightest bit of spice. You squirt it out like ketchup right on the chips, and the locals tear into it like lions.

Weird, huh? Weird but delicious. Now then…let’s talk about those Red Tacos. You can get the Taco Plate, which is just two red tacos.

No rice, no beans. Just tacos. And onion rings (what?).  What’s so special about them, though? Well, first of all they are red. That’s easy to do with food coloring. However, the texture is soft yet crispy.

Now, the tacos are what these guys are known for, but I’m here for the star of the menu: the Casa Relleños, a plate full of chile relleños. It just so happens that the Casa Rellenos comes with a Red Taco to start along with a big ol’ dollop of guacamole. So, let’s talk about these tacos to start off.

The flavor is hardcore corn, but there’s some toothiness to it.

They are stuffed with meat, cheese, and lettuce. And folded over perfectly.

They are chewy, but when you bite into them you get a snap. I’ve postulated that they make these with extra lard in the masa but I have no earthly idea how they do this. However they do it, it’s something that you’ll crave after you have it the first time.

The first few bites of the experience is something you want to savor (claw and antlers to RC Slocum). Get crazy and squeeze a little of that Red Wine sauce.

Great warm-up to the main event:

The chile relleños. Two peppers stuffed with creamy cheese and topped with tomato ranchero sauce and tons of cheddar. No fancy garnish…just a slice of onion and jalepeño. Let the food speak for itself.

The rice is perfect, with a taste of spice but still fluffy and al dente. Same goes for the beans:

Perfect consistency, with a starchy texture but not creamed to the point where it feels like bean dip on your tongue. The plates are served in the traditional Tex-Mex style of being so hot that it will burn the bones in your fingers if you touch it when it’s first served. Somehow, the waitresses can hold them without a towel, though. Never have been able to figure out how they get used to it.

Cutting into the peppers yields melted cheese that you’ll have to wrap around the fork using your knife. The breading is light and crisp, even under the tomatoey ranchero sauce. At home, I’d try to replicate this with an egg white base, but this is done so well. They don’t try to overcomplicate the stuffing…just cheese, but that’s all you need.

You come to Beef Country, you expect a good steak. I can find you a good steak in a few places. However, if you want a meal that is unique and will be like nothing you can find anywhere else, head up north to Casa Mañana in Wichita Falls.

Burgers with Bacon and Blue Cheese (The Great BBB)

Everyone loves a burger…everyone (with the exception of my wife) loves it more when it has bacon and blue cheese on it.

There are only two cooking methods for a burger: flat top or grill. The both have their merits. Today we are cooking on the grill. Your George Foreman grill is not a grill. Return it.

Start with good ground beef.

Scratch that…start with a drink:

Then, move to the ground beef.

Season well with smoked paprika, some shots of cayenne, and Cavender’s Greek Seasoning.

Form a patty. I use this press for consistency.

Cook the bacon. Save the fat.

Fire up the grill. When the grill is hot, grill the buns. Use good buns…seriously. You need to put some fat on the buns beforehand. You can use butter or bacon fat (from the bacon you just made). As I am very health conscious, I use both.

When the buns are done grill the burgers. A little extra seasoning on the burgers at this point is a good idea.

Leave them alone on the grill…play with them too much and they will fall apart.

Get your blue cheese.

Remove the burgers from the grill (medium is perfect).

Turn on your oven’s broiler.

Assemble the burgers (bun, burger, bacon, blue cheese) on a baking sheet.

Place them under the broiler until the cheese is melted.

Garnish and consume with the beverage of your choice.

The Victual Files: Marlene’s @ The Big Chill

One of my favorite things in life to do is to go to a small town and check out the local eatin’ joints. Restaurants in small towns define the character of the town itself in so many ways. How many towns to do you know of only because there’s a restaurant there that serves good BBQ or chicken fried steak or even a great hamburger? Out here in Arcadia, it’s commonplace for us to take trips SPECIFICALLY based on eating something we’ve heard about.

So, we decided to put together a side project for the Arcadian Experience…we took a map and drew a 100m circle on it, and decided that we are going to covertly go into restaurants within that circle in north Texas and post our thoughts about the dishes and overall experience.  We call this new project:  The Victual Files, prounouced “vittle files”.  We are Victualphiles working on the Victual Files.  Catchy, campy, and all ours.

This isn’t a chance to slam restaurants or to give harsh criticism for their food. Rather, it’s a chance for us to share a little piece of life in those towns and the love and care they put into their food. Disclaimer: even though we will focus on the 100m radius, we will probably do this for any other restaurant we might venture into anywhere we go. It’s our site, our project, our rules.  Another disclaimer: I seriously need to update my iPhone to a new version.  The camera on this thing sucks to high holy hell.  Sorry in advance for the blurry pictures.

I’m going to start with one of my favorite places to eat: Marlene’s @ The Big Chill. Owners Marlene and Ben Horst started this restaurant in 1999 and both still work there daily. When you walk in, the first thing you notice is that you’ve stepped back in time…an anachronism to a “simpler” life when sodas came from jerks and green was a much softer hue. From the outside, you see the sign and the awning that immediately give you an idea what to expect on the inside.

When you step in, TBC doesn’t disappoint. From the floors to the lights to the tables, this is as authentic as you get in a small town. One of Ben’s trophies even hangs on the wall right next to the old Dr. Pepper machine (although, the modern stereo on top of the Dr. Pepper machine might not be all that authentic).

Above the service area, Marlene writes her daily specials on a large white board. One of my favorites, the crawfish etouffee, is running today for the last time this season. It happens that her son and daughter-in-law live down in Lafayette, LA, so she’s got a little Cajun tint to her. From time to time, Marlene and Ben will have a crawfish boil dinner. I love crawfish anyway, but they make it BYOB so you can bring your cooler in and have some tasty mudbug that they cook in the alley behind the store.

The quaintness of TBC is striking. From the colors on the walls to the ceiling tiles and light fixtures…

…this place makes you want to sit down and have a nice lunch in the middle of the day. Oh, but wait…my favorite part of the entire place…

It’s this bar. I’ve been literally BEGGING Marlene and Ben to rebuild the foot bar that goes underneath the stools so I can eat up there. I tried it one day, but the stools are just long enough that you can’t get enough leverage w/o sliding off. If there’s any critique I have of TBC is that I can’t sit at the bar and eat lunch.

Above the bar:

If Tom’s peanut bar doesn’t scream “old timey”, I don’t know what does. What’s that you say? Old Dr. Pepper and Coke stuff say “old timey”? Well, ok, they’ve got that, too.

I love sitting in the booths along the mirrored wall across from the bar. They bring out the tea, and keep it flowing. A big cup of Texas sweet tea is a great way to start out lunch.

When I go to TBC, I don’t even have to order. They know that I’m there for the French Dip. I love a French Dip in the first place, but the FD at TBC is my favorite. It’s not too stuffy and not all that complicated. Just a nice hoagie roll, some melty cheese, and tasty beef consommé to dip the sandwich in. Marlene’s hoagie bun is this delicious chewy bread that holds together so well when you dip it. A lot of FD’s will have a yeasty bread, but falls apart. This doesn’t do that…it stays nice and gummy, with lots of yummy gluten to hold it together.  Sorry to my celiac-suffering friends.

There are lots of other things on the TBC menu that are good as well. They have other sandwiches, special hot lunches (again, the etouffee is remarkable; the Cajun catfish is our minister’s favorite. We call him “Rev. Awesome”). Sometimes I’ll throw them a curve and order something different, but if I’m treating myself it’s the French Dip all the way.

If you order a sandwich at TBC you get choices, mainly what sort of chip you want and if you want a pickle. Nothing overly complicated…it’s either Sun Chips or Ruffles, and the pickle is just a clean, crisp deli pickle.

Let’s talk about pickles for a second. I love pickles, and not just pickled cucumbers. Pickled okra, pickled green beans, pickled eggs (Pedigree White Trash)…I love pickles. Zingerman’s Deli in Ann Arbor offers you two types of pickles with your sandwich: old pickle or new pickle. The difference is how long they’ve been in a jar. (For the record…Zingerman’s is the best deli I’ve ever been in.  The reuben there might be the best sandwich alive.)  I’d love to see some homemade pickles make their way to a menu near me here in Arcadia, but that’s a big order and a lot of work. “Who has time to make pickles?” one might say. Not me, which is why I want someone else to make some pickles. I digress…

My order: French Dip, Ruffles, pickle. Sweet tea. That’s all I need in this world.

Look at that cheese melting out of the sandwich. You get a healthy stack of roast beef, a decent ramekin of dip, and a good handful of chips. Luckily for me, Ben has big hands. And now I feel kinda awkward…

A closer look at that cheese oozing out…

Take that little monster and hold her head underwater for a bit…

Then let her up for a breath before you devour her…

And that’s a helluva lunch. I’ll slowly walk thru this sandwich…if I don’t have a good 20min to eat once I get my plate, I won’t go in the first place. No need to rush, and no need to rush the experience. As a matter of fact, I’ll take those plain ol’ chips and dunk them in the dip, too.

As a creature of habit, I have places I go eat for specific things, and at some point I’ll cover some of them in the Victual Files digest. I can’t think of a better place to start, though, than at Marlene’s.

Marlene’s @ The Big Chill in Graham, Texas…open M-Sat for breakfast and lunch.  Breakfast at Marlene’s is suberb as well.  Do yourself a favor and go give Marlene and Ben a try.

The Best Soup I’ve Ever Tasted

I love soup, and when the weather starts turning cool I try to eat soup as often as possible. A lot of people will choose the salad when given the choice, but I often go with the soup as a first course, especially if it’s all made from scratch.

My three favorite soups:

3) Cream of Artichoke soup at  The Messina Hof Vintage House in Bryan, Texas. The restaurant there is hit or miss, but the cream of artichoke will change your life.

2) Red Chicken Curry at Samui Thai in Plano, Texas. I judge thai food joints based on their curry, and Samui always is rock solid.  The bamboo shoots and aubergine are incredible.  I’m not sure if you can really count this as a soup, but it’s my list so I make the rules.

1) Chicken and Mushroom soup. Right here, right now. Buckle up.

Here is the ingredient list (for the most part):

Make a classic mirepoix, which is diced onion, celery, and carrot. I cut these in random sizes for texture. Melt 3tblsn unsalted butter and then throw in the mirepoix and salt. Caution: you are going to add a lot of salt to this dish, but you want to do a little as you go. The salt will help reduce the vege.

Once the carrots start getting soft, add a bunch of garlic. I did four cloves here, but you could go with more if you are a garlic geek. Keep it moving so it doesn’t burn. We are going to use three types of mushrooms here: shitake, oyster, and plain ol’ white button mushrooms, all sliced in a rough chop. Clean the mushrooms WITHOUT water (rub them down w/a towel to remove the dirt). Once you get them sliced, toss them in. Shitake:

Oyster:

Button:

And into the pot with more salt. The shitake have this great beefy taste, the oyster a buttery chewy taste, and the buttons are just a great all around mushroom. If the vege start to look dry, add a little bit of olive oil. It should look like this:

When the mushrooms all start looking soft, add a tspn of red curry paste.

This is what I use. Now, it’s not a thai dish, but we do want a bit of the thai spice that it’s hard to combine with anything other than the paste.

Add the curry paste and toss the mixture to make sure it’s good and mixed in. Let it cook down for a few minutes, then add some white wine. How much? Hell, I don’t know. About that much:

Let that simmer for about five minutes and then add ½ chicken, chopped up. I just used one of those rotisserie chickens from the grocery store. I think the flavor was Garlic Herb. By “1/2 chicken”, I mean ½ breast, a leg, thigh, and then all the dark meat from the back. That’s some of the tastiest meat on the bird.

Then add 6oz of tomato sauce.

And about 6oz of chicken broth.

Simmer for 5 minutes or so, stirring regularly. We are looking for the liquid to reduce down quite a bit. Once you get it so that you can see the moisture but it’s not standing in broth, add 1c of heavy cream:

And 1c of half and half:

Of course, you’ll need to add more salt. Go ahead and grind some pepper in this as well. Let it simmer for 10 minutes or so, add chicken broth to keep the liquid at a soupy consistency. It should look like this:

Get some parmesan cheese (not the cheap powdered crap…get grated parm), and add a cup or so. How much? Hell, I don’t know. About this much:

Cut the heat down to low, and let it simmer for yet another 10 minutes.

The cheese should finish off the flavor. Toast up some French bread and sprinkle on some fresh parsley, and you have one of the most delicious things you’ve ever tasted.

That’s it. The best soup I’ve ever tasted.

Scotch Eggs,Texas-style

“I had some Scotch Eggs this morning. Man, they were incredible, ” J-Skip said to me. What the hell is a Scotch Egg? “It’s a boiled egg wrapped in sausage and then deep fried. It’s so good.”

This was the actual conversation I had with a friend of mine. I’d never heard of such a thing, but anytime you mix egg and sausage together you have a winning combo. So, out I go to the internet. Apparently, J-Skip was absolutely right. The Brits eat these things like we eat burritos here in America. They sell them in supermarkets and gas stations, and are a preferred snack for scores of limey bastards all over the UK.

I thought about this a bit, and came up with a bit of a different take on this and it worked out INCREDIBLY. What I did was mix one of my favorite sausage treats (sausage balls) with this idea of Scotch Eggs. Check it, yo:

To make sausage balls, you mix a pound of sausage with 2c of baking mix and 1/2lbs of shredded cheese.

Mix these together and kneed so that you have all the baking mix “wet”. It should give you something that looks a-like so.

Now, normally you’d roll these into 2″ balls and bake at 350deg for 15-20 minutes until they are golden and delicious. Instead, I’m going to make a patty and push in a little concave spot the size of a boiled egg:

I take a little bit of extra baking mix in a bowl, and then roll a peeled boiled egg in it just to dust it a bit:

Then, let’s fold the patty around the dusted egg:

It doesn’t have to be perfect, but you want to make sure the sausage is a nice even layer around the outside and you have sealed off the holes. You’ll want it oblong in the shape of an egg so you know how the egg is laid out when you cut it open.

In another bowl, I put some panko bread crumbs and rolled the ball around a bit. You don’t have to have too much or any at all. It’s just for a little bit of extra crunch.

The extra I rolled into sausage balls, just because they are bite-sized and awesome. Onto a rack so the sausage can drain while they are cooking, then into the oven at 350deg until they are golden, probably about 40 minutes or so.

When they are finished, it should look something a-like so:

To plate this thing up, I’m going to cut it in half:

I made some quick gravy and sliced some fresh tomatoes

Toast up some bread and top with some preserves and pour yourself a big ass glass of grapefruit juice:

And then you have an instant classic here in Arcadia, the Scotch Egg.

Bob the Cook’s Pit

One of my favorite things to do in life is to cozy up with a beer on a Texas afternoon and do some outdoor cooking. It’s what Arcadia is all about…sharing what you know and do well with your friends and neighbors. In my case, I love seeing the creations that my fellow Arcadians come up with and the crazy things we make different cookers out of. My buddy down in Madisonville made a smoker out of a barrel; my dad’s fish cooker is made from an old gas water heater; and one of my favorite outdoor cookers is my plowdisc wok. I can do fajitas and breakfast tacos on that thing to feed a small army and/or a group of tailgating Aggies.

Across the country, you’ll find cooking competitions of all sorts: chili, BBQ, steaks, or even full chuck wagon competitions where you have multiple dishes as part of the submission. One of the most well-known of the outdoor cooks in our neck of the woods is Bob the Cook out at Wildcatter Ranch. Bob is an incredible gastronomist. He knows his food and knows his wine. If you ever get a chance to make your way to Young County, Texas, make sure you stop by Wildcatter Ranch and let Bob pair up a bottle of his favorite wine from his extensive wine list with a slab of medium-rare Texas beef and then top it off with his banana pudding in a Mason jar.

Bob the Cook (or “BtC” as we like to refer to him) recently catered in ribeyes to a function in downtown Arcadia. Never passing up an opportunity to sidle up to a genuine Texas cooking rig built and used by someone I regard so highly, I got a chance to snap a few pics and talk to BtC a bit about how he goes about making ribeyes for so many people at once.

It starts with his pit. He made this out of a U-shaped pipe that he had bent to a box. Now, this thing has been used time and time again and had to sit out in the Texas weather, so some of the original features aren’t quite as functional as they once were, but the design is still awesome. BtC used a design idea from the great Joe Allen in Abilene, but put some proper modifications on it to increase efficiency for an outdoor unit.

Here this bad boy is with the lid up:

You’ll notice that the grill grates are on a slant. That’s key for a steak cooking pit so you can adjust the amount of heat on the meat. Steaks with less marbled fat are going to cook much faster than the ones that have tons of flavorful fat, so you want to put them in a cooler spot on the grill or pull them earlier. Also, notice the lip that folds over in the front. That has two functions: first of all, it allows for easy access to the cooking surface as well as for moving the grills to an angle. See the bar on the inside of the lip? You can put the grates on that for an even cooking surface when you are doing things like sausage. The other function it has is that it can be propped up from underneath so you can use it as a flat working surface for your tools or bins holding the meat you are putting on the grill.

The firebox has two entrances in for proper flow, and you can adjust the flow in on both sides. There is a chimney on the back side of the lid, but BtC admits that the design is somewhat flawed. Moreover, the chimney just acts as a stop for the lid so it doesn’t flop all the way back.

You can see how easy it is to get to the working surface from here. BtC puts the beef onto the grates before he seasons them so that the meat warms up and absorbs the seasoning all at once. Also, he keeps the meat that will cook faster on one side so he can properly tell how well done the meat is. The fire is well enough away from the meat so you don’t have crispy char on the steaks.

You can see from the backside that there was a pulley system at one time to raise and lower the fireplate, but years of use and weather rusted out the bottom. BtC had to have an additional plate welding in recently for repair, so the pulley system is non-functional now.

This is BtC’s trailer, specifically built for the cooker. He can haul and move this all by himself, which is remarkable because the cooker itself weighs hundreds of pounds. He took an old axle from a junk pile and made a long tongue on it for counterweight. Then, he welded a stinger that pins onto the cooker itself.

Right by the door on the side cooker, you’ll see a halfpipe. Also, on the trailer you’ll see bars that go across. BtC engineered this so the bars on the trailer go into the halfpipes on the cooker as a latch. With the trailer tongue up in the air, he latches the pin in place on the stinger and can pull the tongue down and attach it to his truck. The tongue is counterweighted perfectly so you have a zero balance right on the axle.

Using rebar and pipe, he engineered a hinge system as well as a poking bar all in one. You can see the bar there…he’ll use that to close the doors on the fire box as well as to reach up with the hook to pull the lid down during the cooking.

Secure pins are chained to the side so you don’t lose them. This is a great shot of that lip in the front.

There you have it…a Texas steak pit, fully mobile and as efficient as you can get for outdoor cooking.