Burgers with Bacon and Blue Cheese (The Great BBB)

Everyone loves a burger…everyone (with the exception of my wife) loves it more when it has bacon and blue cheese on it.

There are only two cooking methods for a burger: flat top or grill. The both have their merits. Today we are cooking on the grill. Your George Foreman grill is not a grill. Return it.

Start with good ground beef.

Scratch that…start with a drink:

Then, move to the ground beef.

Season well with smoked paprika, some shots of cayenne, and Cavender’s Greek Seasoning.

Form a patty. I use this press for consistency.

Cook the bacon. Save the fat.

Fire up the grill. When the grill is hot, grill the buns. Use good buns…seriously. You need to put some fat on the buns beforehand. You can use butter or bacon fat (from the bacon you just made). As I am very health conscious, I use both.

When the buns are done grill the burgers. A little extra seasoning on the burgers at this point is a good idea.

Leave them alone on the grill…play with them too much and they will fall apart.

Get your blue cheese.

Remove the burgers from the grill (medium is perfect).

Turn on your oven’s broiler.

Assemble the burgers (bun, burger, bacon, blue cheese) on a baking sheet.

Place them under the broiler until the cheese is melted.

Garnish and consume with the beverage of your choice.

Strawberry Stuff

When I was a kid, one of the greatest joys in life was the random family “get-together”. It could be a family reunion, a holiday, or just a random gathering of our clan of peeps. The best part of these gatherings was the food…OH THE FOOD…that would come out of the families who were from all over North/East Texas. I’ve joked often that I’m pedigree White Trash, but this might be the cherry on the top of the sundae, so to speak. I don’t even remember when this particular dish showed up the first time, but after it did it became a staple in our get-togetherin’. I distinctly remember heated conversations over whose favorite dessert this was as various family members tried to claim that it was their favorite over some other family member.

The original incarnation of this dish was made with peaches and was simply called “Peach Stuff”, and as far as I know has remained so in the family up until this point. I’ve often wondered outloud if this thing would be good with just about any different fruit you throw into it. However, your available ingredients will limit the type of fruit you use. I’m getting ahead of myself…let’s get this thing built and then go back and reassess.

Ingredients:

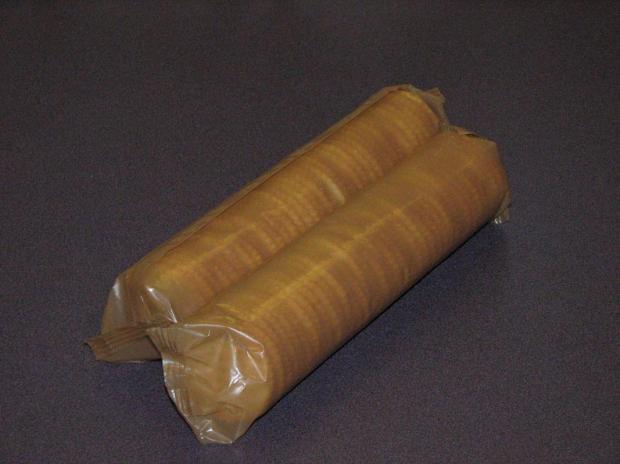
-Two tubes of Ritz crackers

-a stick and a half of unsalted butter (real butter…don’t you DARE use margarine)

-a large pack of strawberry jello (or two small packs)

-a tub of Cool Whip (full strength…not the lite crap)

-a stick of Philly cream cheese (full strength…no the lite crap)

-a cup of sugar

-2lbs of fresh strawberries

Take the two tubes of Ritz and crush them GENTLY so that you don’t bust open the packages. Trust me..it’s easier to do this inside the package. I tried using a food processor on it one time, but it made the crumbs too small. You want a varied sized crumble on this.

By rolling the crackers inside, you can crush them with your thumbs. Just make sure you don’t leave any big chucks. Even if you do, though, you can crunch them in just a bit.

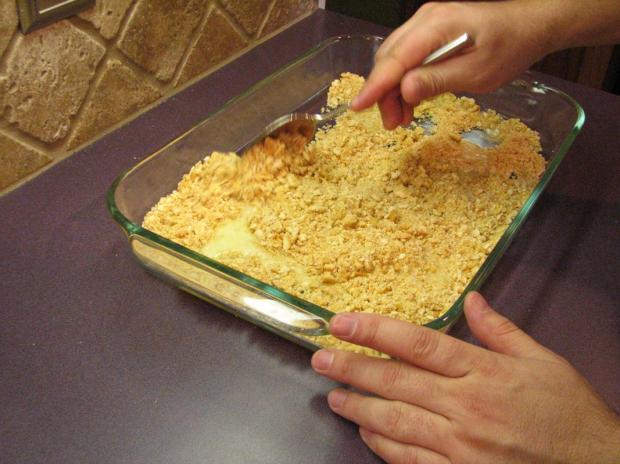
In a 13×9 ungreased pan, dump your crumbs out.

You can see some of the bigger crumbs here…just squeeze them with your fingers to smash them.

Melt the butter (just so that it’s soft…don’t get it too hot or it will separate).

Pour the butter into the crumbs.

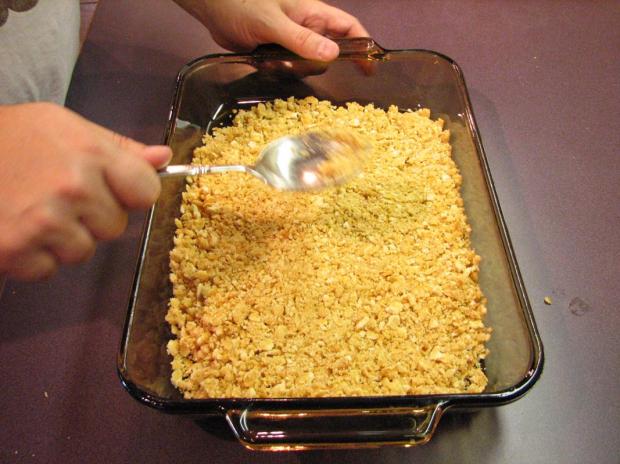
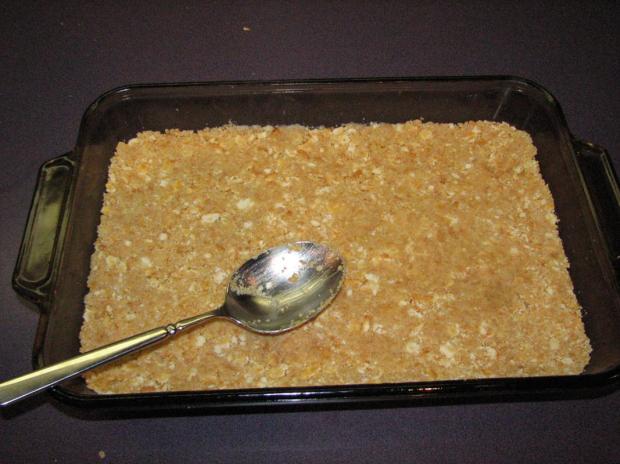
With a big metal spoon, mix the crumbs and butter together so that it’s evenly spread.

Turn the spoon over and start whacking the crumbs so that they even out all over the pan (you’ll notice the pan is suddenly a different color…I grabbed the bigger one on accident when I started out and had to change). Don’t whack too hard. You can use the weight of the spoon if your spoon is big enough. Smacking it will pack the crumbs in. It will take you a good 10min to do this, probably. You want the edges especially to be sealed up around the corners. Again, in just a bit this will make sense.

It should look something a-like so:

Packed in good.

In a preheated oven, put this on the middle rack and cook for 20-25 min @ 350deg. It may take a bit longer, but that should be about right. You are looking for it to be nice and golden brown.

In the meantime, prepare the Jello as per the instructions on the package.

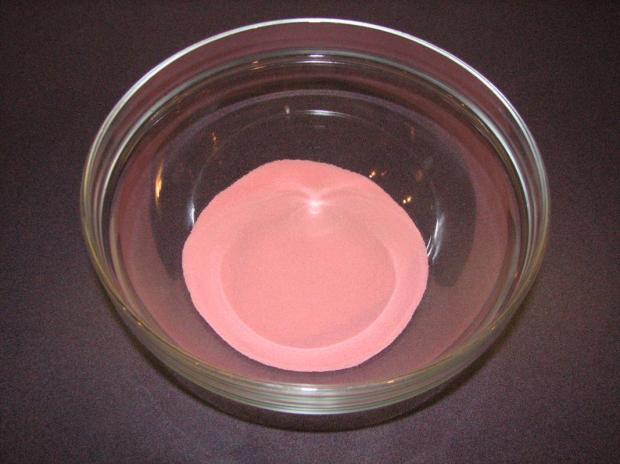
Once you get it made, slip it in the fridge for 20 min, then into the freezer. We want it to get to where it’s JUST starting to set up, but not too set up.

Now then…let’s make the good part. Dump the Cool Whip, cream cheese, and sugar into your mixer and start whipping it up. It helps to leave the cream cheese and Cool Whip out for an hour or so to soften. Whip it on high. The sugar needs to be dissolved completely, and the mixture can use the extra fluff.

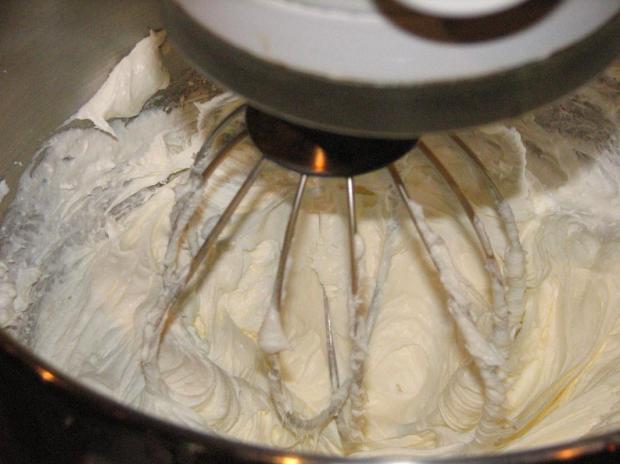
When it’s good and whipped, it will look almost like Crisco. Appetizing.

And you get to pick who gets to lick the beater.

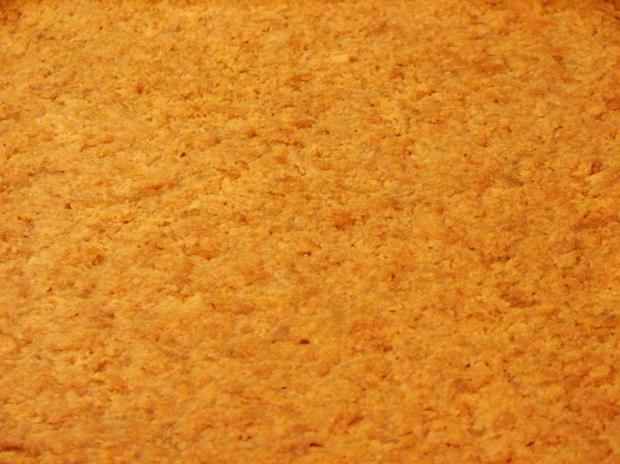
Pull your crust out and let it cool. Don’t try to put the cream cheese mixture on when it’s still hot or it will be a mess.

A close-up of the crust. You’ll be amazed at how good this will make your house smell.

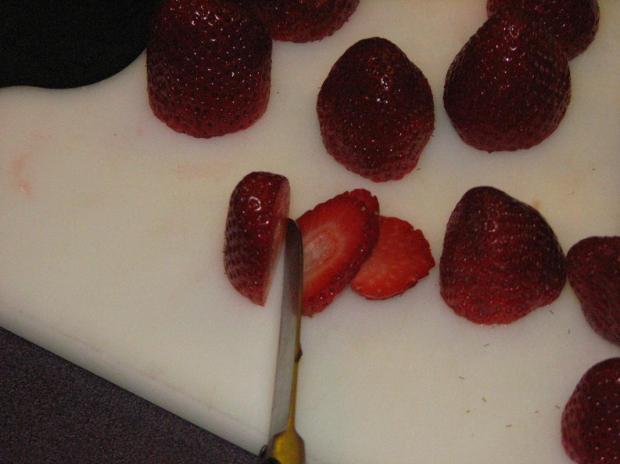
Top the strawberries and slice them up. They need to be in pretty thin slices, which you can accomplish with either a knife:

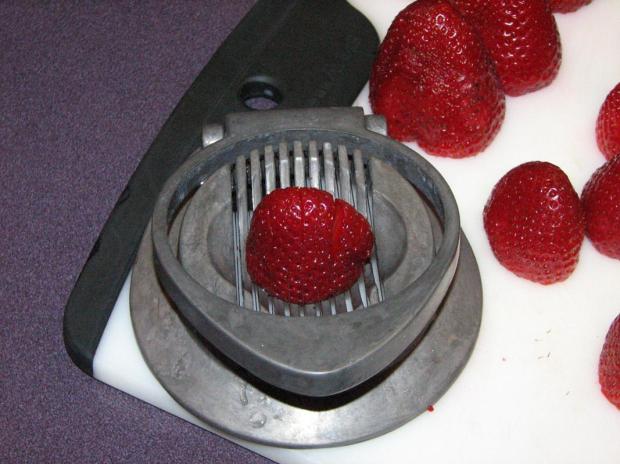
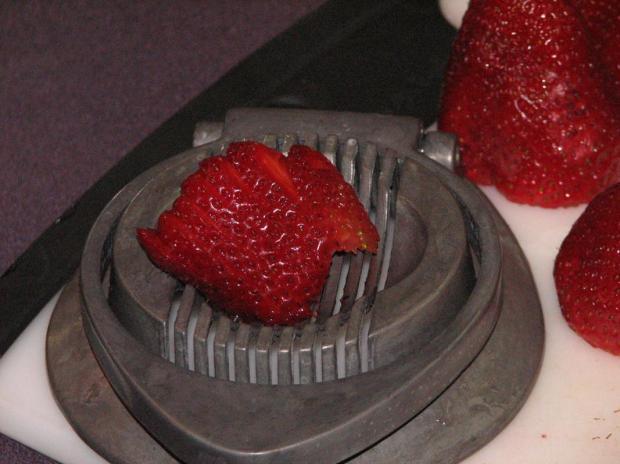
Or an egg slicer, which will cut your work down by a ton. This is one of my favorite tools in the kitchen. I use it for eggs, mushrooms, and strawberries when I want them sliced. You have to go easy at first or you’ll smoosh the strawberries. Just go easy so you don’t end up with a mush.

I thought about macerating these with sugar, but that will drain them of water and you don’t want that. When they are sliced up, put them back in the fridge to keep them cold until your crumbs are cool and your Jello is ready to use.

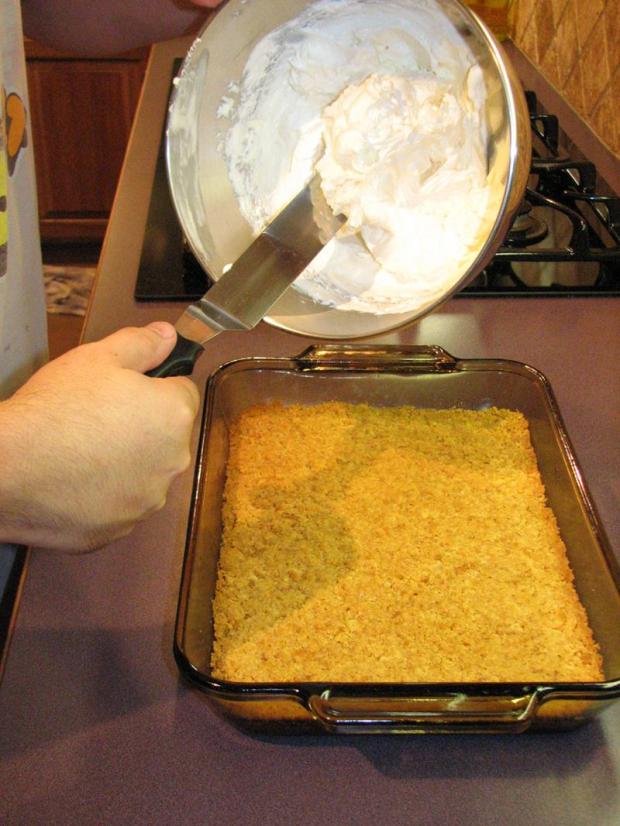
When the crumbs are cool, dump the cream cheese on them and spread them out. Go EASY with this or you’ll f up your crumbs. You need them to be sealed off completely by the cream cheese, and if you push too hard you’ll move the crumbs. Bad. Just go easy.

Speaking of the Jello, by this point it should be ready to go. This is borderline too far…when it starts getting thick, pull it.

Spread the cream cheese and make the edges TIGHT. It needs to seal up the crumbs. Using a paper towel, clean up the sides. It doesn’t have to be too clean, but you’ll want a separate layer look for presentation. If that doesn’t matter to you, then don’t worry about it.

Arrange the first layer of strawberries evenly on the cream cheese.

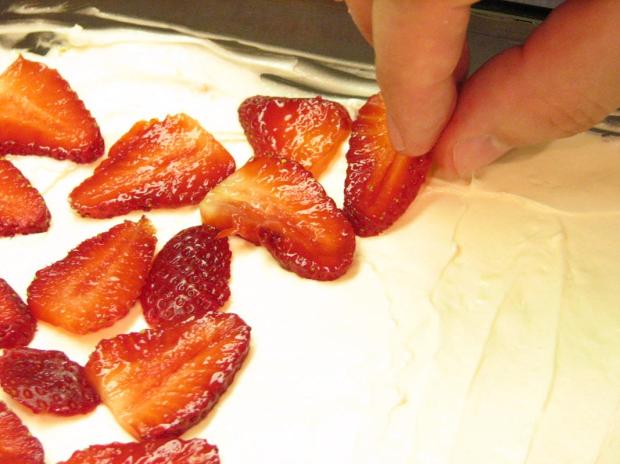
Once you have the bottom layer covered, then take the rest and even spread them out. You put the first layer down one-by-one so you know that you get good coverage of the white stuff.

\\

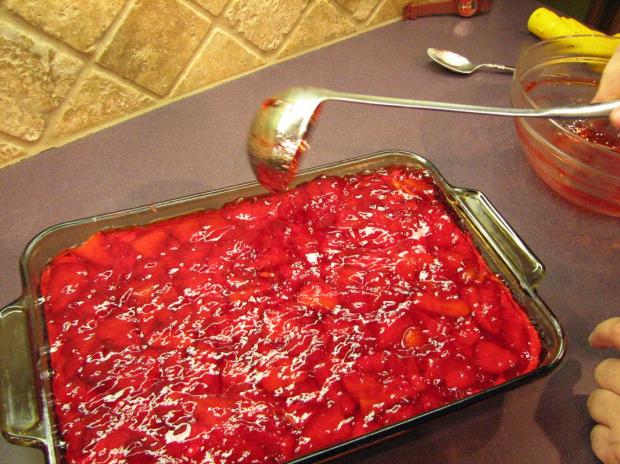
With a ladle, carefully pour the Jello onto the strawberries. Go easy now…if you pour to fast or heavy, it will penetrate the crumb layer and make ’em soggy. Bad.

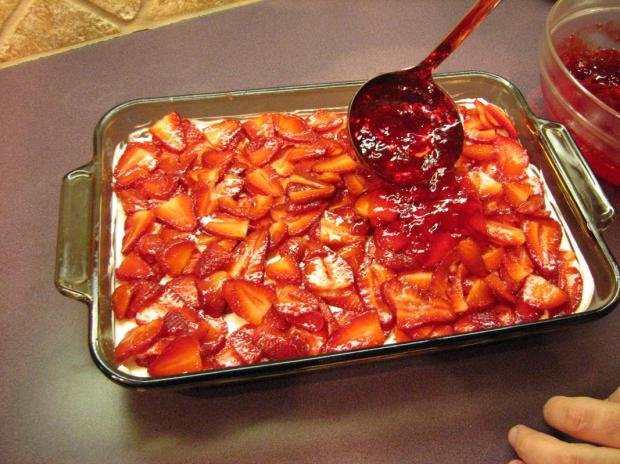
Pour it over evenly.

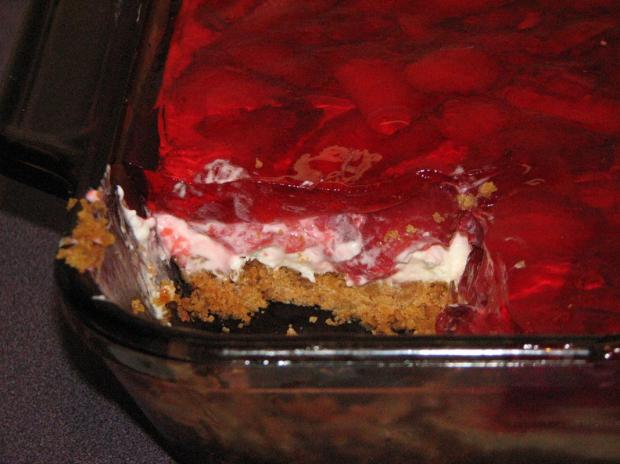
From the side, you can see the layers. Now then…how white trash is this thing? Ritz crackers, whipped cream, cream cheese, and Jello with fruit in it sounds like every recipe out of the local Baptist church cookbook, doesn’t it? I’m sure that’s where this thing came from. Doesn’t matter, though…we are 12 hours away from greatness.

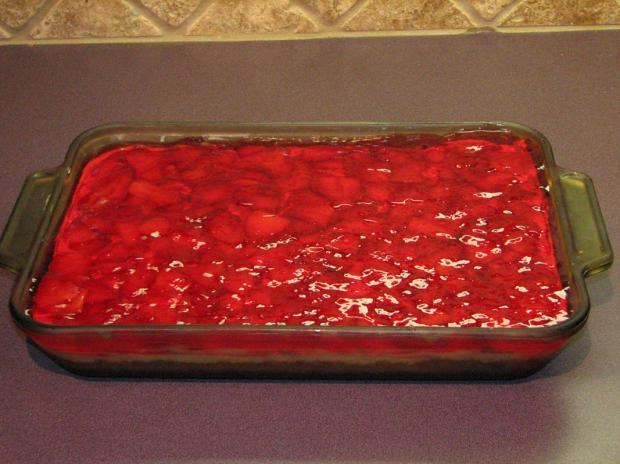
Cover the pan and put it into the fridge overnight. The Jello needs a few hours to set up completely. Don’t pull it early. When you do, though, this is what you are treated to. Oh, man.

The first slice is always the hardest to get out, but when you do get it out you’ve got this crispy, crunchy crust, creamy sweet layer of goodness, then the tart and crisp strawberry/Jello layer.

Back to the original conversation…this was Peach Stuff when I was a kid. You use peach Jello instead of strawberry, and use canned peaches instead of strawberries. You can chill the cans of peaches and drain them, using the juice as the “cold water” on the instructions on the package. I’m sure you can use just about any fruit flavor that Jello makes outside of lemon or lime. Whatever fruit you choose, though, this will be a instant favorite at your family get-togethers or holidays.

The Victual Files: Marlene’s @ The Big Chill

One of my favorite things in life to do is to go to a small town and check out the local eatin’ joints. Restaurants in small towns define the character of the town itself in so many ways. How many towns to do you know of only because there’s a restaurant there that serves good BBQ or chicken fried steak or even a great hamburger? Out here in Arcadia, it’s commonplace for us to take trips SPECIFICALLY based on eating something we’ve heard about.

So, we decided to put together a side project for the Arcadian Experience…we took a map and drew a 100m circle on it, and decided that we are going to covertly go into restaurants within that circle in north Texas and post our thoughts about the dishes and overall experience.  We call this new project:  The Victual Files, prounouced “vittle files”.  We are Victualphiles working on the Victual Files.  Catchy, campy, and all ours.

This isn’t a chance to slam restaurants or to give harsh criticism for their food. Rather, it’s a chance for us to share a little piece of life in those towns and the love and care they put into their food. Disclaimer: even though we will focus on the 100m radius, we will probably do this for any other restaurant we might venture into anywhere we go. It’s our site, our project, our rules.  Another disclaimer: I seriously need to update my iPhone to a new version.  The camera on this thing sucks to high holy hell.  Sorry in advance for the blurry pictures.

I’m going to start with one of my favorite places to eat: Marlene’s @ The Big Chill. Owners Marlene and Ben Horst started this restaurant in 1999 and both still work there daily. When you walk in, the first thing you notice is that you’ve stepped back in time…an anachronism to a “simpler” life when sodas came from jerks and green was a much softer hue. From the outside, you see the sign and the awning that immediately give you an idea what to expect on the inside.

When you step in, TBC doesn’t disappoint. From the floors to the lights to the tables, this is as authentic as you get in a small town. One of Ben’s trophies even hangs on the wall right next to the old Dr. Pepper machine (although, the modern stereo on top of the Dr. Pepper machine might not be all that authentic).

Above the service area, Marlene writes her daily specials on a large white board. One of my favorites, the crawfish etouffee, is running today for the last time this season. It happens that her son and daughter-in-law live down in Lafayette, LA, so she’s got a little Cajun tint to her. From time to time, Marlene and Ben will have a crawfish boil dinner. I love crawfish anyway, but they make it BYOB so you can bring your cooler in and have some tasty mudbug that they cook in the alley behind the store.

The quaintness of TBC is striking. From the colors on the walls to the ceiling tiles and light fixtures…

…this place makes you want to sit down and have a nice lunch in the middle of the day. Oh, but wait…my favorite part of the entire place…

It’s this bar. I’ve been literally BEGGING Marlene and Ben to rebuild the foot bar that goes underneath the stools so I can eat up there. I tried it one day, but the stools are just long enough that you can’t get enough leverage w/o sliding off. If there’s any critique I have of TBC is that I can’t sit at the bar and eat lunch.

Above the bar:

If Tom’s peanut bar doesn’t scream “old timey”, I don’t know what does. What’s that you say? Old Dr. Pepper and Coke stuff say “old timey”? Well, ok, they’ve got that, too.

I love sitting in the booths along the mirrored wall across from the bar. They bring out the tea, and keep it flowing. A big cup of Texas sweet tea is a great way to start out lunch.

When I go to TBC, I don’t even have to order. They know that I’m there for the French Dip. I love a French Dip in the first place, but the FD at TBC is my favorite. It’s not too stuffy and not all that complicated. Just a nice hoagie roll, some melty cheese, and tasty beef consommé to dip the sandwich in. Marlene’s hoagie bun is this delicious chewy bread that holds together so well when you dip it. A lot of FD’s will have a yeasty bread, but falls apart. This doesn’t do that…it stays nice and gummy, with lots of yummy gluten to hold it together.  Sorry to my celiac-suffering friends.

There are lots of other things on the TBC menu that are good as well. They have other sandwiches, special hot lunches (again, the etouffee is remarkable; the Cajun catfish is our minister’s favorite. We call him “Rev. Awesome”). Sometimes I’ll throw them a curve and order something different, but if I’m treating myself it’s the French Dip all the way.

If you order a sandwich at TBC you get choices, mainly what sort of chip you want and if you want a pickle. Nothing overly complicated…it’s either Sun Chips or Ruffles, and the pickle is just a clean, crisp deli pickle.

Let’s talk about pickles for a second. I love pickles, and not just pickled cucumbers. Pickled okra, pickled green beans, pickled eggs (Pedigree White Trash)…I love pickles. Zingerman’s Deli in Ann Arbor offers you two types of pickles with your sandwich: old pickle or new pickle. The difference is how long they’ve been in a jar. (For the record…Zingerman’s is the best deli I’ve ever been in.  The reuben there might be the best sandwich alive.)  I’d love to see some homemade pickles make their way to a menu near me here in Arcadia, but that’s a big order and a lot of work. “Who has time to make pickles?” one might say. Not me, which is why I want someone else to make some pickles. I digress…

My order: French Dip, Ruffles, pickle. Sweet tea. That’s all I need in this world.

Look at that cheese melting out of the sandwich. You get a healthy stack of roast beef, a decent ramekin of dip, and a good handful of chips. Luckily for me, Ben has big hands. And now I feel kinda awkward…

A closer look at that cheese oozing out…

Take that little monster and hold her head underwater for a bit…

Then let her up for a breath before you devour her…

And that’s a helluva lunch. I’ll slowly walk thru this sandwich…if I don’t have a good 20min to eat once I get my plate, I won’t go in the first place. No need to rush, and no need to rush the experience. As a matter of fact, I’ll take those plain ol’ chips and dunk them in the dip, too.

As a creature of habit, I have places I go eat for specific things, and at some point I’ll cover some of them in the Victual Files digest. I can’t think of a better place to start, though, than at Marlene’s.

Marlene’s @ The Big Chill in Graham, Texas…open M-Sat for breakfast and lunch.  Breakfast at Marlene’s is suberb as well.  Do yourself a favor and go give Marlene and Ben a try.

Garden Calamities, Bad Kids and More Bad Dogs

Garden Calamities, Bad Kids and More Bad Dogs

7 to 10 days ago I planted a few rows of spring plants that are space-savers—ideal for my intensive gardening plan. These are also the plants that give you quick pay-off in terms of gardening—radishes, mesclun, rocket (aka arugula), spinach and carrots. All sprout quickly and can be harvested between 25-45 days.  A super-speedy turnaround considering our beloved tomatoes can take up to 90 days to mature.

Planting a sorta-early spring garden...

These quick-return crops have already started to show signs of life … this photo was taken on Monday, 7 days after they were planted.  

Showing signs of life.

See the little sprouts coming up … I have no idea what this is because I didn’t properly label my rows – oh well. I will be able to identify them once they get past the initial phase of sprouting.  

Then Tuesday, I started writing this piece and decided to take photos showing progress.  I went out to the garden to take photos, but there was evidence of a minor Garden Calamity.

Evidence of a very bad dog.

A big dog print in my raised bed …  I only planted half of one raised bed and that is the only place the dog tromped thru. Of course it’s right in the middle of a planted row.

 I still didn’t get the story finished, so after work on Wednesday, I went to take another progress photo.

Then another Garden Calamity struck … usually when that happens it has to do with a bad dog. Yesterday it had to do with a kid … my 4-yr old son came into the house and declared: “I water momma’s flowlers. I help jew, mom.” I didn’t think a lot of it, but then walked out to see what he was talking about.

Seedlings almost washed away by a 4-yr old.

Holy Garden Calamity, Batman! I don’t’ think 4-yr olds understand that you can’t put the sprinkler wand/spray head thingy right up next to the seedlings. And this story has changed drastically since the initial draft, due to Garden Calamities.

Bad kid, good kid? Definitly a cute kid!

More to come on tomatoes and spring gardening in North Texas… I’m dying to plant my tomatoes, but the old farmers say, “thunder in February, frost in April.” And we had thunder in February along with a frozen foot of snow and ice that cancelled school for a week. I’m going to wait a few more days on planting my tomatoes. Hopefully I can avoid future Garden Calamities.

96 tomato plants ... almost ready for a North Texas garden home!

Spring’s Fling: Chocolate Covered Strawberries

Spring’s Fling: Chocolate Covered Strawberries

Strawberries and Chocolate ... Simple Goodness.

Spring is the season for strawberries.  I love berries of all kinds.  And now is the strawberry’s time to shine.  When you are making things with 3 to 5 ingredients, it’s really important to get the best available ingredients possible. This means using fresh produce. If you can get locally-grown produce, even better.

For me one of life’s simple pleasures is chocolate-covered strawberries. I’m a chocoholic and a lover of all berries. But this is simple and delicious.  There are three ingredients: strawberries, cream and chocolate.

Wash a package of fresh strawberries and pat dry.  I used a one-pound package for this recipe. Set them aside to continue drying.  You want them to be as dry as possible to dip into the chocolate.

Strawberries! These came from United Supermarkets!

Next, use a high-quality semi-sweet chocolate.  Scharffen Berger is my favorite … it’s happiness in a wrapper.

Happiness in a wrapper!

If you can’t find it in your local grocery store, Ghirardelli makes a good-quality chocolate and is readily available in most stores.  If you prefer, you can use a darker chocolate, which has a higher percentage of cacao. Kitchen Tip: sometimes you can find a good chocolate bar for melting and baking in the candy section instead of the baking section.

Put 3-4 ounces (one bar) of chocolate in a microwave-safe bowl.

Add 1/4 cup of heavy cream. (technically this is chocolate ganache, which is just the fancy way of saying: chocolate with cream.)

I love cream.
Cream makes everything better-- that and butter!

Microwave for 30 seconds at a time, stirring in between, until the chocolate and cream have melted together.

Mix well!

Take your dry strawberries and dip into the chocolate and put on a chilled plate or pan covered with wax paper.

Dippidy-do, I love you, chocolate.

Stick in the refrigerator for 45 minutes so that the chocolate has time to set up.  Then serve it up and enjoy.

Mmmmm ... Chocolate and Strawberries!

(PS – my photos will improve, I promise.  I’m now motivated to learn how to use my camera much better!)

Tomato time in Texas

Tomato time in Texas

About 2 more weeks and we North Texas gardeners will be able to plant our tender crops.  And that means Tomatoes!  [Why exactly do we have to add an “e” when we make the word “tomato” plural – don’t answer that Micki Jo].

If you have ever had homegrown tomatoes you can fully appreciate the greatness of having fresh garden-ripened tomatoes.  Unfortunately half the year we are relegated to those hard, sorta red tomatoes—I call them red baseballs in the grocery store.

Garden tomatoes!

You can never have enough tomatoes during the summer months … when you are up to your eyeballs, all you have to do is can them.  Then in the winter when you are making a stew or chili, pop open a couple jars of our canned tomatoes, and ta-dah – happiness in a jar.

Canned tomatoes

I went nuts in my greenhouse this winter with tomatoes … There are about 100 or so plants. Yikes! 

Lots and lots of 'maters ... Tomato plants galore

Calling all Gardeners! I need a few of you to take these off my hands!

Bacon Chocolate and a Man-Date

Bacon Chocolate and a Man-Date

Not so long ago my husband and his Runnin’ Buddy ran off to Ft. Worth under the guise of getting ingredients for a crab boil to have a special dinner for the four of us.  

Runnin’ Buddy’s wife and I are always jealous when our hubbies take off like this because they have wonderful “Man-Dates.” They go eat at nice restaurants, (Reata) go shopping and usually end the “Date” with a trip to the foo-foo grocery store, Central Market.

We are all foodies—Runnin’ Buddy’s wife even went to culinary school – she’s a chef! So for us, Central Market is good times. My hubby and Runnin’ Buddy come home from their Man-Date with a truck load of crab and other sundries. 

As parting gifts they brought us Bacon Chocolate Bars. Very interesting mix of sweet and salty.  Not sure I want to eat it every time I need a sweet fix, but it’s very good.  My favorite chocolate is Scharffen Berger.  That is happiness in a wrapper.

Give them chocolate before we tell them about the "Man-Date"

Anyway …After they gave us chocolate, they told us of how the Central Market Foodie was handing out chocolate samples and took a shine to them.  According to the husbands, the CM Foodie gave them about $45 each in chocolate samples.  After they left the area she, then had the audacity to track them down a few aisles over and give them more chocolate.  

Many other [female] shoppers were left standing in the aisles wondering where they got the samples.Apparently the Foodie wasn’t as generous to the ladies shopping for their households in the middle of the day as she was of the dudes on the Man-Date. 

 In all my single years, I don’t think I’ve ever had as good a time on a date as these two did on their Man-Date.

The Best Soup I’ve Ever Tasted

I love soup, and when the weather starts turning cool I try to eat soup as often as possible. A lot of people will choose the salad when given the choice, but I often go with the soup as a first course, especially if it’s all made from scratch.

My three favorite soups:

3) Cream of Artichoke soup at  The Messina Hof Vintage House in Bryan, Texas. The restaurant there is hit or miss, but the cream of artichoke will change your life.

2) Red Chicken Curry at Samui Thai in Plano, Texas. I judge thai food joints based on their curry, and Samui always is rock solid.  The bamboo shoots and aubergine are incredible.  I’m not sure if you can really count this as a soup, but it’s my list so I make the rules.

1) Chicken and Mushroom soup. Right here, right now. Buckle up.

Here is the ingredient list (for the most part):

Make a classic mirepoix, which is diced onion, celery, and carrot. I cut these in random sizes for texture. Melt 3tblsn unsalted butter and then throw in the mirepoix and salt. Caution: you are going to add a lot of salt to this dish, but you want to do a little as you go. The salt will help reduce the vege.

Once the carrots start getting soft, add a bunch of garlic. I did four cloves here, but you could go with more if you are a garlic geek. Keep it moving so it doesn’t burn. We are going to use three types of mushrooms here: shitake, oyster, and plain ol’ white button mushrooms, all sliced in a rough chop. Clean the mushrooms WITHOUT water (rub them down w/a towel to remove the dirt). Once you get them sliced, toss them in. Shitake:

Oyster:

Button:

And into the pot with more salt. The shitake have this great beefy taste, the oyster a buttery chewy taste, and the buttons are just a great all around mushroom. If the vege start to look dry, add a little bit of olive oil. It should look like this:

When the mushrooms all start looking soft, add a tspn of red curry paste.

This is what I use. Now, it’s not a thai dish, but we do want a bit of the thai spice that it’s hard to combine with anything other than the paste.

Add the curry paste and toss the mixture to make sure it’s good and mixed in. Let it cook down for a few minutes, then add some white wine. How much? Hell, I don’t know. About that much:

Let that simmer for about five minutes and then add ½ chicken, chopped up. I just used one of those rotisserie chickens from the grocery store. I think the flavor was Garlic Herb. By “1/2 chicken”, I mean ½ breast, a leg, thigh, and then all the dark meat from the back. That’s some of the tastiest meat on the bird.

Then add 6oz of tomato sauce.

And about 6oz of chicken broth.

Simmer for 5 minutes or so, stirring regularly. We are looking for the liquid to reduce down quite a bit. Once you get it so that you can see the moisture but it’s not standing in broth, add 1c of heavy cream:

And 1c of half and half:

Of course, you’ll need to add more salt. Go ahead and grind some pepper in this as well. Let it simmer for 10 minutes or so, add chicken broth to keep the liquid at a soupy consistency. It should look like this:

Get some parmesan cheese (not the cheap powdered crap…get grated parm), and add a cup or so. How much? Hell, I don’t know. About this much:

Cut the heat down to low, and let it simmer for yet another 10 minutes.

The cheese should finish off the flavor. Toast up some French bread and sprinkle on some fresh parsley, and you have one of the most delicious things you’ve ever tasted.

That’s it. The best soup I’ve ever tasted.

Scotch Eggs,Texas-style

“I had some Scotch Eggs this morning. Man, they were incredible, ” J-Skip said to me. What the hell is a Scotch Egg? “It’s a boiled egg wrapped in sausage and then deep fried. It’s so good.”

This was the actual conversation I had with a friend of mine. I’d never heard of such a thing, but anytime you mix egg and sausage together you have a winning combo. So, out I go to the internet. Apparently, J-Skip was absolutely right. The Brits eat these things like we eat burritos here in America. They sell them in supermarkets and gas stations, and are a preferred snack for scores of limey bastards all over the UK.

I thought about this a bit, and came up with a bit of a different take on this and it worked out INCREDIBLY. What I did was mix one of my favorite sausage treats (sausage balls) with this idea of Scotch Eggs. Check it, yo:

To make sausage balls, you mix a pound of sausage with 2c of baking mix and 1/2lbs of shredded cheese.

Mix these together and kneed so that you have all the baking mix “wet”. It should give you something that looks a-like so.

Now, normally you’d roll these into 2″ balls and bake at 350deg for 15-20 minutes until they are golden and delicious. Instead, I’m going to make a patty and push in a little concave spot the size of a boiled egg:

I take a little bit of extra baking mix in a bowl, and then roll a peeled boiled egg in it just to dust it a bit:

Then, let’s fold the patty around the dusted egg:

It doesn’t have to be perfect, but you want to make sure the sausage is a nice even layer around the outside and you have sealed off the holes. You’ll want it oblong in the shape of an egg so you know how the egg is laid out when you cut it open.

In another bowl, I put some panko bread crumbs and rolled the ball around a bit. You don’t have to have too much or any at all. It’s just for a little bit of extra crunch.

The extra I rolled into sausage balls, just because they are bite-sized and awesome. Onto a rack so the sausage can drain while they are cooking, then into the oven at 350deg until they are golden, probably about 40 minutes or so.

When they are finished, it should look something a-like so:

To plate this thing up, I’m going to cut it in half:

I made some quick gravy and sliced some fresh tomatoes

Toast up some bread and top with some preserves and pour yourself a big ass glass of grapefruit juice:

And then you have an instant classic here in Arcadia, the Scotch Egg.

Bob the Cook’s Pit

One of my favorite things to do in life is to cozy up with a beer on a Texas afternoon and do some outdoor cooking. It’s what Arcadia is all about…sharing what you know and do well with your friends and neighbors. In my case, I love seeing the creations that my fellow Arcadians come up with and the crazy things we make different cookers out of. My buddy down in Madisonville made a smoker out of a barrel; my dad’s fish cooker is made from an old gas water heater; and one of my favorite outdoor cookers is my plowdisc wok. I can do fajitas and breakfast tacos on that thing to feed a small army and/or a group of tailgating Aggies.

Across the country, you’ll find cooking competitions of all sorts: chili, BBQ, steaks, or even full chuck wagon competitions where you have multiple dishes as part of the submission. One of the most well-known of the outdoor cooks in our neck of the woods is Bob the Cook out at Wildcatter Ranch. Bob is an incredible gastronomist. He knows his food and knows his wine. If you ever get a chance to make your way to Young County, Texas, make sure you stop by Wildcatter Ranch and let Bob pair up a bottle of his favorite wine from his extensive wine list with a slab of medium-rare Texas beef and then top it off with his banana pudding in a Mason jar.

Bob the Cook (or “BtC” as we like to refer to him) recently catered in ribeyes to a function in downtown Arcadia. Never passing up an opportunity to sidle up to a genuine Texas cooking rig built and used by someone I regard so highly, I got a chance to snap a few pics and talk to BtC a bit about how he goes about making ribeyes for so many people at once.

It starts with his pit. He made this out of a U-shaped pipe that he had bent to a box. Now, this thing has been used time and time again and had to sit out in the Texas weather, so some of the original features aren’t quite as functional as they once were, but the design is still awesome. BtC used a design idea from the great Joe Allen in Abilene, but put some proper modifications on it to increase efficiency for an outdoor unit.

Here this bad boy is with the lid up:

You’ll notice that the grill grates are on a slant. That’s key for a steak cooking pit so you can adjust the amount of heat on the meat. Steaks with less marbled fat are going to cook much faster than the ones that have tons of flavorful fat, so you want to put them in a cooler spot on the grill or pull them earlier. Also, notice the lip that folds over in the front. That has two functions: first of all, it allows for easy access to the cooking surface as well as for moving the grills to an angle. See the bar on the inside of the lip? You can put the grates on that for an even cooking surface when you are doing things like sausage. The other function it has is that it can be propped up from underneath so you can use it as a flat working surface for your tools or bins holding the meat you are putting on the grill.

The firebox has two entrances in for proper flow, and you can adjust the flow in on both sides. There is a chimney on the back side of the lid, but BtC admits that the design is somewhat flawed. Moreover, the chimney just acts as a stop for the lid so it doesn’t flop all the way back.

You can see how easy it is to get to the working surface from here. BtC puts the beef onto the grates before he seasons them so that the meat warms up and absorbs the seasoning all at once. Also, he keeps the meat that will cook faster on one side so he can properly tell how well done the meat is. The fire is well enough away from the meat so you don’t have crispy char on the steaks.

You can see from the backside that there was a pulley system at one time to raise and lower the fireplate, but years of use and weather rusted out the bottom. BtC had to have an additional plate welding in recently for repair, so the pulley system is non-functional now.

This is BtC’s trailer, specifically built for the cooker. He can haul and move this all by himself, which is remarkable because the cooker itself weighs hundreds of pounds. He took an old axle from a junk pile and made a long tongue on it for counterweight. Then, he welded a stinger that pins onto the cooker itself.

Right by the door on the side cooker, you’ll see a halfpipe. Also, on the trailer you’ll see bars that go across. BtC engineered this so the bars on the trailer go into the halfpipes on the cooker as a latch. With the trailer tongue up in the air, he latches the pin in place on the stinger and can pull the tongue down and attach it to his truck. The tongue is counterweighted perfectly so you have a zero balance right on the axle.

Using rebar and pipe, he engineered a hinge system as well as a poking bar all in one. You can see the bar there…he’ll use that to close the doors on the fire box as well as to reach up with the hook to pull the lid down during the cooking.

Secure pins are chained to the side so you don’t lose them. This is a great shot of that lip in the front.

There you have it…a Texas steak pit, fully mobile and as efficient as you can get for outdoor cooking.