Out here in north Texas, when the Fall hits we get to take our choice of festivals every weekend. From cooking competitions to fundraisers and heritage celebrations, we get a decent selection of weekend activities within a quick drive for just about anyone in all of the north part of the state. One of the best you can find is right in Young County held every second full weekend in November.
St. Mary’s Catholic Church started making homemade sausage in the 1970’s after one of their parishioners who had a German family recipe for sausage came up with the idea for a fundraiser. Originally, they harvested the pork in the local fields as hog hunters would provide the meat. As it grew, though, the church had to go to a more reliable source of pork. Decades later, the annual fundraiser lives strong, and the entire church turns out to lend a hand to pull off the impressive event. The church will feed 1,200-1,500 people hundreds of pounds of homemade sausage made over a weekend. Named “Sausagefest” (funny name acknowledged), folks from all over flock to the church to eat lunch on Sunday and buy the uncooked sausage for their freezer so they can have it all year long (or at least until summer when they run out). Here’s a little tour behind the scenes.
The week before the festival, the pork roasts arrive in boxes.
The roasts are then taken out of the boxes and cut up into small chunks by volunteers.
The church has a large commercial kitchen in its annex where all the magic occurs.
The chunks of pork are loaded into large tubs, which are stored in a refrigerated storage container, retrofit with a large air conditioner.
The chunks are then fed thru a commercial grinder not once but twice. The pork is dusted with the special secret seasonings that includes cayenne pepper and garlic before the first grind. The smell is overpowering when you walk into the kitchen.
There’s a guard over the grinder to avoid injury.
The pork after the first grind:
And after the second grind:
And here’s the grind:
Then the casings have to be filled. What are casings? Well…if you don’t know, it’s probably best I don’t explain it. Let’s just say that the sausage is all natural. The casings are soaked in warm water:
Then loaded onto PVC pipes so they are easier to push onto the sausage filler…
And then the casings are filled.
The sausage filler is pretty ingenious. You load the barrel with the the ground pork
Which is powered by a water hose attached to a water faucet outside. It’s a pretty cool system…the pressure on the water builds up, you slowly release the water into the barrel and the sausage shoots out of the cap:
The casing is loaded on the spout and the pressure inflates the casings with delicious spiced pork.
Want to see it in action? Check it:
The sausage is then moved to tubs…
…and then hung in the refrigerated storage container to cure for a couple days before it’s cooked. The sausage is hung on 1″x1″ boards that run the width of the container.
Outside the kitchen is a commercial smoker with 12 rotating racks. On Sunday morning, the sausage will go on and given the perfect combo of heat and Texas smoke from wood cut down and seasoned locally, usually a combo of oak and mesquite.
And lo, we have sausage.
It’s a delicious bite all the way thru with the perfect blend of spice and flavor. The ladies in the church also make a special secret recipe of sweet mustard, as well as fresh cobblers for the crowd.
And there you have it…St. Mary’s Sausagefest. You don’t want to miss it.
1 cup Hatch chiles, roasted, peeled, seeded & diced
¾ cup chopped onion
3 cloves garlic, minced
3 roma tomatoes, diced
1 large avocado, diced
½ cup chopped cilantro
Juice of 1 lime
2 cups half & half
1 cup chicken broth
In a large saucepan, sauté the onion in some olive oil & butter until soft and translucent. Add the chiles and garlic and sauté briefly. Do not allow the garlic to brown. Add the chicken broth and bring to a rolling boil for two minutes. Add the half & half, lime juice, tomato, avocado, and ½ the cilantro. Bring to a simmer for 30 minutes. Put into bowls and serve with a sprinkle of cilantro and a twist of lime.
Our South Texas chef buddy, Trav, checks in with another great recipe. For more info on Trav’s culinary offerings, services and contact info, visit his Facebook page.
1 pork loin section
8 oz crawfish tails
1 red bell pepper, diced
1 onion, chopped
Chopped parsley
Celery seed
Old Bay
White wine
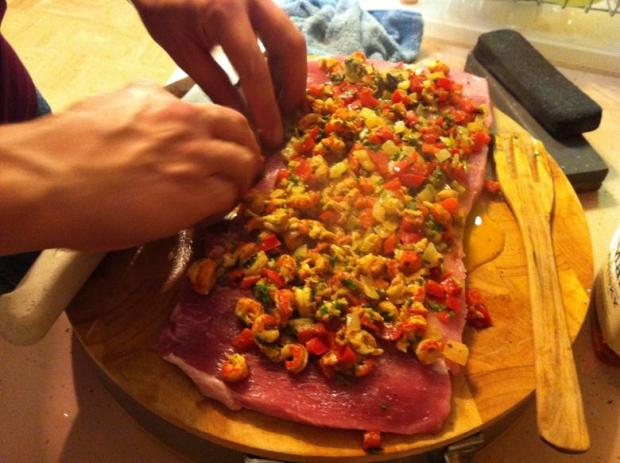
First, make the filling. Drain the crawfish tails and sauté with the onion and bell pepper in a little olive oil. Season with Old Bay and celery seed. When the onion is translucent, deglaze with a little white wine, squeeze in a little lemon juice and reduce til the liquid is almost gone. Remove from heat, toss in the parsley and set aside.
Next, make a roulade with the pork loin. Using a long, sharp knife, start cutting the loin the loin about an inch from the bottom, like so:
Continue cutting, turning as you get to the sides, maintaining a constant thickness until you have a flat sheet.
Season the meat with salt and pepper, then spread the crawfish filling on the loin.
Roll up the loin and tie with butcher’s twine.
Season with Tony’s, the roast in a 375 degree oven until a thermometer inserted to the middle reads 160 (about 30-45 mins). While it is cooking, make the sauce:
White wine
Lemon
Shallots, minced
Chicken broth
Cream
Diced tomato
Paprika
cayenne
1 stick of butter, room temp, cut into pats
In a small sauté pan, boil the shallots in half and half mix of white wine and lemon. Reduce to a glaze, and then add a little chicken broth, three times as much cream and the paprika, cayenne and tomato. Reduce to a sauce like consistency, and then strain. Whisk the butter into the hot sauce, one pat at a time, until completely incorporated. Keep the sauce warm, but not hot. If it gets too hot, the butter will melt and the sauce will break.
When the loin is done, slice, plate, and pour the sauce over the top. Serve immediately.
If you like to visit different towns to take in and experience the local culture, there’s not a better way to do it than to test out the local food. A community is defined by what they eat and how they eat together. Especially in small towns, the available food is a large part of the definition of that community itself. Anytime we travel, we try to find out where the locals eat. You’ll usually get the best food, the best value, and the heart of what makes the community so much different than others.
The food culture in Texas follows no general rules, as each local town could best identify with BBQ or homestyle cuisine or even Mexican food. In the Old Town area of Graham is home to a non-so-hidden but probably mostly unknown treasure: La Taqueria Mexicana.
Right on 4th street, residents have probably driven by it hundreds of times without much thought at all. Those who haven’t ventured in have really done themselves a disservice, though, because in the unassuming and relatively small taco shack you’ll find a delectable meal with “authentico” written all over it.
First of all, any Mexican food place that serves menudo on Sundays is as authentic as it gets. For those who aren’t familiar with menudo, it’s a stew that’s noted for its ability to help calm the aching head and rumbling gut of a late-night Saturday spent on the bottom side of a beer bottle. It’s not for the faint of heart, though. Menudo is a spicy broth made with chilis, tons of herbs and spices, and glistens with fat that’s rendered from its main ingredient: tripas, or tripe. Specifically, menudo is made with the honeycomb reticulum tripas from a beef’s second stomach. That’s right…one of the best hangover cures in Texas and all points south is a spicy beef stomach stew. Sounds disgusting, right? It’s definitely an acquired taste, but if you appreciate real Mexican cuisine and don’t pale at the sight of offal on your plate, then give menudo a try.
I’m not here today for the menudo at Taqueria Mexicana, though. It’s the tacos. If you like tacos (and every non-insane human loves tacos), then this is the place you need to head.
When you walk in the front door, you see the kitchen behind a front counter, and off to the right you have a small dining area.
Taqueria Mexicana has a solid reputation around town as a great place for breakfast burritos (which are more like the size of what we consider to be a taco). There’s nothing wrong at all with coming here for those, because they really are outstanding. Your choices for breakfast burritos include:
Pick either egg with meat or potato with meat. You can’t go wrong with these, although I’m a big fan of the potato with chorizo and egg. A closer look at the full menu:
This is the first page but you can see that you’ve got a pretty good choice of how you want your dish. I’m here for the taquitos, or little tacos. They are served on corn tortillas, which are made fresh back in the back. If you order the burrito, you get a flour tortilla, which is also made in the back. I love either one, and depending on my mood I’ll order either or both. Specifically, I’m here for the tacos al pastor.
Tacos al pastor are made with pork over a rotisserie. The meat is cooked similarly to the way that gyro meat in greek cuisine is made. The meat is cut into small bite-sized bits with just a perfect amount of chewiness and toothiness to make you want to take as many chews as possible to extract the most flavor.
Fresh onion and cilantro highlight the spicy flavors on the tacos al pastor.
While I was there, I went ahead and picked up a handful of the brisket tacos, too. It’s a different flavor profile completely, but it’s a formidable back up to the tacos al pastor on the menu
A close-up of the tacos al pastor:
Roll this over so you have a tight cigar, and you have a compact blast of nuclear Mexican flavor. The soft chewiness of the meat, the crunchy fresh onion, and the perfume of the fresh cilantro is unbeatable.
This is the part that I love…the mouth-coating grease from the pork falls right out the back. The seasonings, a mixture of chili, cumin, and oregano, make for a finger-licking cleanup.
Those brisket tacos I was talking about? They make a great mild compliment to the spicy pork.
Laying these out, you can see the perfect amount of meat, laid perfectly into the center of the taco. No cheese, no sour cream, no ancillary or superfluous filling to take away or confuse the flavor.
Other menu items of note:
-The gorditas are incredible. They take the same meat as the tacos and put them in a purse of masa (like the texture of a tamale, but not steamed and round like a large ravioli).
-If you think you can handle it, try the chicharrones on your taco. Those are “pig rinds”, or pork skin cut into strips. The texture is like stiff gelatin. Unless you’ve had them before and know you like them, go ahead and hold off on those until your third or fourth trip to TM.
-The salsa (labeled as “big container of hot sauce” on the menu) is superb. They serve a single serving with each taco/burrito, but you can also buy it in bulk. It’s fresh and delicious.
-You can buy the flour tortillas by the dozen. Homemade tortillas are unbeatable anyway, but the ones at Taqueria Mexicana really are tasty.
-During the week, they have lunch specials served with rice and beans.
Authentic. Homemade. Delicious. Taqueria Mexicana in Graham, Texas.
I love soup, and when the weather starts turning cool I try to eat soup as often as possible. A lot of people will choose the salad when given the choice, but I often go with the soup as a first course, especially if it’s all made from scratch.
My three favorite soups:
3) Cream of Artichoke soup at The Messina Hof Vintage Housein Bryan, Texas. The restaurant there is hit or miss, but the cream of artichoke will change your life.
2) Red Chicken Curry at Samui Thai in Plano, Texas. I judge thai food joints based on their curry, and Samui always is rock solid. The bamboo shoots and aubergine are incredible. I’m not sure if you can really count this as a soup, but it’s my list so I make the rules.
1) Chicken and Mushroom soup. Right here, right now. Buckle up.
Here is the ingredient list (for the most part):
Make a classic mirepoix, which is diced onion, celery, and carrot. I cut these in random sizes for texture. Melt 3tblsn unsalted butter and then throw in the mirepoix and salt. Caution: you are going to add a lot of salt to this dish, but you want to do a little as you go. The salt will help reduce the vege.
Once the carrots start getting soft, add a bunch of garlic. I did four cloves here, but you could go with more if you are a garlic geek. Keep it moving so it doesn’t burn. We are going to use three types of mushrooms here: shitake, oyster, and plain ol’ white button mushrooms, all sliced in a rough chop. Clean the mushrooms WITHOUT water (rub them down w/a towel to remove the dirt). Once you get them sliced, toss them in. Shitake:
Oyster:
Button:
And into the pot with more salt. The shitake have this great beefy taste, the oyster a buttery chewy taste, and the buttons are just a great all around mushroom. If the vege start to look dry, add a little bit of olive oil. It should look like this:
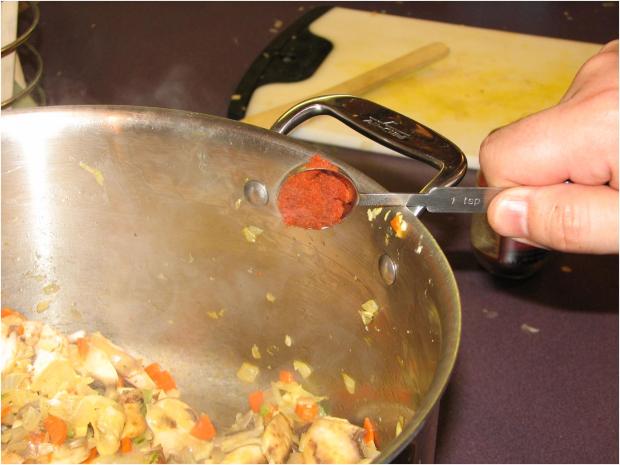
When the mushrooms all start looking soft, add a tspn of red curry paste.
This is what I use. Now, it’s not a thai dish, but we do want a bit of the thai spice that it’s hard to combine with anything other than the paste.
Add the curry paste and toss the mixture to make sure it’s good and mixed in. Let it cook down for a few minutes, then add some white wine. How much? Hell, I don’t know. About that much:
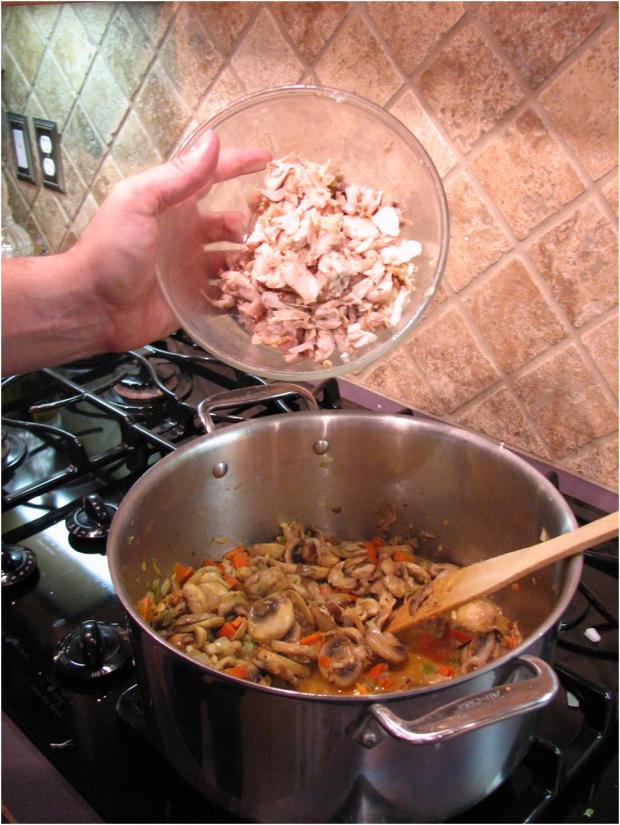
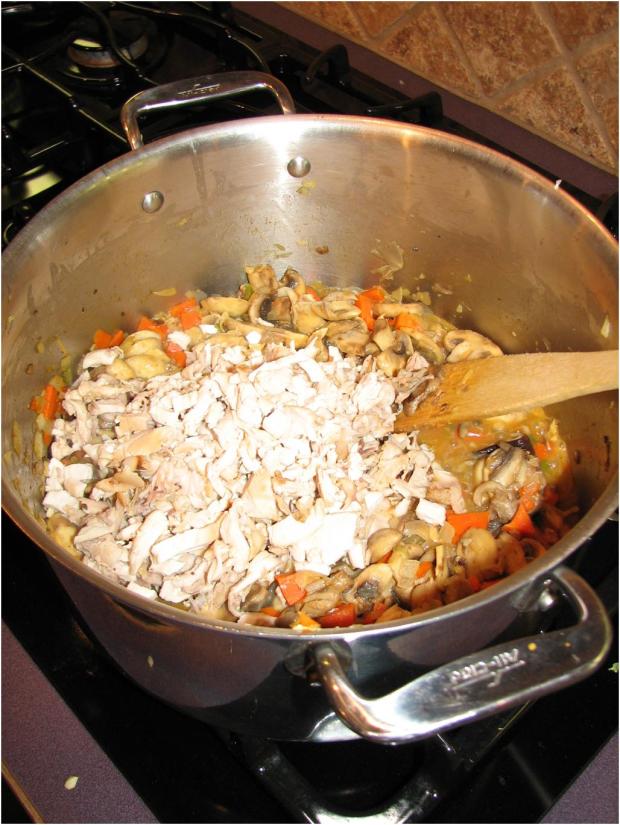
Let that simmer for about five minutes and then add ½ chicken, chopped up. I just used one of those rotisserie chickens from the grocery store. I think the flavor was Garlic Herb. By “1/2 chicken”, I mean ½ breast, a leg, thigh, and then all the dark meat from the back. That’s some of the tastiest meat on the bird.
Then add 6oz of tomato sauce.
And about 6oz of chicken broth.
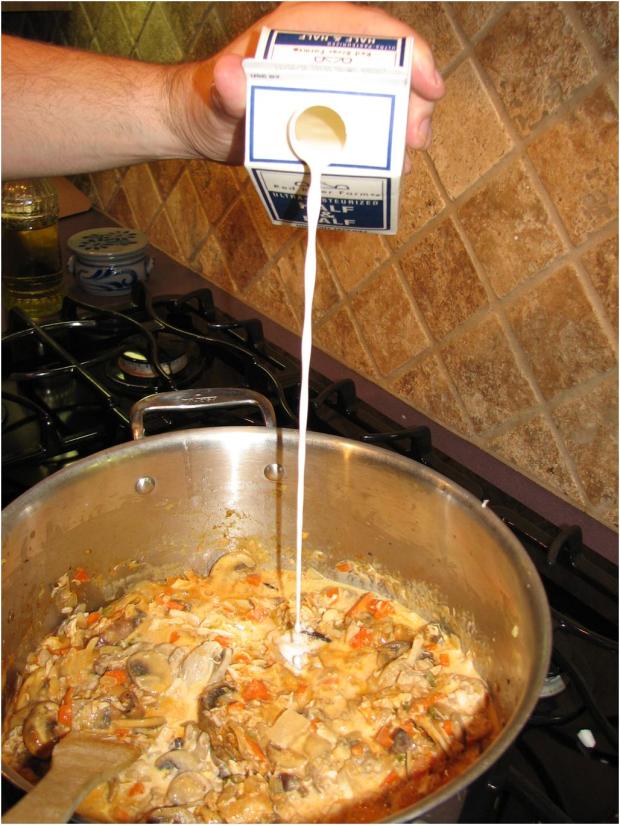
Simmer for 5 minutes or so, stirring regularly. We are looking for the liquid to reduce down quite a bit. Once you get it so that you can see the moisture but it’s not standing in broth, add 1c of heavy cream:
And 1c of half and half:
Of course, you’ll need to add more salt. Go ahead and grind some pepper in this as well. Let it simmer for 10 minutes or so, add chicken broth to keep the liquid at a soupy consistency. It should look like this:
Get some parmesan cheese (not the cheap powdered crap…get grated parm), and add a cup or so. How much? Hell, I don’t know. About this much:
Cut the heat down to low, and let it simmer for yet another 10 minutes.
The cheese should finish off the flavor. Toast up some French bread and sprinkle on some fresh parsley, and you have one of the most delicious things you’ve ever tasted.
One of my favorite things to do in life is to cozy up with a beer on a Texas afternoon and do some outdoor cooking. It’s what Arcadia is all about…sharing what you know and do well with your friends and neighbors. In my case, I love seeing the creations that my fellow Arcadians come up with and the crazy things we make different cookers out of. My buddy down in Madisonville made a smoker out of a barrel; my dad’s fish cooker is made from an old gas water heater; and one of my favorite outdoor cookers is my plowdisc wok. I can do fajitas and breakfast tacos on that thing to feed a small army and/or a group of tailgating Aggies.
Across the country, you’ll find cooking competitions of all sorts: chili, BBQ, steaks, or even full chuck wagon competitions where you have multiple dishes as part of the submission. One of the most well-known of the outdoor cooks in our neck of the woods is Bob the Cook out at Wildcatter Ranch. Bob is an incredible gastronomist. He knows his food and knows his wine. If you ever get a chance to make your way to Young County, Texas, make sure you stop by Wildcatter Ranch and let Bob pair up a bottle of his favorite wine from his extensive wine list with a slab of medium-rare Texas beef and then top it off with his banana pudding in a Mason jar.
Bob the Cook (or “BtC” as we like to refer to him) recently catered in ribeyes to a function in downtown Arcadia. Never passing up an opportunity to sidle up to a genuine Texas cooking rig built and used by someone I regard so highly, I got a chance to snap a few pics and talk to BtC a bit about how he goes about making ribeyes for so many people at once.
It starts with his pit. He made this out of a U-shaped pipe that he had bent to a box. Now, this thing has been used time and time again and had to sit out in the Texas weather, so some of the original features aren’t quite as functional as they once were, but the design is still awesome. BtC used a design idea from the great Joe Allen in Abilene, but put some proper modifications on it to increase efficiency for an outdoor unit.
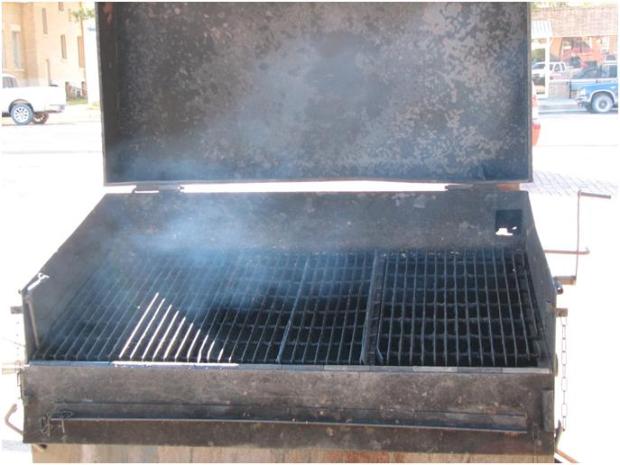
Here this bad boy is with the lid up:
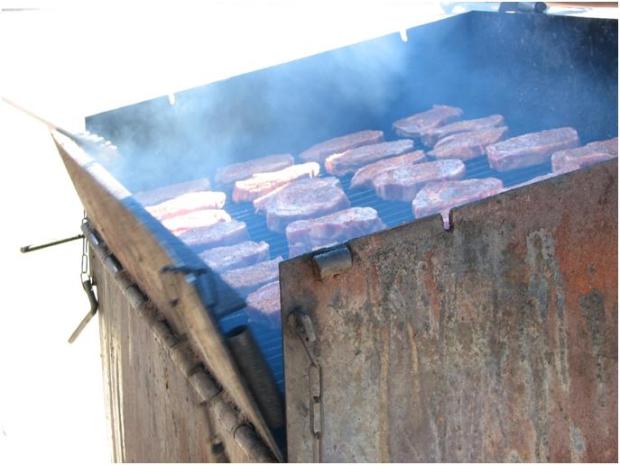
You’ll notice that the grill grates are on a slant. That’s key for a steak cooking pit so you can adjust the amount of heat on the meat. Steaks with less marbled fat are going to cook much faster than the ones that have tons of flavorful fat, so you want to put them in a cooler spot on the grill or pull them earlier. Also, notice the lip that folds over in the front. That has two functions: first of all, it allows for easy access to the cooking surface as well as for moving the grills to an angle. See the bar on the inside of the lip? You can put the grates on that for an even cooking surface when you are doing things like sausage. The other function it has is that it can be propped up from underneath so you can use it as a flat working surface for your tools or bins holding the meat you are putting on the grill.
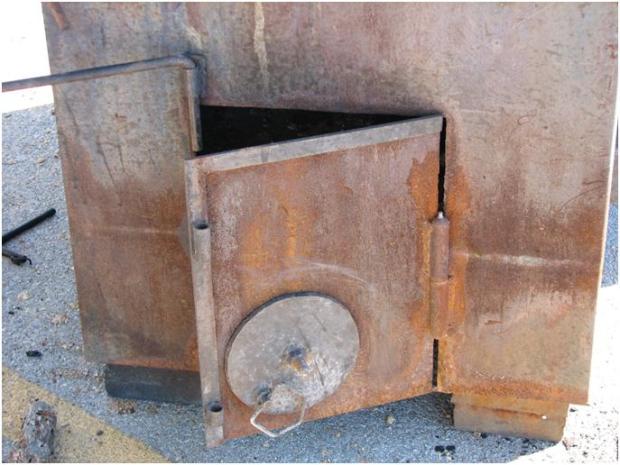
The firebox has two entrances in for proper flow, and you can adjust the flow in on both sides. There is a chimney on the back side of the lid, but BtC admits that the design is somewhat flawed. Moreover, the chimney just acts as a stop for the lid so it doesn’t flop all the way back.
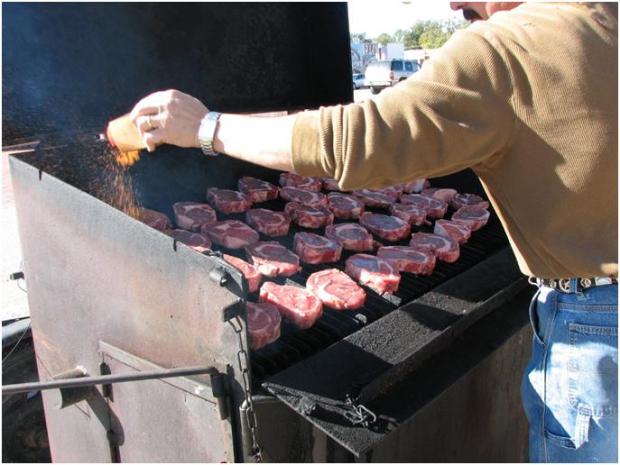
You can see how easy it is to get to the working surface from here. BtC puts the beef onto the grates before he seasons them so that the meat warms up and absorbs the seasoning all at once. Also, he keeps the meat that will cook faster on one side so he can properly tell how well done the meat is. The fire is well enough away from the meat so you don’t have crispy char on the steaks.
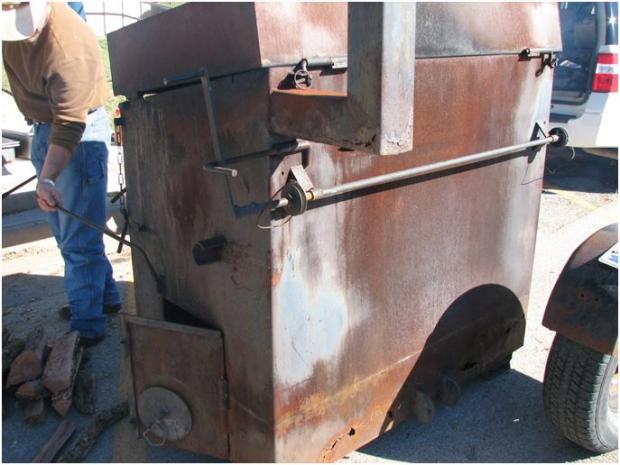
You can see from the backside that there was a pulley system at one time to raise and lower the fireplate, but years of use and weather rusted out the bottom. BtC had to have an additional plate welding in recently for repair, so the pulley system is non-functional now.
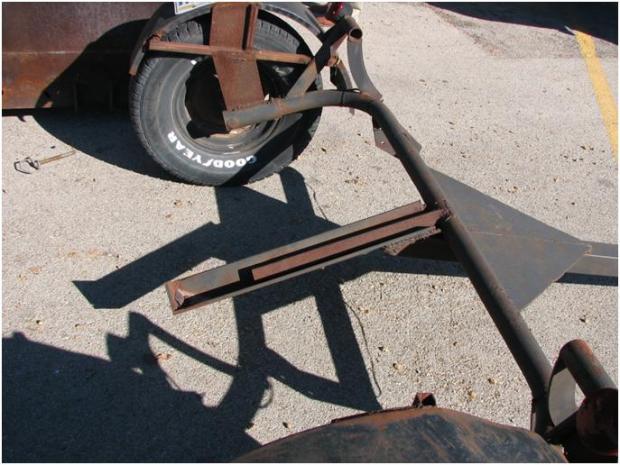
This is BtC’s trailer, specifically built for the cooker. He can haul and move this all by himself, which is remarkable because the cooker itself weighs hundreds of pounds. He took an old axle from a junk pile and made a long tongue on it for counterweight. Then, he welded a stinger that pins onto the cooker itself.
Right by the door on the side cooker, you’ll see a halfpipe. Also, on the trailer you’ll see bars that go across. BtC engineered this so the bars on the trailer go into the halfpipes on the cooker as a latch. With the trailer tongue up in the air, he latches the pin in place on the stinger and can pull the tongue down and attach it to his truck. The tongue is counterweighted perfectly so you have a zero balance right on the axle.
Using rebar and pipe, he engineered a hinge system as well as a poking bar all in one. You can see the bar there…he’ll use that to close the doors on the fire box as well as to reach up with the hook to pull the lid down during the cooking.
Secure pins are chained to the side so you don’t lose them. This is a great shot of that lip in the front.
There you have it…a Texas steak pit, fully mobile and as efficient as you can get for outdoor cooking.
I’m a Texan, and any good Texan loves BBQ. However, BBQ can be a tricky. You can’t just throw a slab of meat onto a grill and then slather it with sticky sweet sauce and expect to have good BBQ. BBQ needs LOOOOONG slow cooking with delicious smoke from well-seasoned wood. What that means is that you have to have a piece of meat that has lots of fat, so chicken breasts and backstrap are out. Those boys in Tennessee and South Carolina know this as a BBQ must.
Here in cattle country, we know that brisket is the key to a Texas BBQ. And if you’ve read the Big Red Ribsrecipe, you know that if you are going with ribs they need to be pork ribs and not beef. However, Texans have a really bad habit of overlooking the greatness of the Boston Butt. It could be because it’s pork and not beef; it could be because it’s got a yankee name and the fact that yankees call a shoulder roast a “butt”. Let’s overlook the sins of our sisters from the North and look deeply into what could potentially change everything you’ve known about BBQ and become a staple in your stable.
They call this thing a pulled pork; if you go to a Hard Rock Café, you should find a dish called the Tennessee Pulled Pork or the “TPP” (‘If you’ve been to the HRC and you haven’t had the TPP, you haven’t been to the HRC’). Before they closed the HRC in Dallas, that was one of my favorite things to get. I actually had a kidney stone attack one time eating a TPP, but it’s so good I hung in there for the whole sandwich before heading to the emergency room. True story. On a toasted bun, this might turn into your favorite BBQ sandwich, and again…this is coming from a Texas Beef fan.
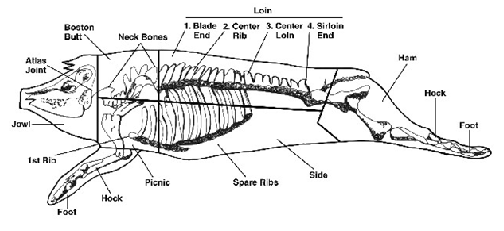
First of all, let’s take another look at our pig diagram:
Right above the ear, you’ll see the words “Boston Butt”. Yeah, it’s the shoulder. They also call this a “blade roast”. Either way, when you go shopping you’ll be looking for the biggest slab of non-ham pork you can find. Note: there’s also a “picnic roast”, which is a nice alternative if you can’t find a shoulder roast. However, the bone isn’t quite as easy to remove for presentation, so stick with the shoulder if you can.
In the package:
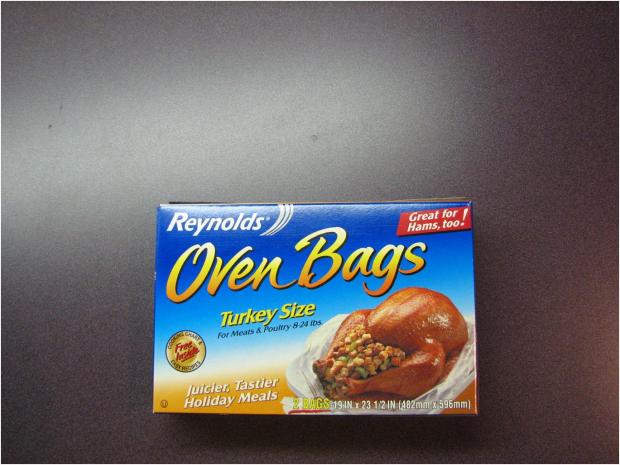
That’s an eight-pounder, which is about the average of what you’ll find. On occasion you’ll run across one a little bigger or smaller, but for the most part that’s what you’ll get when you buy one. First thing’s first….take it out of the package and rinse it under water. Be careful…there are a couple different muscles here, so it may try to fall apart on you. When you get it rinsed off and set aside, let’s get the bag out. I like to use a turkey bag. Reynold’s makes a perfect product for this:
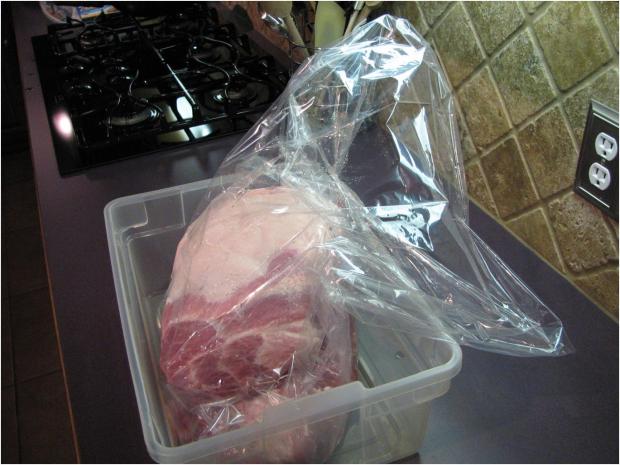
Take the bag and put it into one of those cheap plastic storage bins.
I’m doing two roasts here, but you can double this up easily in the same bag and bucket.
Go ahead and put the roast(s) in the bag. Now, for the next 24 hours, we need to brine this bad boy. Remember…a brine is for moisture, not for flavor. If any flavor is garnered from the brine, it’s a bonus and not the original intent. The brine will be a mix of sugar, salt, and acid to break down those muscle fibers to be as tender and moist as possible. For our brine we are going to use about this much apple juice:
Just pour it right into the bag. No reason to scrimp, but no reason to over do it.
And about this much apple cider vinegar (about a cup):
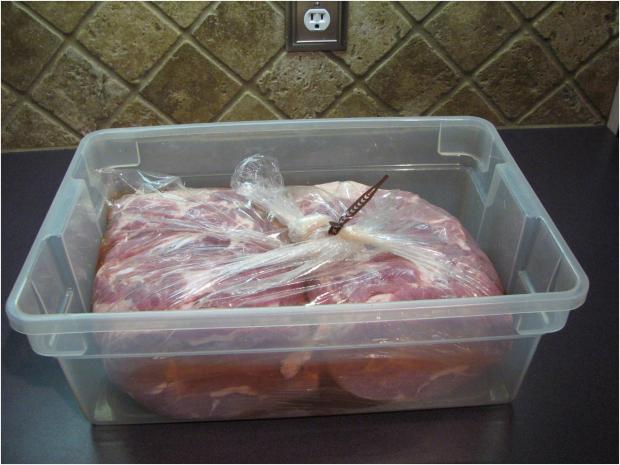
You can mix them right in together. Swish ’em around a bit, but you don’t have to worry about getting them perfectly mixed. Go ahead and close up the bag and get as much air as you can out. It’s not imperative to get it air tight, but it will keep your fridge from being too vinegared up if you get it closed.
Into the fridge it goes for the night. The next day, take it out of the fridge, unfastened the closure and pour as much of the liquid out as possible. We are going to use a dry rub on this, so you want to make sure you get as much liquid out as possible. No reason to save the brine…it’s done it’s job, and we’ll have ample liquid from the drippings from this after it’s cooked.
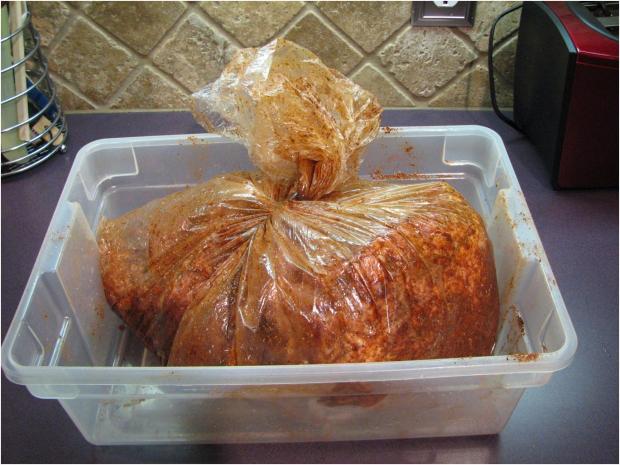
Using the Arcadian BBQ rub, liberally coat these things down on all sides and any cracks and crevices you can find. Then, put it back into the bag and close it back up. It needs another night to get seasoned up.
So that your timing is right, this is your timeline:
Day 1: brine in the evening, in the fridge overnight and into the next evening
Day 2: season with rub, into the fridge overnight
Day 3: smoking for six-ten hours (including the rest)
Fire up your smoker. Now, you guys know how I feel about mesquite. That’s not changing. However, I really like pecan/hickory on this recipe. Because you are cooking for so long, though, you’ll want to use a mixture. Mesquite is a harder wood and will cook hotter and longer than pecan, which is a softer wood. That’s why my nickname in college was “Mesquite”. What’s up, ladies?
Get your smoker rolling to 225-250deg and put your roast on fat side UP. It’s totally up to you on how much smoke you put on it, but you need at least 2 hours of pure unadulterated smoke. Some might argue with me on the fat thing, but if your smoker is designed correctly you’ll have indirect heat, full smoke, and the fat will melt into the meat fibers. That’s important in this dish. You see, it’s different from brisket because on brisket we cut against the grain. However, with TPP we are going to literally pull the pork apart so the meat fibers will be long. Since they are going to be long and not short, they need to have a lot of fat in between them to lubricate the fibers and make them easy to masticate. Get your mind out of the gutter.
After you’ve put all the smoke you want on it, take your digital probe thermometer and stick it into the opposite end of the shoulder blade bone longways and push it in as far as it will go. Then wrap the roast in foil VERY well. That is, lay down the foil with the shiny side down and lay the roast on it.
Then wrap the foil around the sides and back over the roast, making sure the thermometer is sticking out and the foil is tight around it. Then put another layer of foil around it. The reason is that there will be lots and lots of tasty liquid that we want to save, and if you don’t have it wrapped well the drippings will escape.
Note: the temperature we are looking for does not reflect doneness in any way. Instead, it’s just a marker for us to go off of because once we get to 195deg internal temp, then we know that the roast is cooked the proper amount of time to melt all that delicious fat intertwined into the roast meat fibers.
For the next few hours, keep your smoker going at 225-275. When you wrap the roast, it will probably be around 110-120deg. After you wrap it, the temp will start coming up relatively more rapidly.
Don’t rush it. We need it to go slow, so take your time and pay attention to the temp of the smoker and look for 195deg on internal temp. Once you get there, pull it and put it into a cooler. You know the drill…you need at least two hours of rest in the cooler, but the mass of this thing will let you go much longer. You can keep the probe in and keep the therm on and watch the temp. As long as you don’t drop too far down (130 or so), then you can let it rest a long time.
When you pull it out of the cooler, get one of those disposable foil pans. Get a deep one because the presentation is going to get kinda messy. Using your cooking gloves and with the assistance of your favorite sous chef, open up the foil and take the roast out without spilling any of the juice. The juice is good. The meat should be receded from the shoulder blade enough so you can grab onto it, give it a jiggle or two and take it out.
Jiggle to remove the bone
Throw it away…it’s duty to the world is over (or at least until some critty comes along to chew on it).
Using two large forks turned back-to-back, start ripping the meat apart. Don’t worry about being gentle, just rip. Break up all the chunks. It needs to be stringy.
When you get it all ripped apart, pour the juice over the top and toss the meat in it. Do as little or as much of the drippings as you want, but keep in mind that if you have any too much juice after serving the drippings will coagulate and make pork jello when it cools.
This is great straight up on a plate with some Texas Toast, or you can toast up some buns and throw some of the meat onto the crispy bun. Add some sauce if you like, a couple of pickles slices or onion slices, and you’ve got yourself a gen-yoo-wine TPP. Texas Pulled Pork, made the way Texans eat BBQ.
I had a pork tenderloin I needed to cook, so I fired up the smoker this afternoon for a quick smoke. I didn’t take pictures, so you guys will just have to use your imaginations.
Porkloin is really fun to cook because it will take on flavor really well. The natural flavor of lean pork is really mild anyway, but especially with a cut of the pig that’s this lean. Even moreso is the fact that we are using tenderloin vs. the loin. What’s the difference? Glad you asked.
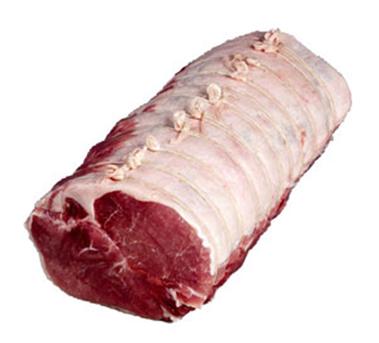
The pork loin is the porcine “backstrap”…the muscles that run along the back connected to the spine. That’s where filet mignon on a beef comes from and where the most edible non-chickenfried parts of the deer comes from. If you picture a pork loin:
You can see that there two parts to the loin separated by a thin layer of fat. The top part has a nice layer of fat on it, and if you take the entire loin and cut it against the grain you have “pork loin chops”, which are really tasty but lean pork chops. It’s the most tender part of the pig and extremely lean.
To cook this thing, we are going to need to add fat to make sure it doesn’t dry out. Fire up your smoker to maintain about 300deg. While it’s rolling, remove the porkloin from the package (there will be two pieces of meat in the package) and rinse them off with cold water. Coat them in olive oil, then add ks&p. Mince a few cloves of garlic and rub down the meat. Then chop up some fresh rosemary and rub that in as well.
You know that cheap bacon at the grocery store? It’s called “Bar S”. It’s not the best bacon, but it’s perfect for what we need here. Take three strips of bacon per tenderloin and wrap the tenderloin like a candycane. You don’t have to pin the bacon with a toothpick or anything…just wrap it and it should stay. Sprinkle the top with cayenne pepper and just a little bit of cumin, then throw it on the smoker. An hour unwrapped and then an hour wrapped at 275deg is perfect. The meat will have a great pussylip-pink ring of smoke and will be really moist, hopefully tender enough to cut with the side of your fork. When you take it out, let it sit for 10-15 minutes or so to rest. Standard fare for meat.
But wait…do you have any apples at the house? Peel and cut the apples into slices. In a pan, melt a couple of tbspn of butter and add a tblspn of sugar. When it starts to bubble, throw in the apples and some cinnamon. Cook that, stirring constantly, over medium heat until it makes a thick compote. You can even throw in a handful of golden raisins if you want. Cut the tenderloin against the grain in 1″ slices and top with the apples.
But wait even more…Take a french hoagie roll and cut it in half. Spread on some delicious Inglehoffer mustard:
…some sliced pickles and swiss cheese, then run the sandwich thru a sandwich press and you’ve got a Cubano, which is one of the greatest sandwiches alive. Do the same thing as the apples, but go with 1/2 the ingredients and use plantains instead of apples and serve it on the side.