Shiner Bocker Beans

You know what I like? Beans. You know what else? Shiner Bock. You know what’s REEEEEEL good together? Beans and Shiner Bock. Your life as a bean-eater is about to change. For the better. Bocker better.

A quick glance at the ingredients:
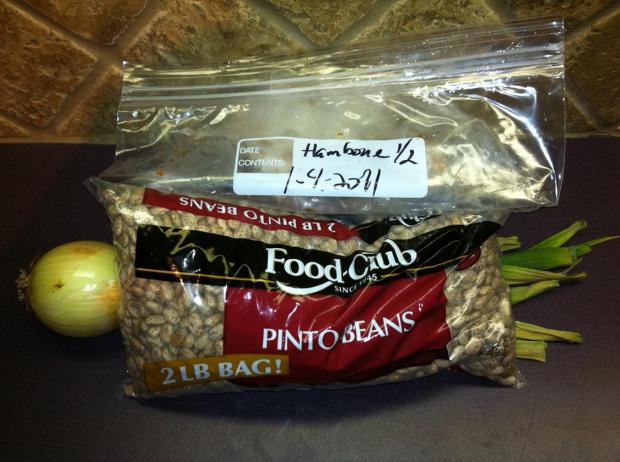
-2lbs of dry pintos

-a medium yellow onion (I’m using a fresh one here with the greens still attached, right out of the garden)

-a tomato or two, homegrown if possible

-a juicy ripe jalepeno, homegrown if possible

-pork (I had a hambone from NYD that I needed to get out of the deepfreeze)

-SHINER THUMS UP BOCK

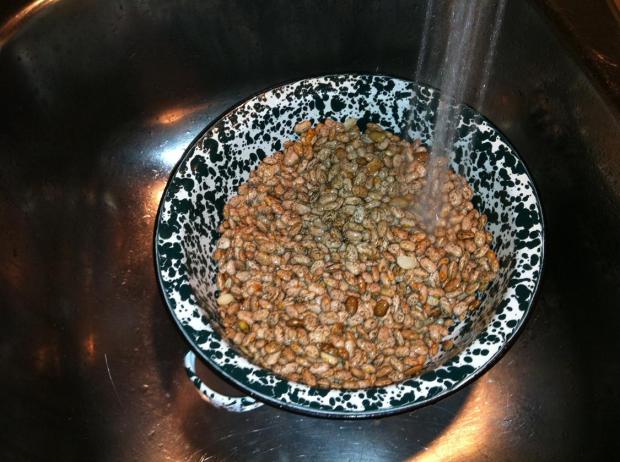
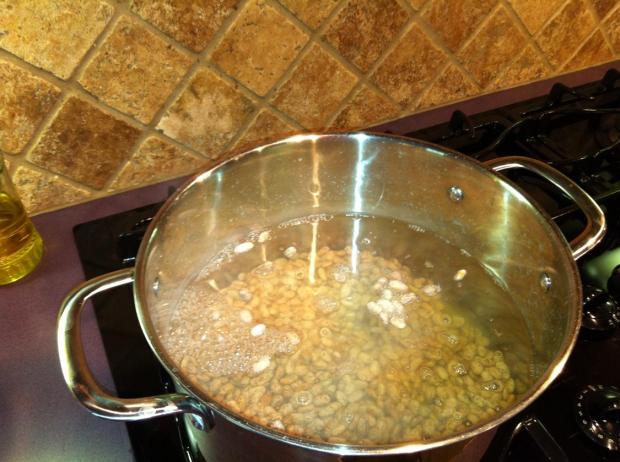
Pour the dried beans into a colander and rinse them off really good under cool water.

Get your best stock pot out and put a few cups of water in, just enough to cover the beans. A thick bottom on your pot will keep the beans from scorching. It makes a difference because we are going to be cooking for a LONG time. Add some salt when you turn the heat on. The salt will soften the water and flavor the beans.

Pour in the beans and bring the water to a boil. After the water boils, let it go for 10 minutes and then cut the heat off and cover the pot. It will need to sit for an hour in the hot water.

After an hour, strain the water off the beans back into your colander. Don’t rinse the beans…just pour the water off.

Add enough water back to the pot to cover the beans plus another inch and then add the beans back in. Throw the heat back to the beans and bring them back to a boil. Add a little bit of salt, but not too much if any at all. We’ll add our seasoning later on.

Now…before we go any farther, let’s discuss pork and beans. Pork is good, too. Pork is real good. I save all my bacon drippings in an Illy Coffee can. It’s perfect for storing bacon grease so I can use it for cooking. Nothing other than bacon drippings goes into this can. No vegetable oil or olive oil or butter…just pork fat. I’d drink this in a pinch if I had to. Add a couple of good scoops of fat to the pot.

I mentioned my New Year’s hambone. I make a ham every NYD to go along with my blackeyed peas and cabbage. That’s also my birthday, so I get a pineapple upside-down cake, too. When I’m on death row, that might be my last meal. Anyway…(tense)…back to the pork. If you don’t have a spare hambone laying around your freezer, get some hamhocks from the grocery store. They are a close 2nd place on the pork scale for me when it comes to beans. Hambone is the way you want to go if possible, though.

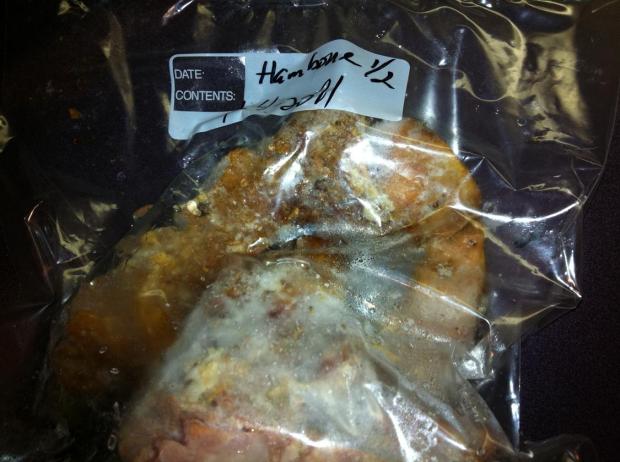
I like to leave a bunch of meat on the ham when I carve it just for the reason that I know that at some point in the next few months I’m going to make beans, and the ham in the beans will send it over the top. If for some reason you don’t have a hambone and have to use hamhocks, it’s ok to get a couple of slices of country ham from the meat counter at your grocery store.  Don’t use deli sandwich slices…the ham you add needs to be thick cuts.  If you are using a hambone, make sure you take off all the cloves and you’ll want to separate the joint, but other than that just pitch all that pork into the pot.
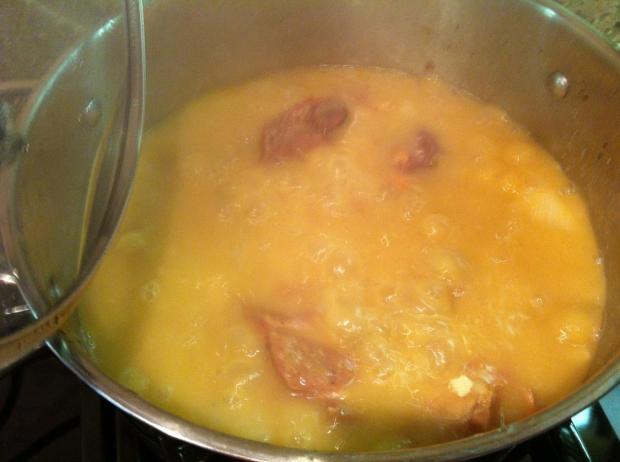
Heat. Cover. Go.

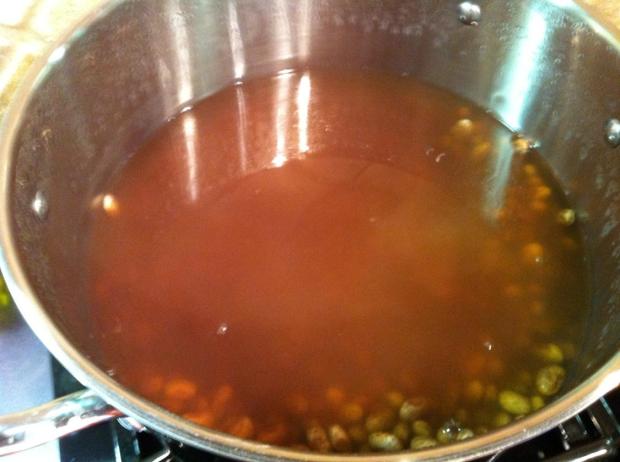
After it comes to a boil, set it to simmer and uncover. It’s going to slow simmer ALL DAMN DAY. 5 hours at least. After it starts to simmer, let’s start putting in some flavor. Take an onion and quarter it. If you are lucky enough to have a whole fresh onion, go ahead and rough chop the greens, too.

While you are at it, throw in 5-6 cloves of garlic, peeled but whole. The simmer: (note the delicious fat on top)

The vege mise en place:

In they go:

Stir it in well, and let it simmer again. For an hour. Uncovered. UNCOVERED!!!! WHOOOOOP!!!

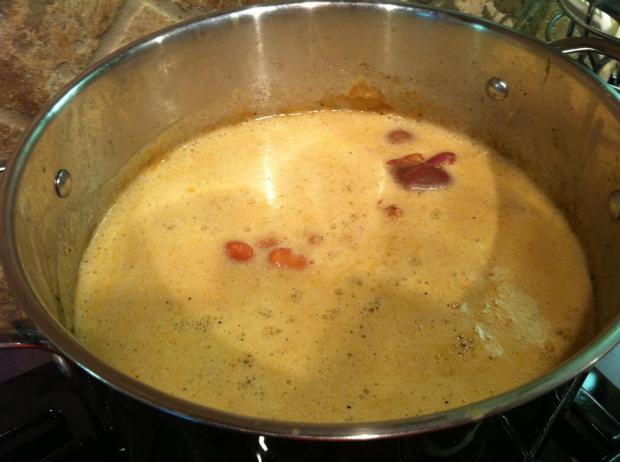
After an hour or so, cover it back up but make sure you lower the heat so you don’t burn it. The onion and garlic will break down and leave you with a nice full body of flavor. Plus, the starch will start leaking out of the beans and the fat and connective tissue will start melting from the pork. It all leaves you with a delicious brown color and a thick gravy.

Now we are going to start adding flavor. Remember the Arcadian Rub? Let’s sprinkle in 2tblspns.

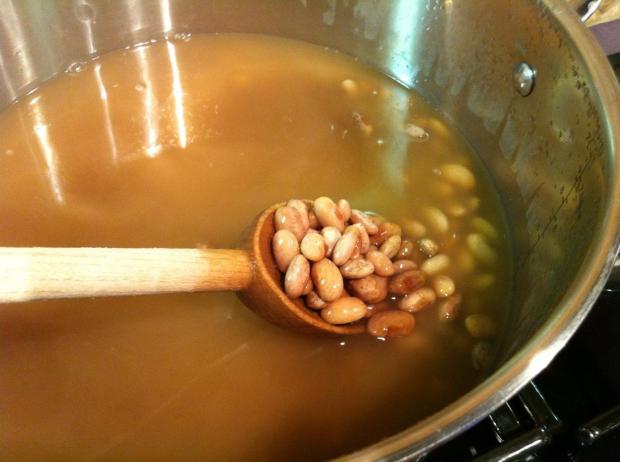
Now we are starting to resemble real live beans. Make sure every 15 minutes or so, you give them a good fold. Try not to stir too hard and break up the beans…just a gentle fold.

You should be to the point where you can see the line along the side of the pan where the liquid started. We’ve lost a lot of liquid so far from the beans soaking it up and the constant simmer evaporating the water out. If you ever get to the point where you are running low on liquid, you need to add some back in. And that’s where the Shiner comes in.

I set a bottle out at room temp so I’m not adding cold beer to the beans and ceasing the simmer. Pour it in slowly…it will foam up as the carbonation fizzes out.

The foam will subside pretty quickly, but be careful so that it doesn’t overflow onto your cooking surface.

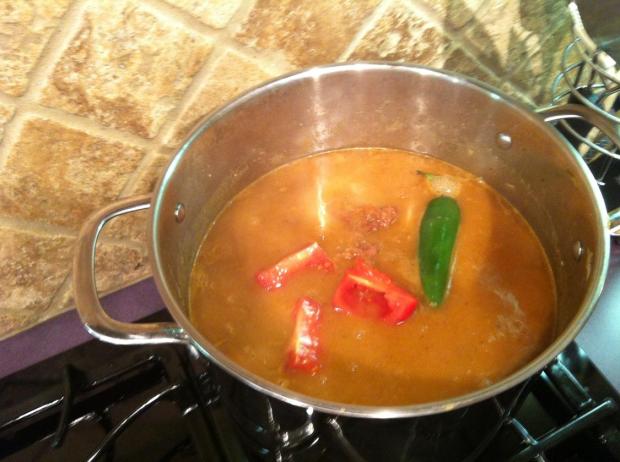
While you are here, go ahead and throw in a quartered tomato or two. If you like it spicy, pitch in a whole jalepeno. Don’t pierce it or cut it up. Just throw it in whole. Any real Texan will tell you that the Jalepeno not only packs a solid wallop, but it also has a delicious fruity flavor. Let it boil for a while…if you don’t want it too spicy, take it out after 30 minutes, bifurcate the pepper and remove the seeds and inner membrane with a spoon. That’s what makes it spicy. You can then throw the pepper back it so it can continue its purpose in life.  If you like onion or think that it needs a bit more of the onion flavor, you can throw in another quartered onion.

All along the way, you should be tasting this to see how it is coming. I like a lot of cowboy in my beans, so after an hour with the tomato and the jalepeno I’ll add Arcadian rub every 5-10 minutes and taste. If the spice/flavor is there, but you want it a bit more salty go ahead and add some fine grain salt like table salt. Pull the beans from the heat and let them rest for a few minutes, covered. Then you are ready to serve ’em right out of the pot.

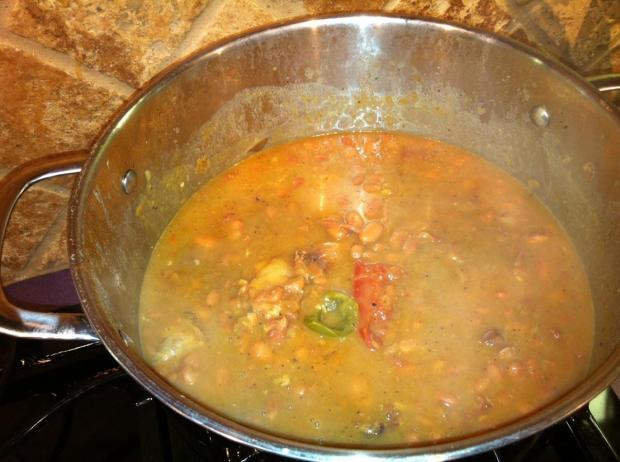
The essence of Texas ranch-style beans. Serve straight up or with some of momma’s cornbread like a good boy/girl. Congrats to you; you are the proud new eater of the Shiner Bocker Beans.

Trav’s Corner: Southwestern Chicken Liver Pate

I have been trying to get more liver into my diet lately, as it is the richest source of vitamin A out there. The vitamin A found in liver is much more readily absorbed and complete than the beta carotene found in plant sources and is one of the best antioxidants around. That being said, liver can challenging to make appetizing, especially when you don’t want to fry it (for carb avoidance reasons in my case). This recipe is not only appetizing, but simple and inexpensive to boot.

1 bucket of chicken livers (about 1 1/3 pounds)

½ an onion, chopped coarse

2 cloves garlic, smashed

1 bay leaf

2 t dried thyme leaves

2 t dried basil

1 jalapeño, sliced

4 Anaheim or New Mexico chiles, roasted, peeled, and seeded

1 t bourbon

1 stick of butter, room temp

Put everything except the last three items in a saucepan and cover with water. Bring to a boil, and then turn down to a simmer for three minutes. Remove from heat and cover for 5 minutes. Remove the bay leaf and discard. Using a slotted spoon, move everything to a food processor. Add the chiles and the bourbon. Pulse a few times to combine, season with salt and pepper (I recommend kosher salt and freshly finely ground pepper), and while the processor is running, add the butter a pat at a time until fully incorporated. Continue processing until silky smooth. Scrape into ramekins or small bowls and chill for at least three hours before serving. If you want to keep it longer, put some melted butter on top and cover in the fridge for a week or the freezer for 2 months. Serve with crackers, toast, or tortilla chips, or even with veggies.

Variations: If you like it spicier, throw in a Serrano pepper with the boil. For a smoky flavor, take out the jalapeño and use a chipotle with the chiles. For a more Mexican flavor, substitute Poblanos for the chiles and throw in some chopped cilantro with the butter.

The Victual Files: Casa Mañana

Across the high plains of north Texas sits dusty Wichita Falls. You may know the city from the giant tornado that hit it in the early 80’s or because the Dallas Cowboys held training camp there or the world renowned Hotter ‘N Hell 100 bike race that takes place in the hottest part of August every year. You may not know the city at all…there are only about 100k people that live there at one time, however the city is home to Sheppard Air Force base so there are quite a few of our brave servicemen and women who have spent some time there at some point over the last 60 years.

Either by bike or plane, a trip to Wichita Falls can be a bit underwhelming. At one time the city was a bustling boom town, and was the “big city” destination in The Last Picture Show that was set in Archer City, Texas. However, now it can seem like a city that is hanging on by a thread to past glory. Depending on when you go, the downtown can seem almost like a ghost town. There are gorgeous buildings down there, but the style harkens back to a time when people around the country thought all Texans looked and acted like the characters on the tv show Dallas.

With that long-winded intro, let me say that love to go to downtown Wichita Falls. There’s a great kitchen supply store there, and you can usually catch some pretty unique events at the Kay Yeager Coliseum/Multi-Purpose Event Center (MPEC). As well, one of the better steaks in all of north Texas resides at McBride’s Land and Cattle right at the corner of 6th and Scott. However, the greatest joy in Wichita Falls comes from a visit to Casa Mañana, the “Home of the Red Taco”.

Confused? Yeah…just hang on. This is a good ‘un.

If you don’t know what you are looking for, you will miss it. It’s on a street next to a shoeshine place that I’m not sure is still open, and that’s next to a store that I’m pretty sure is closed also. Look for the red door. On the inside, it looks like a simple Mexican food joint you can find in any strip mall. If you are looking for authentic Mexican food, then you are going to be disappointed. I’m not really sure exactly how you’d describe this food other than being authentic Wichita Falls. It’s definitely TexMex but it’s unique.

The menu is about what you’d expect from any other Mexican food place, complete with the stereotypical sleepy Mexican picture and random bullfighting image.

However, right on the inside cover at the bottom, you notice something very telling: Home of the Original “Red Taco”. Red taco? Oh, hell yeah. Red Taco.

Ask anyone from the area about the Red Taco and you’ll see their eyes light up. I’ll get there in a sec. First…

Oh, yeah…there’s a sombrero…

…and the vexing young Alicia, our server for the evening. Ask for her.

They start you out with a nice cold beverage and a bowl of chips. These chips are as thick as sheet metal and are extremely crisp and tasty. Along with…

…some really tasty salsa, it’s a great way to start this meal. The chips are really good, but that’s only the beginning of this unique experience. Every table gets a bowl of queso. Check this stuff out:

Yeah, it’s kinda orange. The first time I ate at Casa Mañana I made a funny face when they brought this stuff out. Don’t be scared, though. The queso is thick and it is good.

It hangs on those chips. The next unique item comes in a plastic bottle.

You might have to ask for a bottle, but it’s worth it. They call it “red wine sauce”. I have no idea what it is…it might just be catalina dressing, but it’s sweet and tangy with the slightest bit of spice. You squirt it out like ketchup right on the chips, and the locals tear into it like lions.

Weird, huh? Weird but delicious. Now then…let’s talk about those Red Tacos. You can get the Taco Plate, which is just two red tacos.

No rice, no beans. Just tacos. And onion rings (what?).  What’s so special about them, though? Well, first of all they are red. That’s easy to do with food coloring. However, the texture is soft yet crispy.

Now, the tacos are what these guys are known for, but I’m here for the star of the menu: the Casa Relleños, a plate full of chile relleños. It just so happens that the Casa Rellenos comes with a Red Taco to start along with a big ol’ dollop of guacamole. So, let’s talk about these tacos to start off.

The flavor is hardcore corn, but there’s some toothiness to it.

They are stuffed with meat, cheese, and lettuce. And folded over perfectly.

They are chewy, but when you bite into them you get a snap. I’ve postulated that they make these with extra lard in the masa but I have no earthly idea how they do this. However they do it, it’s something that you’ll crave after you have it the first time.

The first few bites of the experience is something you want to savor (claw and antlers to RC Slocum). Get crazy and squeeze a little of that Red Wine sauce.

Great warm-up to the main event:

The chile relleños. Two peppers stuffed with creamy cheese and topped with tomato ranchero sauce and tons of cheddar. No fancy garnish…just a slice of onion and jalepeño. Let the food speak for itself.

The rice is perfect, with a taste of spice but still fluffy and al dente. Same goes for the beans:

Perfect consistency, with a starchy texture but not creamed to the point where it feels like bean dip on your tongue. The plates are served in the traditional Tex-Mex style of being so hot that it will burn the bones in your fingers if you touch it when it’s first served. Somehow, the waitresses can hold them without a towel, though. Never have been able to figure out how they get used to it.

Cutting into the peppers yields melted cheese that you’ll have to wrap around the fork using your knife. The breading is light and crisp, even under the tomatoey ranchero sauce. At home, I’d try to replicate this with an egg white base, but this is done so well. They don’t try to overcomplicate the stuffing…just cheese, but that’s all you need.

You come to Beef Country, you expect a good steak. I can find you a good steak in a few places. However, if you want a meal that is unique and will be like nothing you can find anywhere else, head up north to Casa Mañana in Wichita Falls.

Burgers with Bacon and Blue Cheese (The Great BBB)

Everyone loves a burger…everyone (with the exception of my wife) loves it more when it has bacon and blue cheese on it.

There are only two cooking methods for a burger: flat top or grill. The both have their merits. Today we are cooking on the grill. Your George Foreman grill is not a grill. Return it.

Start with good ground beef.

Scratch that…start with a drink:

Then, move to the ground beef.

Season well with smoked paprika, some shots of cayenne, and Cavender’s Greek Seasoning.

Form a patty. I use this press for consistency.

Cook the bacon. Save the fat.

Fire up the grill. When the grill is hot, grill the buns. Use good buns…seriously. You need to put some fat on the buns beforehand. You can use butter or bacon fat (from the bacon you just made). As I am very health conscious, I use both.

When the buns are done grill the burgers. A little extra seasoning on the burgers at this point is a good idea.

Leave them alone on the grill…play with them too much and they will fall apart.

Get your blue cheese.

Remove the burgers from the grill (medium is perfect).

Turn on your oven’s broiler.

Assemble the burgers (bun, burger, bacon, blue cheese) on a baking sheet.

Place them under the broiler until the cheese is melted.

Garnish and consume with the beverage of your choice.

Strawberry Stuff

When I was a kid, one of the greatest joys in life was the random family “get-together”. It could be a family reunion, a holiday, or just a random gathering of our clan of peeps. The best part of these gatherings was the food…OH THE FOOD…that would come out of the families who were from all over North/East Texas. I’ve joked often that I’m pedigree White Trash, but this might be the cherry on the top of the sundae, so to speak. I don’t even remember when this particular dish showed up the first time, but after it did it became a staple in our get-togetherin’. I distinctly remember heated conversations over whose favorite dessert this was as various family members tried to claim that it was their favorite over some other family member.

The original incarnation of this dish was made with peaches and was simply called “Peach Stuff”, and as far as I know has remained so in the family up until this point. I’ve often wondered outloud if this thing would be good with just about any different fruit you throw into it. However, your available ingredients will limit the type of fruit you use. I’m getting ahead of myself…let’s get this thing built and then go back and reassess.

Ingredients:

-Two tubes of Ritz crackers

-a stick and a half of unsalted butter (real butter…don’t you DARE use margarine)

-a large pack of strawberry jello (or two small packs)

-a tub of Cool Whip (full strength…not the lite crap)

-a stick of Philly cream cheese (full strength…no the lite crap)

-a cup of sugar

-2lbs of fresh strawberries

Take the two tubes of Ritz and crush them GENTLY so that you don’t bust open the packages. Trust me..it’s easier to do this inside the package. I tried using a food processor on it one time, but it made the crumbs too small. You want a varied sized crumble on this.

By rolling the crackers inside, you can crush them with your thumbs. Just make sure you don’t leave any big chucks. Even if you do, though, you can crunch them in just a bit.

In a 13×9 ungreased pan, dump your crumbs out.

You can see some of the bigger crumbs here…just squeeze them with your fingers to smash them.

Melt the butter (just so that it’s soft…don’t get it too hot or it will separate).

Pour the butter into the crumbs.

With a big metal spoon, mix the crumbs and butter together so that it’s evenly spread.

Turn the spoon over and start whacking the crumbs so that they even out all over the pan (you’ll notice the pan is suddenly a different color…I grabbed the bigger one on accident when I started out and had to change). Don’t whack too hard. You can use the weight of the spoon if your spoon is big enough. Smacking it will pack the crumbs in. It will take you a good 10min to do this, probably. You want the edges especially to be sealed up around the corners. Again, in just a bit this will make sense.

It should look something a-like so:

Packed in good.

In a preheated oven, put this on the middle rack and cook for 20-25 min @ 350deg. It may take a bit longer, but that should be about right. You are looking for it to be nice and golden brown.

In the meantime, prepare the Jello as per the instructions on the package.

Once you get it made, slip it in the fridge for 20 min, then into the freezer. We want it to get to where it’s JUST starting to set up, but not too set up.

Now then…let’s make the good part. Dump the Cool Whip, cream cheese, and sugar into your mixer and start whipping it up. It helps to leave the cream cheese and Cool Whip out for an hour or so to soften. Whip it on high. The sugar needs to be dissolved completely, and the mixture can use the extra fluff.

When it’s good and whipped, it will look almost like Crisco. Appetizing.

And you get to pick who gets to lick the beater.

Pull your crust out and let it cool. Don’t try to put the cream cheese mixture on when it’s still hot or it will be a mess.

A close-up of the crust. You’ll be amazed at how good this will make your house smell.

Top the strawberries and slice them up. They need to be in pretty thin slices, which you can accomplish with either a knife:

Or an egg slicer, which will cut your work down by a ton. This is one of my favorite tools in the kitchen. I use it for eggs, mushrooms, and strawberries when I want them sliced. You have to go easy at first or you’ll smoosh the strawberries. Just go easy so you don’t end up with a mush.

I thought about macerating these with sugar, but that will drain them of water and you don’t want that. When they are sliced up, put them back in the fridge to keep them cold until your crumbs are cool and your Jello is ready to use.

When the crumbs are cool, dump the cream cheese on them and spread them out. Go EASY with this or you’ll f up your crumbs. You need them to be sealed off completely by the cream cheese, and if you push too hard you’ll move the crumbs. Bad. Just go easy.

Speaking of the Jello, by this point it should be ready to go. This is borderline too far…when it starts getting thick, pull it.

Spread the cream cheese and make the edges TIGHT. It needs to seal up the crumbs. Using a paper towel, clean up the sides. It doesn’t have to be too clean, but you’ll want a separate layer look for presentation. If that doesn’t matter to you, then don’t worry about it.

Arrange the first layer of strawberries evenly on the cream cheese.

Once you have the bottom layer covered, then take the rest and even spread them out. You put the first layer down one-by-one so you know that you get good coverage of the white stuff.

\\

With a ladle, carefully pour the Jello onto the strawberries. Go easy now…if you pour to fast or heavy, it will penetrate the crumb layer and make ’em soggy. Bad.

Pour it over evenly.

From the side, you can see the layers. Now then…how white trash is this thing? Ritz crackers, whipped cream, cream cheese, and Jello with fruit in it sounds like every recipe out of the local Baptist church cookbook, doesn’t it? I’m sure that’s where this thing came from. Doesn’t matter, though…we are 12 hours away from greatness.

Cover the pan and put it into the fridge overnight. The Jello needs a few hours to set up completely. Don’t pull it early. When you do, though, this is what you are treated to. Oh, man.

The first slice is always the hardest to get out, but when you do get it out you’ve got this crispy, crunchy crust, creamy sweet layer of goodness, then the tart and crisp strawberry/Jello layer.

Back to the original conversation…this was Peach Stuff when I was a kid. You use peach Jello instead of strawberry, and use canned peaches instead of strawberries. You can chill the cans of peaches and drain them, using the juice as the “cold water” on the instructions on the package. I’m sure you can use just about any fruit flavor that Jello makes outside of lemon or lime. Whatever fruit you choose, though, this will be a instant favorite at your family get-togethers or holidays.

The Victual Files: Marlene’s @ The Big Chill

One of my favorite things in life to do is to go to a small town and check out the local eatin’ joints. Restaurants in small towns define the character of the town itself in so many ways. How many towns to do you know of only because there’s a restaurant there that serves good BBQ or chicken fried steak or even a great hamburger? Out here in Arcadia, it’s commonplace for us to take trips SPECIFICALLY based on eating something we’ve heard about.

So, we decided to put together a side project for the Arcadian Experience…we took a map and drew a 100m circle on it, and decided that we are going to covertly go into restaurants within that circle in north Texas and post our thoughts about the dishes and overall experience.  We call this new project:  The Victual Files, prounouced “vittle files”.  We are Victualphiles working on the Victual Files.  Catchy, campy, and all ours.

This isn’t a chance to slam restaurants or to give harsh criticism for their food. Rather, it’s a chance for us to share a little piece of life in those towns and the love and care they put into their food. Disclaimer: even though we will focus on the 100m radius, we will probably do this for any other restaurant we might venture into anywhere we go. It’s our site, our project, our rules.  Another disclaimer: I seriously need to update my iPhone to a new version.  The camera on this thing sucks to high holy hell.  Sorry in advance for the blurry pictures.

I’m going to start with one of my favorite places to eat: Marlene’s @ The Big Chill. Owners Marlene and Ben Horst started this restaurant in 1999 and both still work there daily. When you walk in, the first thing you notice is that you’ve stepped back in time…an anachronism to a “simpler” life when sodas came from jerks and green was a much softer hue. From the outside, you see the sign and the awning that immediately give you an idea what to expect on the inside.

When you step in, TBC doesn’t disappoint. From the floors to the lights to the tables, this is as authentic as you get in a small town. One of Ben’s trophies even hangs on the wall right next to the old Dr. Pepper machine (although, the modern stereo on top of the Dr. Pepper machine might not be all that authentic).

Above the service area, Marlene writes her daily specials on a large white board. One of my favorites, the crawfish etouffee, is running today for the last time this season. It happens that her son and daughter-in-law live down in Lafayette, LA, so she’s got a little Cajun tint to her. From time to time, Marlene and Ben will have a crawfish boil dinner. I love crawfish anyway, but they make it BYOB so you can bring your cooler in and have some tasty mudbug that they cook in the alley behind the store.

The quaintness of TBC is striking. From the colors on the walls to the ceiling tiles and light fixtures…

…this place makes you want to sit down and have a nice lunch in the middle of the day. Oh, but wait…my favorite part of the entire place…

It’s this bar. I’ve been literally BEGGING Marlene and Ben to rebuild the foot bar that goes underneath the stools so I can eat up there. I tried it one day, but the stools are just long enough that you can’t get enough leverage w/o sliding off. If there’s any critique I have of TBC is that I can’t sit at the bar and eat lunch.

Above the bar:

If Tom’s peanut bar doesn’t scream “old timey”, I don’t know what does. What’s that you say? Old Dr. Pepper and Coke stuff say “old timey”? Well, ok, they’ve got that, too.

I love sitting in the booths along the mirrored wall across from the bar. They bring out the tea, and keep it flowing. A big cup of Texas sweet tea is a great way to start out lunch.

When I go to TBC, I don’t even have to order. They know that I’m there for the French Dip. I love a French Dip in the first place, but the FD at TBC is my favorite. It’s not too stuffy and not all that complicated. Just a nice hoagie roll, some melty cheese, and tasty beef consommé to dip the sandwich in. Marlene’s hoagie bun is this delicious chewy bread that holds together so well when you dip it. A lot of FD’s will have a yeasty bread, but falls apart. This doesn’t do that…it stays nice and gummy, with lots of yummy gluten to hold it together.  Sorry to my celiac-suffering friends.

There are lots of other things on the TBC menu that are good as well. They have other sandwiches, special hot lunches (again, the etouffee is remarkable; the Cajun catfish is our minister’s favorite. We call him “Rev. Awesome”). Sometimes I’ll throw them a curve and order something different, but if I’m treating myself it’s the French Dip all the way.

If you order a sandwich at TBC you get choices, mainly what sort of chip you want and if you want a pickle. Nothing overly complicated…it’s either Sun Chips or Ruffles, and the pickle is just a clean, crisp deli pickle.

Let’s talk about pickles for a second. I love pickles, and not just pickled cucumbers. Pickled okra, pickled green beans, pickled eggs (Pedigree White Trash)…I love pickles. Zingerman’s Deli in Ann Arbor offers you two types of pickles with your sandwich: old pickle or new pickle. The difference is how long they’ve been in a jar. (For the record…Zingerman’s is the best deli I’ve ever been in.  The reuben there might be the best sandwich alive.)  I’d love to see some homemade pickles make their way to a menu near me here in Arcadia, but that’s a big order and a lot of work. “Who has time to make pickles?” one might say. Not me, which is why I want someone else to make some pickles. I digress…

My order: French Dip, Ruffles, pickle. Sweet tea. That’s all I need in this world.

Look at that cheese melting out of the sandwich. You get a healthy stack of roast beef, a decent ramekin of dip, and a good handful of chips. Luckily for me, Ben has big hands. And now I feel kinda awkward…

A closer look at that cheese oozing out…

Take that little monster and hold her head underwater for a bit…

Then let her up for a breath before you devour her…

And that’s a helluva lunch. I’ll slowly walk thru this sandwich…if I don’t have a good 20min to eat once I get my plate, I won’t go in the first place. No need to rush, and no need to rush the experience. As a matter of fact, I’ll take those plain ol’ chips and dunk them in the dip, too.

As a creature of habit, I have places I go eat for specific things, and at some point I’ll cover some of them in the Victual Files digest. I can’t think of a better place to start, though, than at Marlene’s.

Marlene’s @ The Big Chill in Graham, Texas…open M-Sat for breakfast and lunch.  Breakfast at Marlene’s is suberb as well.  Do yourself a favor and go give Marlene and Ben a try.

Garden Calamities, Bad Kids and More Bad Dogs

Garden Calamities, Bad Kids and More Bad Dogs

7 to 10 days ago I planted a few rows of spring plants that are space-savers—ideal for my intensive gardening plan. These are also the plants that give you quick pay-off in terms of gardening—radishes, mesclun, rocket (aka arugula), spinach and carrots. All sprout quickly and can be harvested between 25-45 days.  A super-speedy turnaround considering our beloved tomatoes can take up to 90 days to mature.

Planting a sorta-early spring garden...

These quick-return crops have already started to show signs of life … this photo was taken on Monday, 7 days after they were planted.  

Showing signs of life.

See the little sprouts coming up … I have no idea what this is because I didn’t properly label my rows – oh well. I will be able to identify them once they get past the initial phase of sprouting.  

Then Tuesday, I started writing this piece and decided to take photos showing progress.  I went out to the garden to take photos, but there was evidence of a minor Garden Calamity.

Evidence of a very bad dog.

A big dog print in my raised bed …  I only planted half of one raised bed and that is the only place the dog tromped thru. Of course it’s right in the middle of a planted row.

 I still didn’t get the story finished, so after work on Wednesday, I went to take another progress photo.

Then another Garden Calamity struck … usually when that happens it has to do with a bad dog. Yesterday it had to do with a kid … my 4-yr old son came into the house and declared: “I water momma’s flowlers. I help jew, mom.” I didn’t think a lot of it, but then walked out to see what he was talking about.

Seedlings almost washed away by a 4-yr old.

Holy Garden Calamity, Batman! I don’t’ think 4-yr olds understand that you can’t put the sprinkler wand/spray head thingy right up next to the seedlings. And this story has changed drastically since the initial draft, due to Garden Calamities.

Bad kid, good kid? Definitly a cute kid!

More to come on tomatoes and spring gardening in North Texas… I’m dying to plant my tomatoes, but the old farmers say, “thunder in February, frost in April.” And we had thunder in February along with a frozen foot of snow and ice that cancelled school for a week. I’m going to wait a few more days on planting my tomatoes. Hopefully I can avoid future Garden Calamities.

96 tomato plants ... almost ready for a North Texas garden home!

Spring’s Fling: Chocolate Covered Strawberries

Spring’s Fling: Chocolate Covered Strawberries

Strawberries and Chocolate ... Simple Goodness.

Spring is the season for strawberries.  I love berries of all kinds.  And now is the strawberry’s time to shine.  When you are making things with 3 to 5 ingredients, it’s really important to get the best available ingredients possible. This means using fresh produce. If you can get locally-grown produce, even better.

For me one of life’s simple pleasures is chocolate-covered strawberries. I’m a chocoholic and a lover of all berries. But this is simple and delicious.  There are three ingredients: strawberries, cream and chocolate.

Wash a package of fresh strawberries and pat dry.  I used a one-pound package for this recipe. Set them aside to continue drying.  You want them to be as dry as possible to dip into the chocolate.

Strawberries! These came from United Supermarkets!

Next, use a high-quality semi-sweet chocolate.  Scharffen Berger is my favorite … it’s happiness in a wrapper.

Happiness in a wrapper!

If you can’t find it in your local grocery store, Ghirardelli makes a good-quality chocolate and is readily available in most stores.  If you prefer, you can use a darker chocolate, which has a higher percentage of cacao. Kitchen Tip: sometimes you can find a good chocolate bar for melting and baking in the candy section instead of the baking section.

Put 3-4 ounces (one bar) of chocolate in a microwave-safe bowl.

Add 1/4 cup of heavy cream. (technically this is chocolate ganache, which is just the fancy way of saying: chocolate with cream.)

I love cream.
Cream makes everything better-- that and butter!

Microwave for 30 seconds at a time, stirring in between, until the chocolate and cream have melted together.

Mix well!

Take your dry strawberries and dip into the chocolate and put on a chilled plate or pan covered with wax paper.

Dippidy-do, I love you, chocolate.

Stick in the refrigerator for 45 minutes so that the chocolate has time to set up.  Then serve it up and enjoy.

Mmmmm ... Chocolate and Strawberries!

(PS – my photos will improve, I promise.  I’m now motivated to learn how to use my camera much better!)

The Band

The Band

“We’re putting the band back together!”   What movie?

If you live anywhere near Chicago you don’t get to guess … or if you’re a die-hard Dan Aykroyd or John Belushi fan … enough clues, already.

“The Blues Brothers!?! They still owe you money, fool.” Thank you Aretha Franklin and The Blues Brothers for the awesomeness of that quote.

Jake and Elroy Blues with Aretha

So my hubby and Runnin’ Buddy are now in a “band.” A band of two and they’ve decided to name themselves the Inlaws (no hyphen, I’ve been instructed).  The name is cleverly thought up.  You see they are just getting started as an acoustic duo.  And their first “gig” is to play as the intermission band at the annual Knights of Columbus rodeo dance.  The gig was acquired thru their “connections.”

Practic session in the back yard while smoking elk tenderloin.

The name comes from the fact that one of the head organizers of the rodeo is the father-in-law of Runnin’ Buddy.  And my hubby’s father-in-law (my dad) is the bass player in the headliner band, 380 West.  Hence, the Inlaws.

Runnin’ Buddy has played in serious bands before.  He played in several Austin-based bands whose booking venues could range from 100-2,000 people.  He’s a lead guitar player, and pretty darn good too.  Just in the last few months of tinkering around and playing with my hubby – the hubby has improved tremendously with his guitar playing. Did I mention that Runnin’ Buddy was a really good guitar player?

The pressure of the-first-gig deadline is looming, and with that I have a whole new appreciation for my mom.  She has endured hours-long practice sessions with my dad and his band.  The process of learning a song includes picking-around with different chords, random outbursts of broken lyrics, and the repetitious play-pause, play-pause of recorded music, followed by the plunkey-pick-around learner’s version. I love that my husband has a musical side and I’m even happier that he’s found a Runnin’ Buddy to play with him.  Fortunately I really like the songs they’ve chosen to play and best of all … I get to make song requests.    First up, It’sAll Been Done by the Barenaked Ladies.

Tomato time in Texas

Tomato time in Texas

About 2 more weeks and we North Texas gardeners will be able to plant our tender crops.  And that means Tomatoes!  [Why exactly do we have to add an “e” when we make the word “tomato” plural – don’t answer that Micki Jo].

If you have ever had homegrown tomatoes you can fully appreciate the greatness of having fresh garden-ripened tomatoes.  Unfortunately half the year we are relegated to those hard, sorta red tomatoes—I call them red baseballs in the grocery store.

Garden tomatoes!

You can never have enough tomatoes during the summer months … when you are up to your eyeballs, all you have to do is can them.  Then in the winter when you are making a stew or chili, pop open a couple jars of our canned tomatoes, and ta-dah – happiness in a jar.

Canned tomatoes

I went nuts in my greenhouse this winter with tomatoes … There are about 100 or so plants. Yikes! 

Lots and lots of 'maters ... Tomato plants galore

Calling all Gardeners! I need a few of you to take these off my hands!